
用 Pyinstaller 模块将 Python 程序打包成 exe 文件(全网最全面最详细)
posted on 2023-05-07 21:05 read(844) comment(0) like(6) collect(3)
Table of contents
1. What is an exe executable file?
2. Why should the Python program be packaged as an exe executable file?
3. Why can't the Python program run directly?
4. What do we use to package Python files?
5. What are the classifications of packaging?
2. Download and install the Pyinstaller module
3. Switch the path of the command line
5. The location of the package generated file
Packaging in a virtual environment
0. First introduce a few conda commands
1. Create a virtual environment
2. Install the required third-party packages
3. Pursue the ultimate exe size (non-essential steps)
Packaging of multiple Python files
2. Modify the file open function
The whole process of packaging
Step 1: Start Anaconda Prompt and switch to the target folder path location
Step 3: Generate spec file (my Pyinstaller is already installed)
Step 6: Package the project (note that the object here is a spec file)
Step 7: Check the packaging
effect
Packaging pre-knowledge
1. What is an exe executable file?
The full English name of the exe file is executable file, which is translated as an executable file (but it is not equal to an executable file). There are two types of executable files, and the one with the file extension .exe is one of them. The correct exe file can be directly double-clicked to run on the Windows platform! All kinds of software we usually use are opened through shortcuts, and the target address of this shortcut is an exe file of this software.
2. Why should the Python program be packaged as an exe executable file?
As we all know, a Python program must have a Python environment to run, but the program is compiled for use. What if it is used by someone else, and his/her computer does not have a Python program running environment? Can't let him/her install one? At this point we will package the Python program into an exe file. In this way, under the Windows platform, the program can be run directly, no matter whether there is a Python environment or not.
3. Why can't the Python program run directly?
Python is an interpreted language, which is different from compiled languages such as C or C++. C or C++ needs to be compiled and then run (the final file generated by compilation is an exe file). Python essentially only interprets a piece of text, similar to Since the browser parses the html document, no exe file will be generated.
4. What do we use to package Python files?
Generally, we use Python's Pyinstaller module for packaging, and there are other packaging modules, but in comparison, Pyinstaller has the most users and is easy to use, so this article uses the Pyinstaller module to package Python programs.
5. What are the classifications of packaging?
According to the needs, you can choose one of the following methods for packaging (I usually use the third method), but if you are a novice, it is recommended to read all of them.
① General packaging
The least steps, the easiest operation, but the packaging time is long, the effect is not ideal (the file is too large after packaging, generally more than 100MB)
② Packaging in a virtual environment
There are a little more steps, and the operation is slightly complicated, but the packaging is fast and the effect is good (the file after packaging is not large, generally within 10MB)
③Packaging of multiple Python files
There are more steps and more complicated operations, but multiple Python files can be packaged in
④ Packing containing resource files
The steps are extremely cumbersome and the operation is very complicated, but all the files can be included
packing method
general packaging
The general packaging method is the simplest, but the packaged finished product is a bit bloated, so it is not particularly recommended.
1. Open Anaconda Prompt
If you have installed Anaconda's Python integrated environment, you can see Anaconda and Anaconda Prompt in all applications on the menu page.
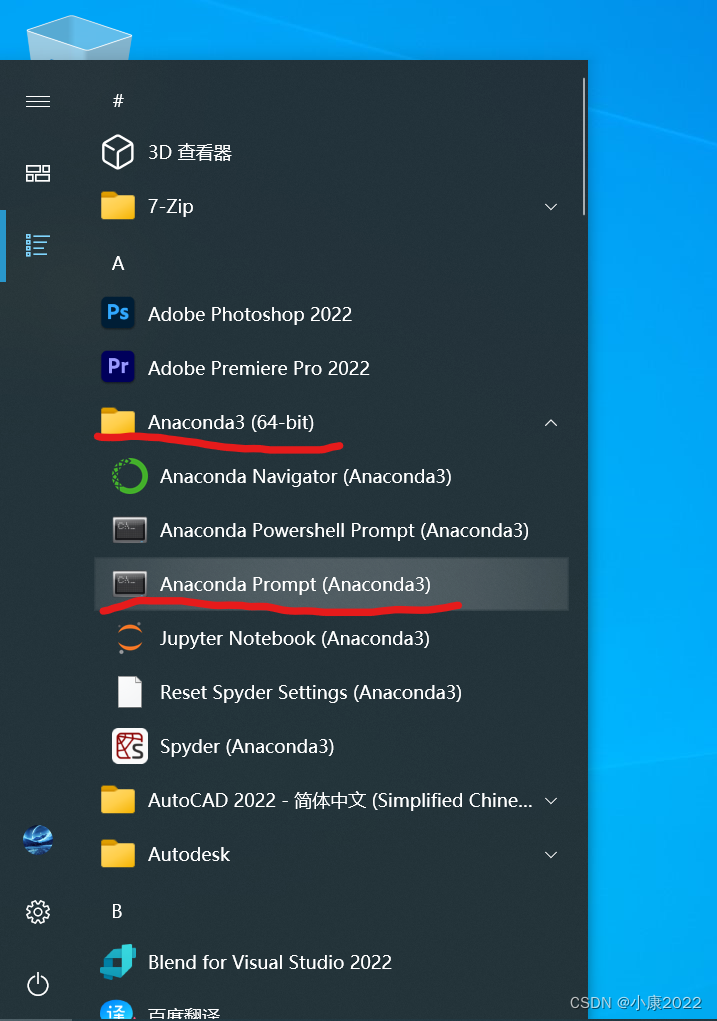
Click to see the following interface:

2. Download and install the Pyinstaller module
This can be downloaded directly with the pip module, directly downloaded in the Python environment that needs to be packaged this time (base environment)
pip install Pyinstaller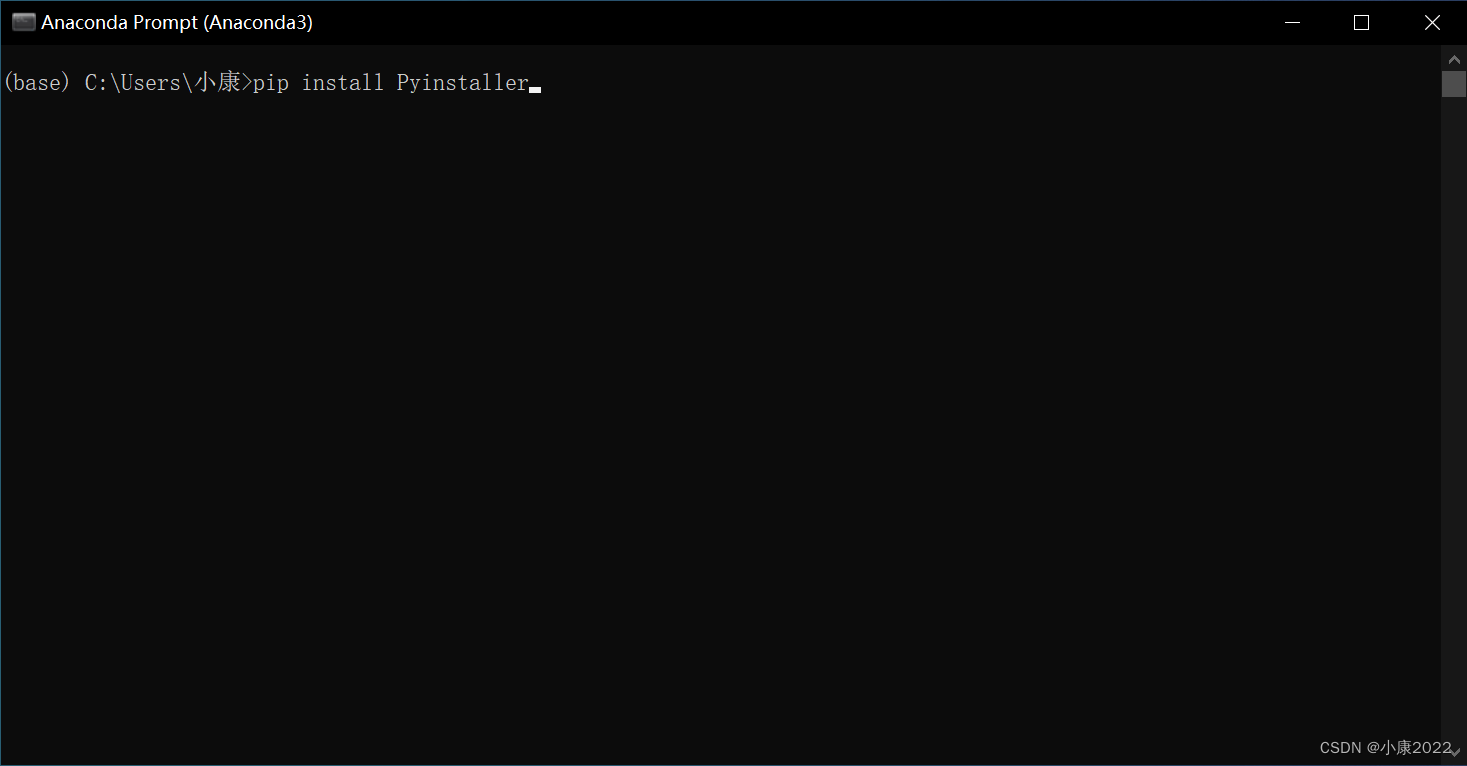
Of course, those who have already installed the Pyinstaller module can skip this step.
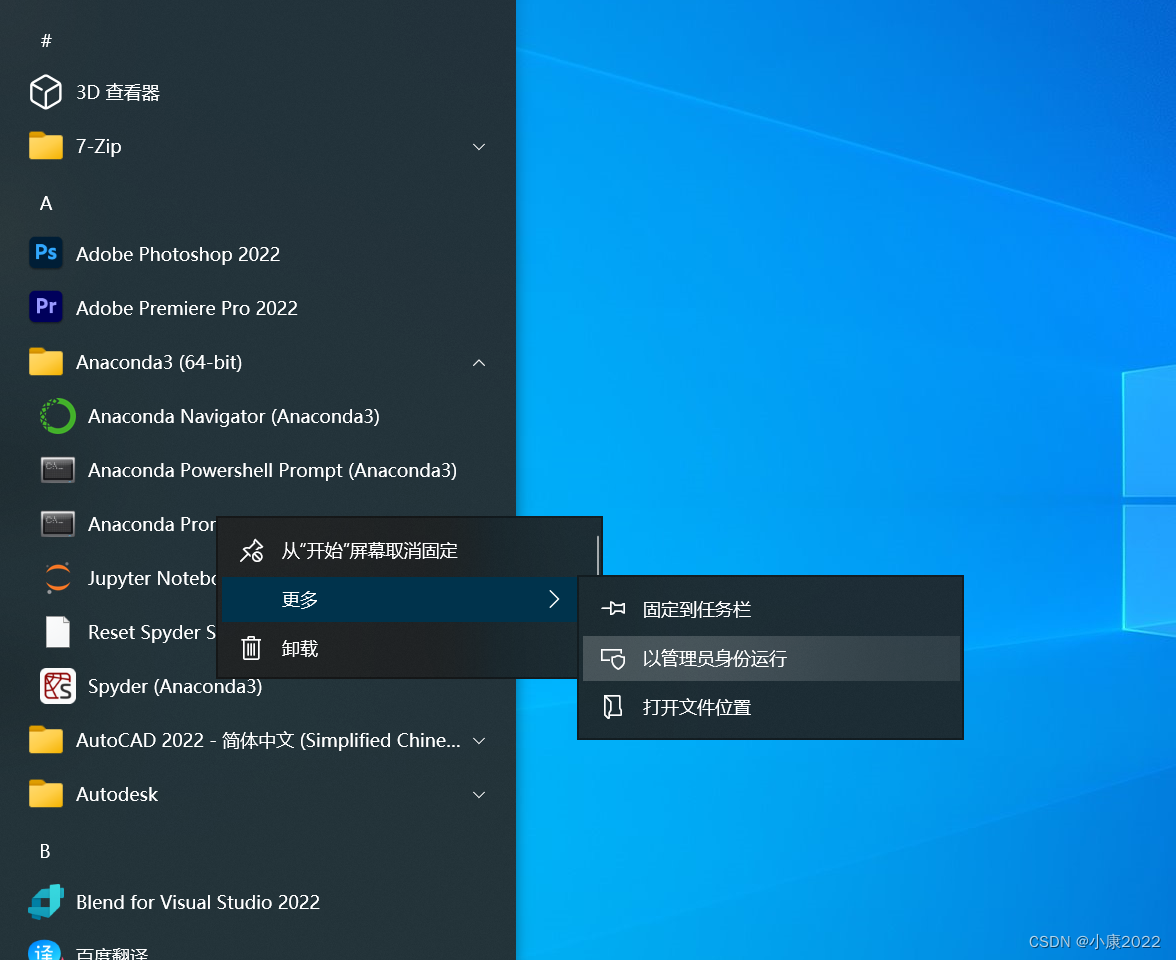
If there are any intractable diseases, there is a high probability that the problem is caused by permissions. Just reopen Anaconda Prompt according to the following method.
At this point, the display text of Anaconda Prompt will become as follows:
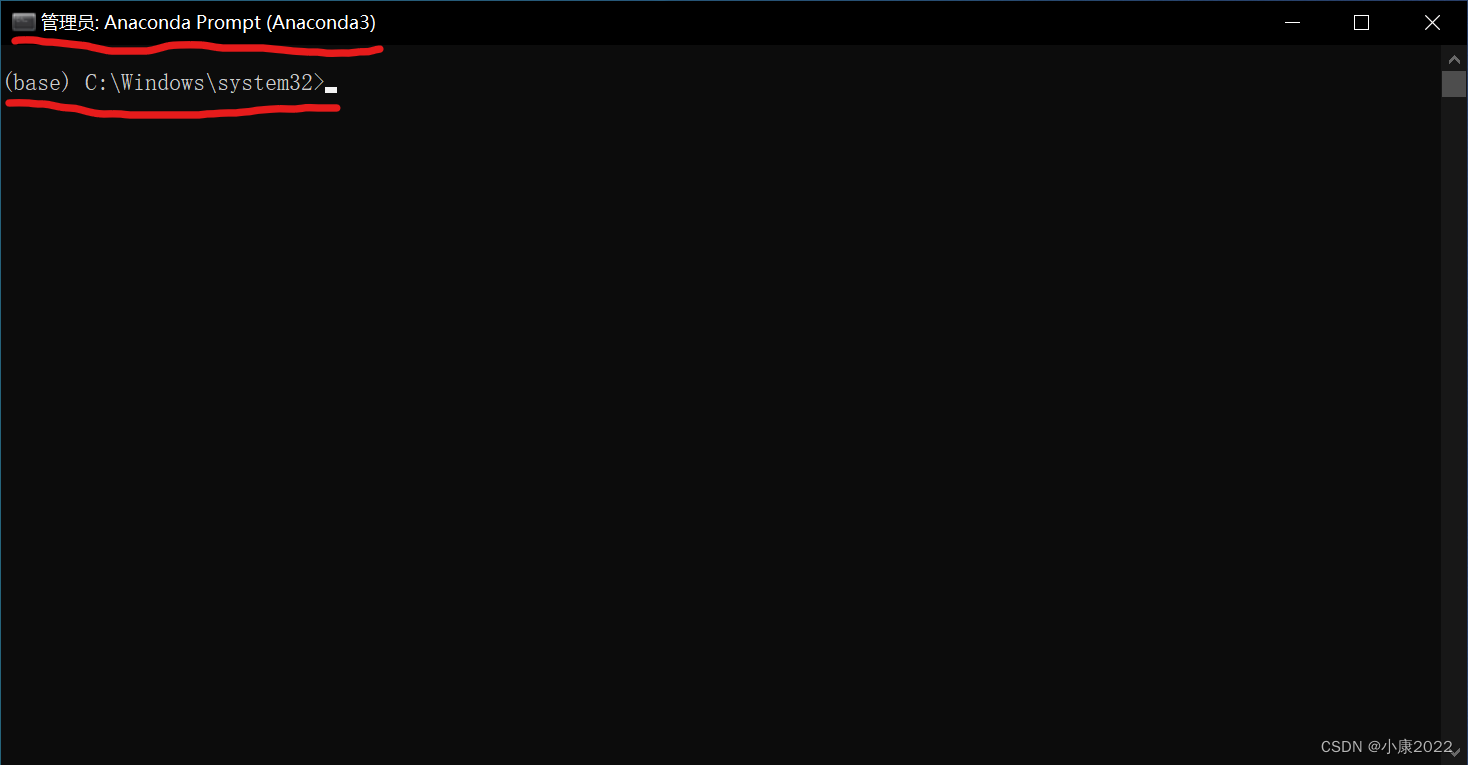
Then just pip again, so there should be no problem.
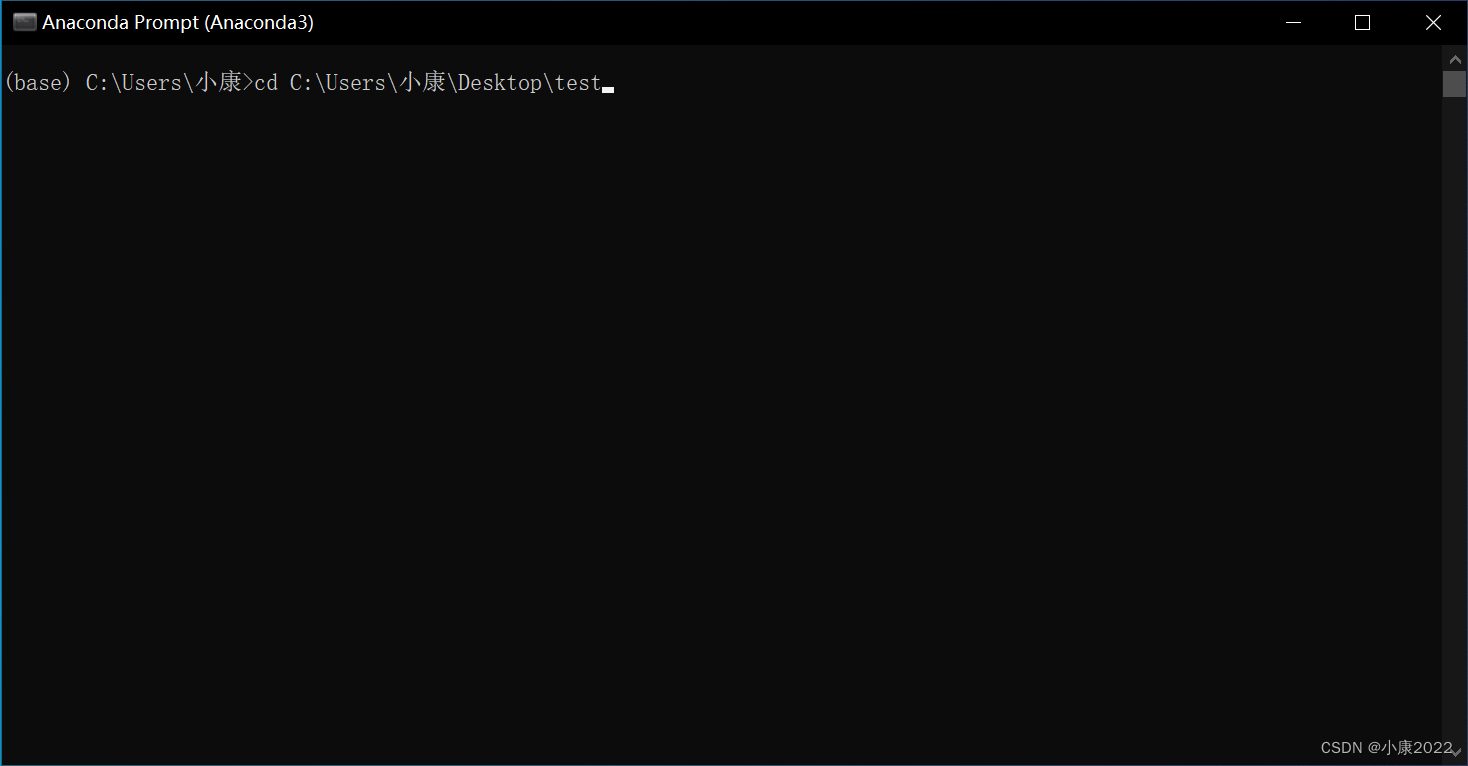
3. Switch the path of the command line
Because the file you want to package is in the corresponding folder, and Pyinsatller does not know where the file to be packaged is at the beginning, so you need to directly switch the path of the command line to the path of the target folder, so that in the following steps, Pyinstaller can Find the corresponding file.
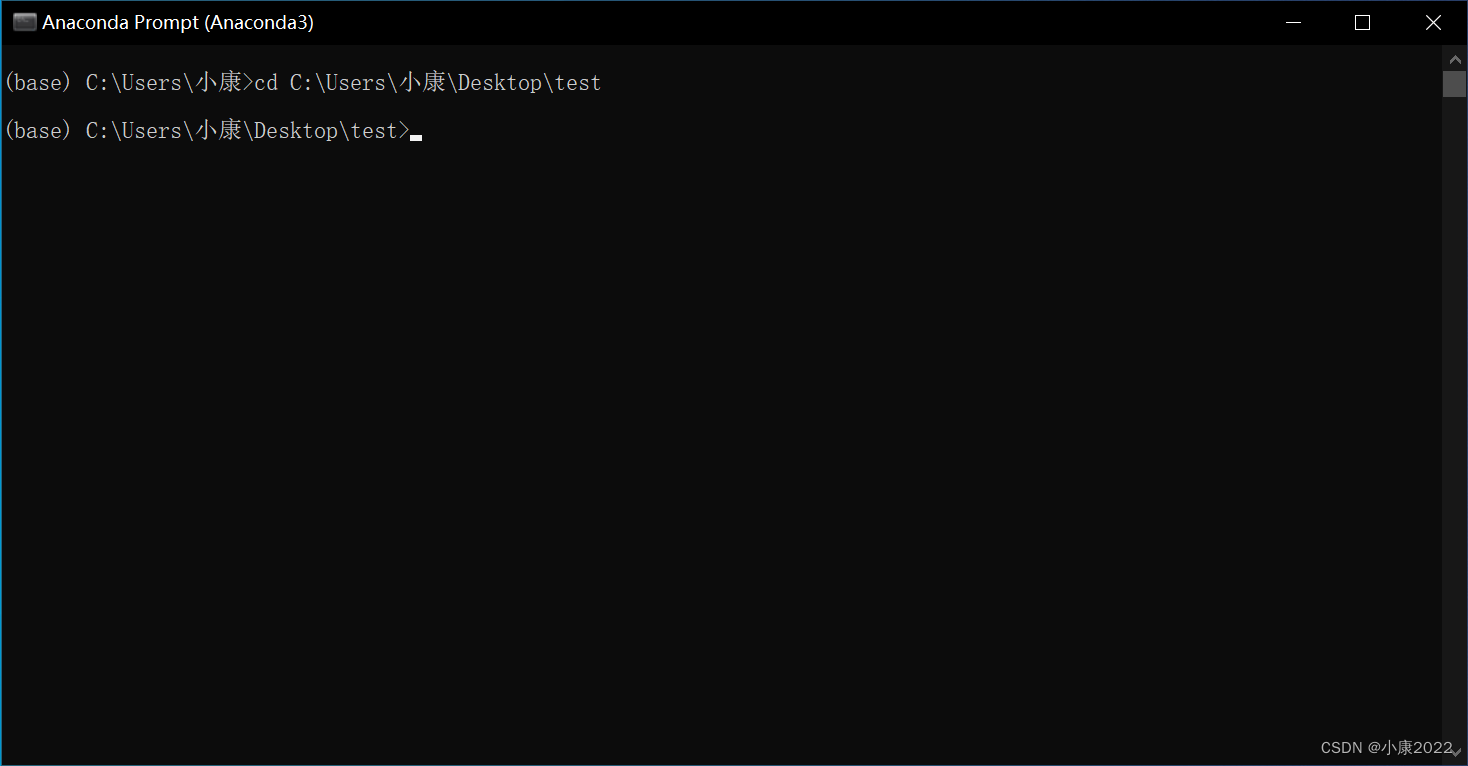
cd 文件夹路径Here my packaging folder is placed on the desktop, the folder name is test, and the Python file to be packaged is in the test folder, named Python.py. So my folder path is C:\Users\Xiaokang\Desktop\test (must be an absolute path).
Then press Enter and you can see the following, which means success.
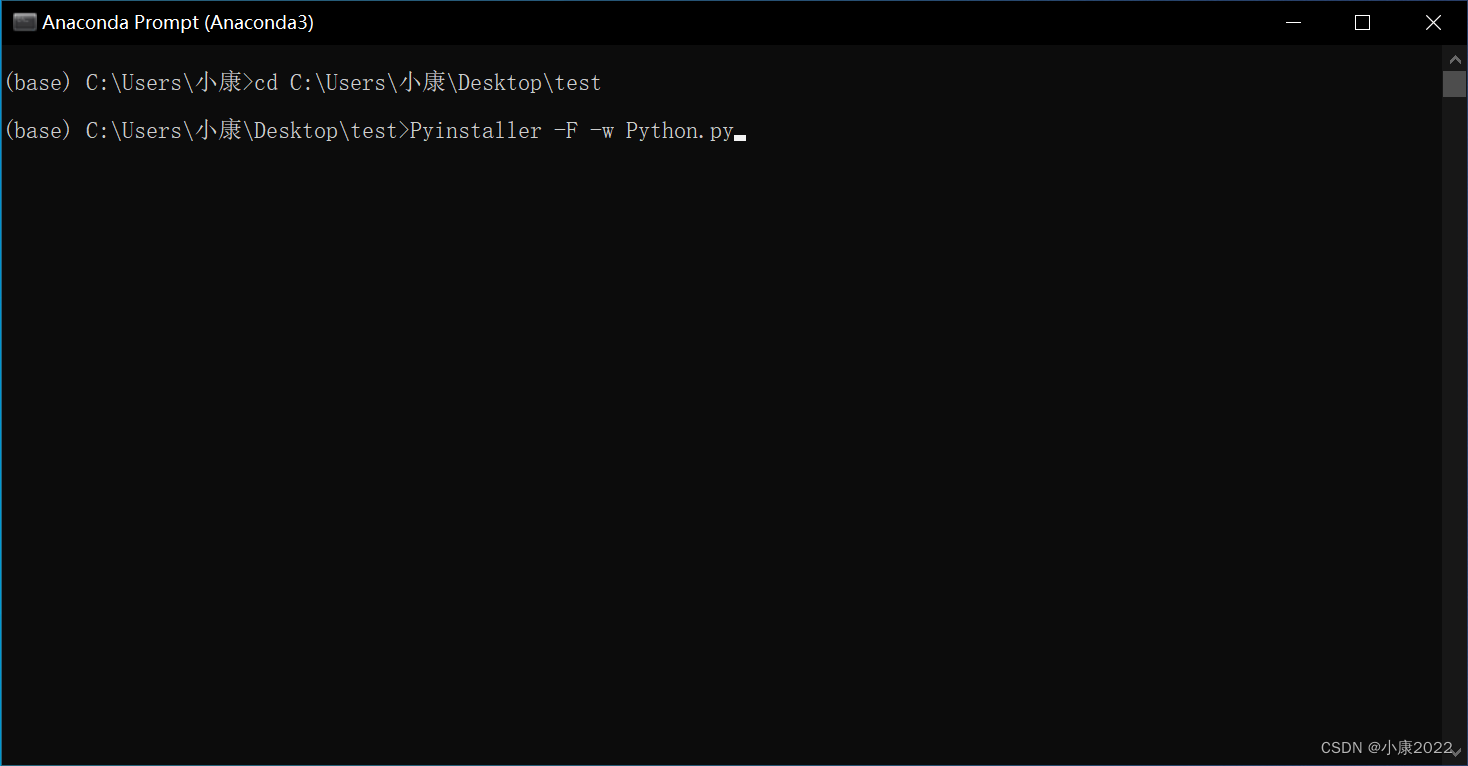
4. Package Python files
Enter the command in the following format
Pyinstaller -option1 -option2 -... 要打包的文件There are many parameter options, here I list a table:
| parameter options | describe |
| -F, -onefile | Only generate a single file (only one exe file) |
| -D, -onedir | Package multiple files and generate many dependent files in dist, which is suitable for writing tool code in the form of a framework, so that the code is easy to maintain |
| -K, –tk | Include TCL/TK when deploying |
| -a, -ascii | does not contain code All encodings are included by default on versions of Python that support Unicode |
| -d, -debug | Generate a debug version of the executable |
| -w, -windowed, -noconsole | Execute using the Windows Subsystem Does not open a command line when the program starts (Windows only) |
| -c, -nowindowed, -console | Execute using the console subsystem (default) (only available on Windows) pyinstaller -c xxxx.py pyinstaller xxxx.py --console |
| -s, -strip | Executables and shared libraries will run through strip Note that Cygwin's strip tends to make common win32 Dlls unusable |
| -X, -upx | If there is UPX installed (detected when executing Configure.py), the executable file will be compressed (the DLL in the Windows system will also) |
| -o YOU, -out=YOU | Specifies the build directory of the spec file, if not specified, and the current directory is the root directory of PyInstaller, a directory for output (spec and generated executable) will be created automatically If not specified, and the current directory is not the root directory of Pyinstaller, it will be output to the current directory |
| -p DIR, -path=DIR | Set the import path (similar to using PYTHONPATH) You can use path separator (semicolon for Windows, colon for Linux) to specify multiple directories You can also use multiple -p parameters to set multiple import paths, and let pyinstaller find the resources needed by the program by itself |
| -i -icon=<FILE.ICO> | Add file.ico as an executable file resource (only valid for Windows systems), change the icon of the program |
| -i -icon=<FILE.EXE,N> | Add the nth icon of file.exe as the resource of the executable file (only valid for Windows system) |
| -v FILE, -version=FILE | Use verfile as the version resource of the executable file (only valid for Windows systems) |
| -n NAME, -name=NAME | optional project (generated spec's) name If omitted, the main filename of the first script will be used as the name of the spec |
Here are a few simple examples to let everyone understand how to write this parameter.
- # 这一般是用来打包界面化的程序的,如用tkinter、Pyqt5等制作的程序。
- # -w 的意思就是exe运行的时候不弹出那个命令行(黑窗口)
- Pyinstaller -F -w somefile.py
-
- # 这一般用来添加exe的图标
- Pyinstaller -F -i someicon.ico somefile.py
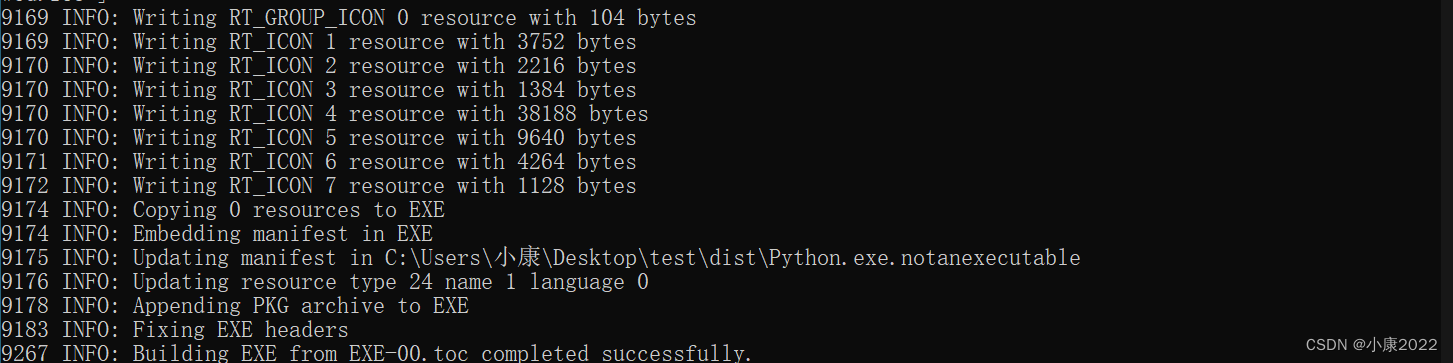
Then press Enter and it will be automatically packaged. To explain, generally we will only select a few of the parameter options, such as -F and -w, and we will also select some other parameters according to the needs. When the following text (mainly the last line of text) appears, it means that the packaging is successful!
5. The location of the package generated file
Let's go back to the folder we switched to initially, we can see that there are three more files (build folder, dist folder and spec file):
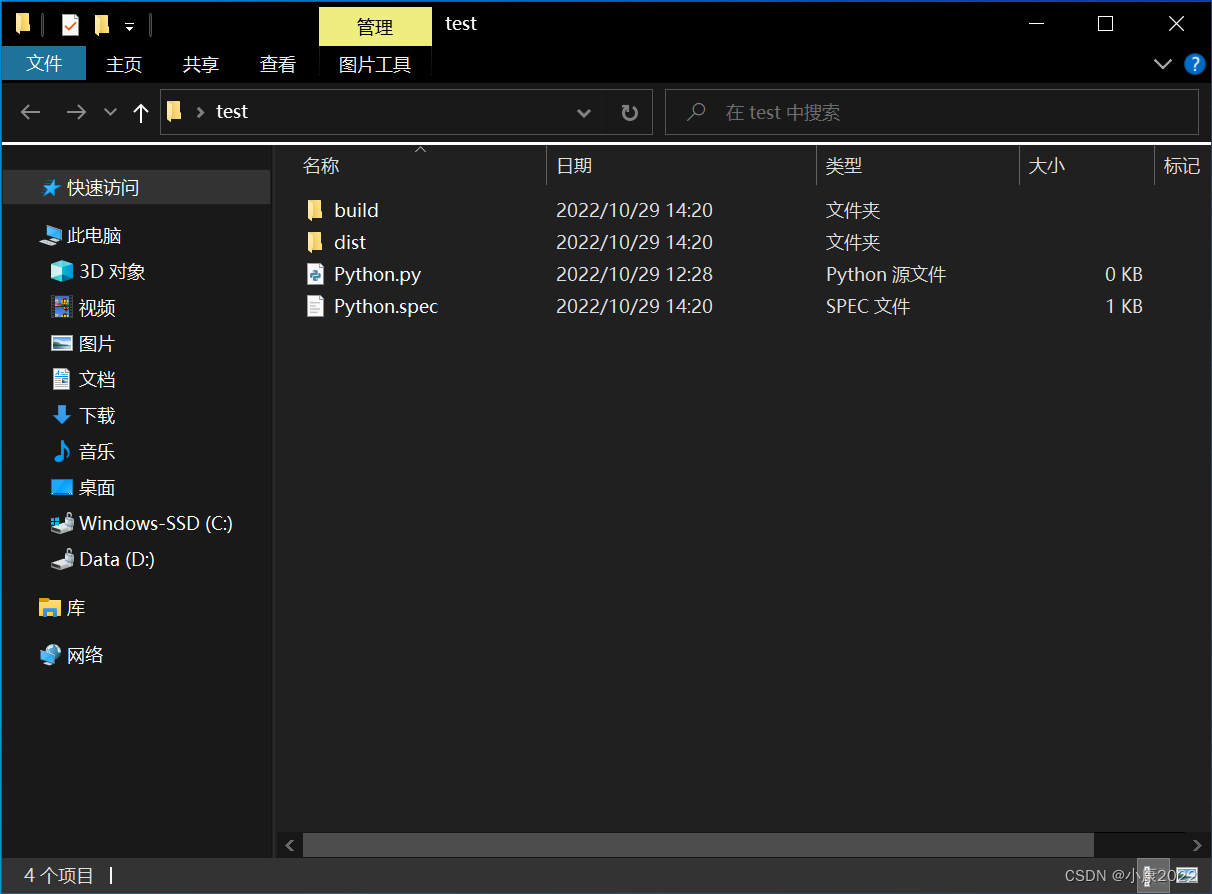
The exe file we want is inside the newly generated dist folder. At this time, the exe file may not be able to run, because it may involve some resource files or other Python files. Put them in the same folder and they will work correctly.
这里说明一下,打包完之后,spec 文件和 build 文件夹就没用了,可以删除了。
这里一般的打包方式产生的 exe 文件都比较大,这是因为 Pyinstaller 打包的时候会把你环境中的库和模块全部打包进去,这就会使一些你根本用不着的库和模块也被打包进去了!而且这些库被打包之后不仅会使 exe 文件变大,还会使其运行变卡变慢、变得十分臃肿。因此,不建议这样的打包方式。十分地建议大家用第二种方式进行打包 —— 虚拟环境下的打包。
虚拟环境下的打包
所谓的虚拟环境,就是我们自己创建一个小型的 Python 环境,也可以这样理解,自己创一个新的、纯净的、没有奇奇怪怪的第三方库和模块的 Python 环境。这个环境你也是可以用来编写 Python 程序的,但这里我们是要来打包 exe 的,这就要求它里面的库和模块尽可能的少。
0、先介绍几个 conda 命令
① 导出虚拟环境的列表
conda env list② 导出当前环境的包
conda list③ 启动/切换至名为name的Python环境
conda activate name默认为base环境(名为base)
④ 退出虚拟环境
conda deactivate退出后会自动回到base环境
⑤ 创建新的、名为name的、Python 版本为3.x的虚拟环境
conda create -n name python==3.x1、创建虚拟环境
和一般的打包方式一样,打开 Anaconda Prompt,然后输入如下格式的命令:
conda create -n env_1 python==3.10.8
这里它会停下来询问你新的环境是否要安装这些包,这些包大部分都是一些必须的包,直接输入 y 或者直接回车即可。
2、安装需要的第三方包
这样,我们的虚拟环境就弄好了!但是!这并不代表着它就是符合你程序运行的环境,如果你的 Python 程序还用到了一些其他的第三方库,那么就一定要把这些库给添加进这个虚拟环境,添加方式就是直接在当前环境下用 pip。
下载库很慢的,可以在 pip 时加上镜像源的地址:
pip install -i https://pypi.tuna.tsinghua.edu.cn/simple 包的名字这里有一点很关键!不能忘记!Pyinstaller 也是第三方的包,所以新的环境里面一定一定要 pip install Pyinstaller!
其他的打包步骤和一般的打包方式一模一样,请看上面的步骤。
3、追求极致的exe大小(非必要步骤)
如果你想让你的 Python 程序打包后的 exe 大小,小到不能再小的话,那么就要尽可能地删去虚拟环境里面的一些用不到的包(用 pip uninstall 来删)。
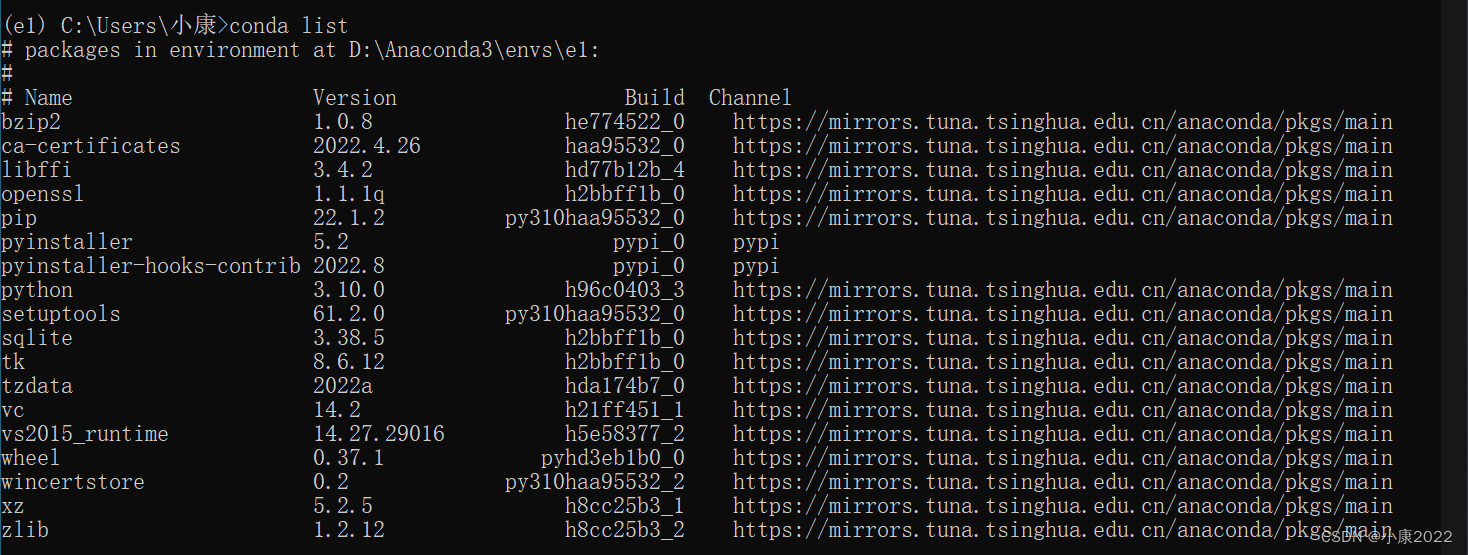
我这里有一个环境的包,它已经把一般程序用不到的包删干净了(没有第三方包)。你可以参考一下(通过输入 conda list 命令来查看)。
多 Python 文件的打包
或许对于单个文件而言,你已经清楚该怎么做了,但是对于多个 Python 文件同时打包而言,你未必清楚。
我相信我们大多数人在编写大项目的时候,都会将一个程序拆解成多个 Python 文件以便于维护。但是前面的打包方式又只能打包一个 Python 文件,其他的 Python 文件就只能作为资源文件放在外面。但是这样别人使用这个程序的时候,不就能看到那些在外面的 Python 文件的源代码了吗?谁愿意把源代码给别人免费看呢?
所以,我们就要将多个 Python 文件同时打包!这里要说一点,这里的多个 Python 文件同时打包时,还是要使用 -F 参数,生成一个文件,
这里可以创建虚拟环境来打包,也可以不用。
1、生成spec文件
同之前的步骤一样,先打开 Anaconda Prompt,然后输入如下命令以生成 Python 源文件 name.py 的 spec 文件,这里的 name.py 一般选取多个 Python 文件的主文件。
pyi-makespec -option1 -option2 -... name.pyoption 参数和之前步骤里的一样,输入你需要的参数即可。回到我们源代码的文件夹中,可以发现已经多了一个 name.spec 的文件了。
2、编辑spec文件
spec 文件实际上就是一个文本格式的文件,可以用任意文本编辑器打开,也可以用你的 IDE 直接打开,细心的人会发现,里面的内容实际上就是 Python 格式的代码,只不过文件扩展名改成了 spec 而已。
spec 文件实际上就包含了打包的所有参数,我们可以对其进行修改,以达到自定义打包的效果。
找到下面的这句:
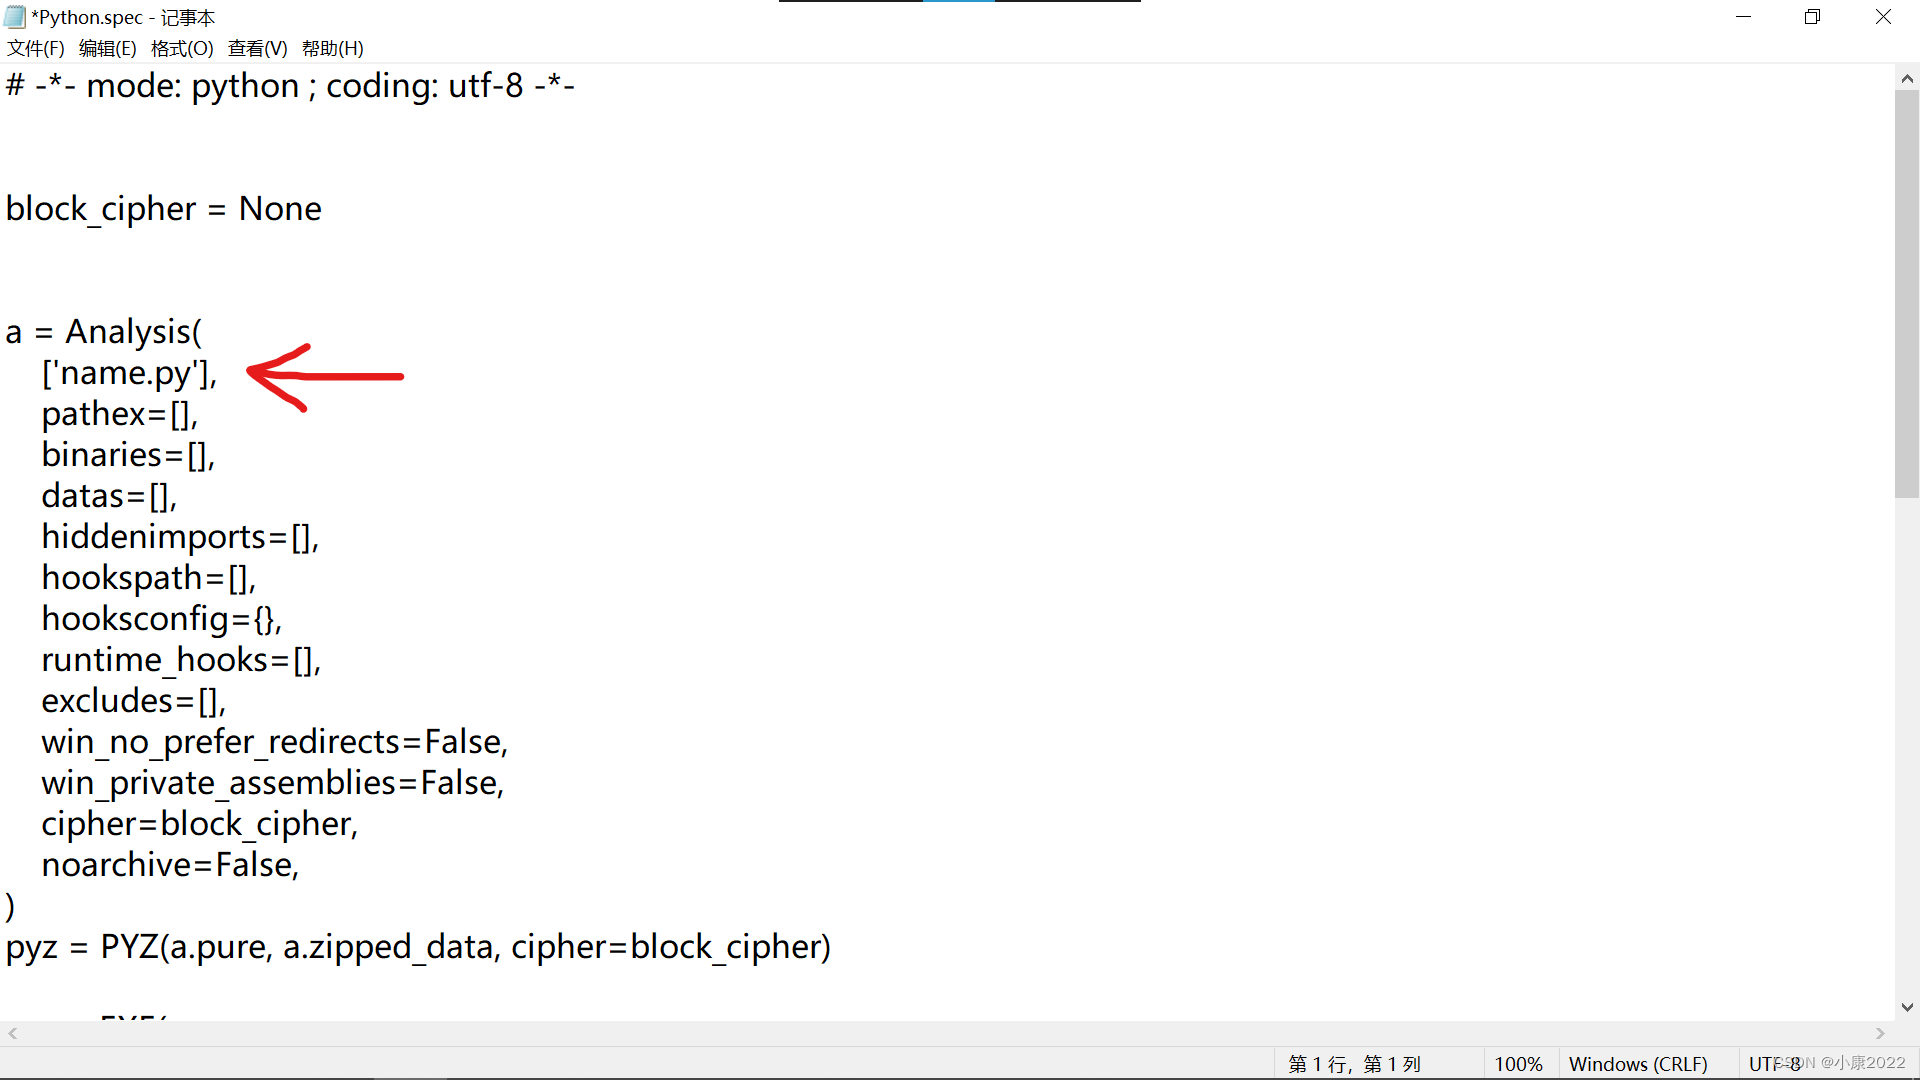
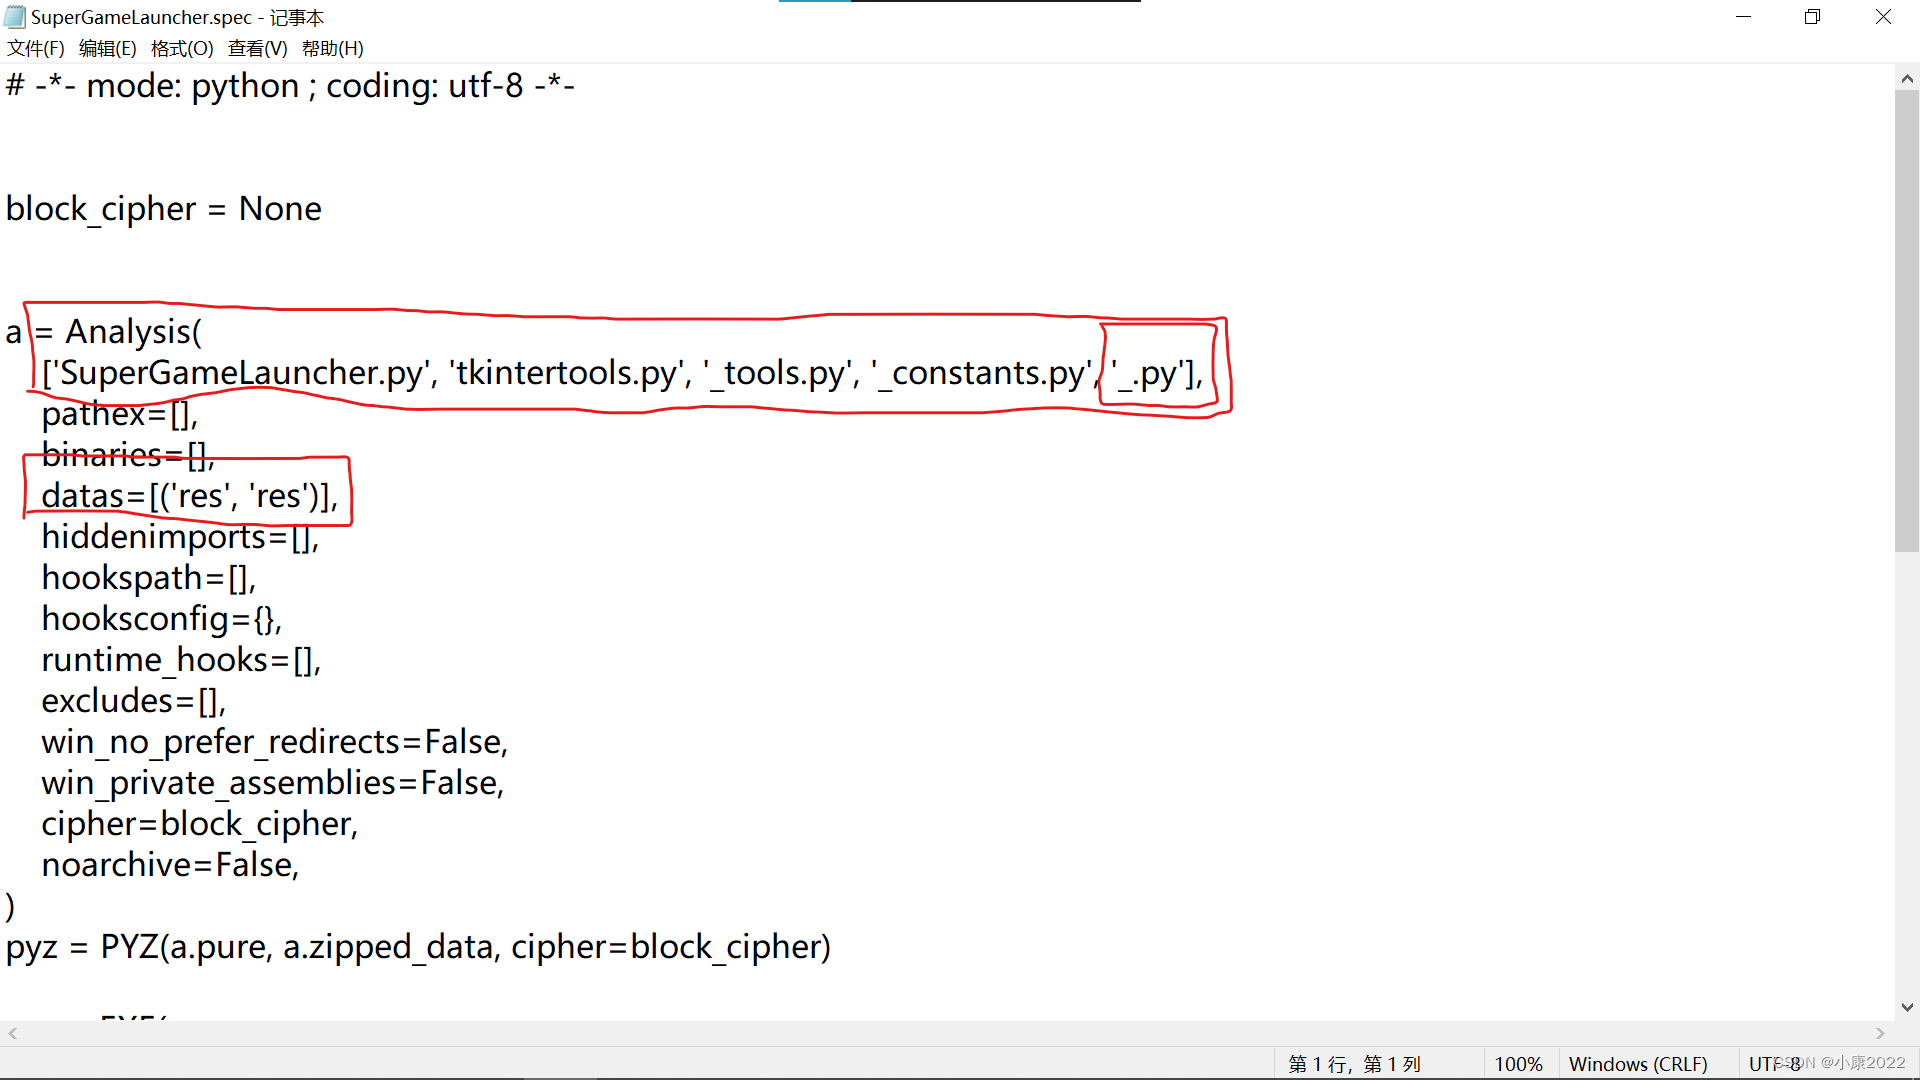
它实际上就是个列表!将你需要的 Python 文件的路径(允许相对路径)都以字符串的形式写进这个列表里面,如果是与 name.py 不在同一目录(同一文件夹)下的 Python 文件,那就要写它的绝对路径。编辑完之后,记得保存文件。
3、以spec文件进行打包
回到之前的命令行(Anaconda Prompt),输入以下命令进行打包。
Pyinstaller name.spec慢慢等待,打包完之后,就是我们想要的 exe 文件了,它把所有的 Python 文件都加了进去!但是很可惜,资源文件还是要放在同一目录下才可以正确运行 exe 程序。不过我还是极力推荐这种方式!我每次打包就是用的这一种方式,毕竟资源文件也不是必须打包进 exe 才好的,有些时候,我们的 Python 代码一般都不会超过 1MB 吧(想必大部分人都没有),而资源文件却有大几十甚至几百 MB,打包进去之后,会使得 exe 程序运行变慢,这不好。
而且,你想啊,现在大部分的软件,资源文件啊什么的不都是放在 exe 外面的么?
包含资源文件的打包
这个打包方式,就是对多个 Python 文件的打包方式的补充。
0、一点吐槽
说到这个,我不得不吐槽一句,网上大部分的打包资源文件的方法都是一模一样的,繁琐且复杂,而且好多根本都实现不了,搞得我当时初学的时候一脸懵……,什么引用 os、sys 库搞些什么路径操作啊什么的,辣么麻烦,还有什么把图片文件用 base64 硬编码的啊什么的,也不解释原理,只能说离谱……
Python 的简约风格都被他们忘得一干二净了!对于打包资源文件的路径问题,虽然它打包后认不得相对路径,但是绝对路径总是认得的嘛,没有程序不认识绝对路径!
有人说绝对路径改不了啊,到别人的电脑上怎么运行呢?我只能说……你见识短浅了!一个简单的装饰器知识就可以解决的问题!
好了,不吐槽了,继续说正事。
多个 Python 文件的打包还是和之前讲到的一样,这里只说资源文件的方法。也是一样的,编辑 spec 文件。
1、编辑spec文件
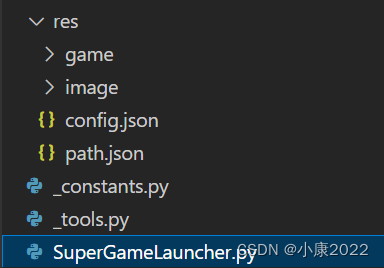
我的建议是,把资源文件(或者文件夹)都统一放在一个与 Python 文件同一目录下的的 res 文件夹里,方便打包,就如下图。
然后,将下图中标识的这一行改成这样:
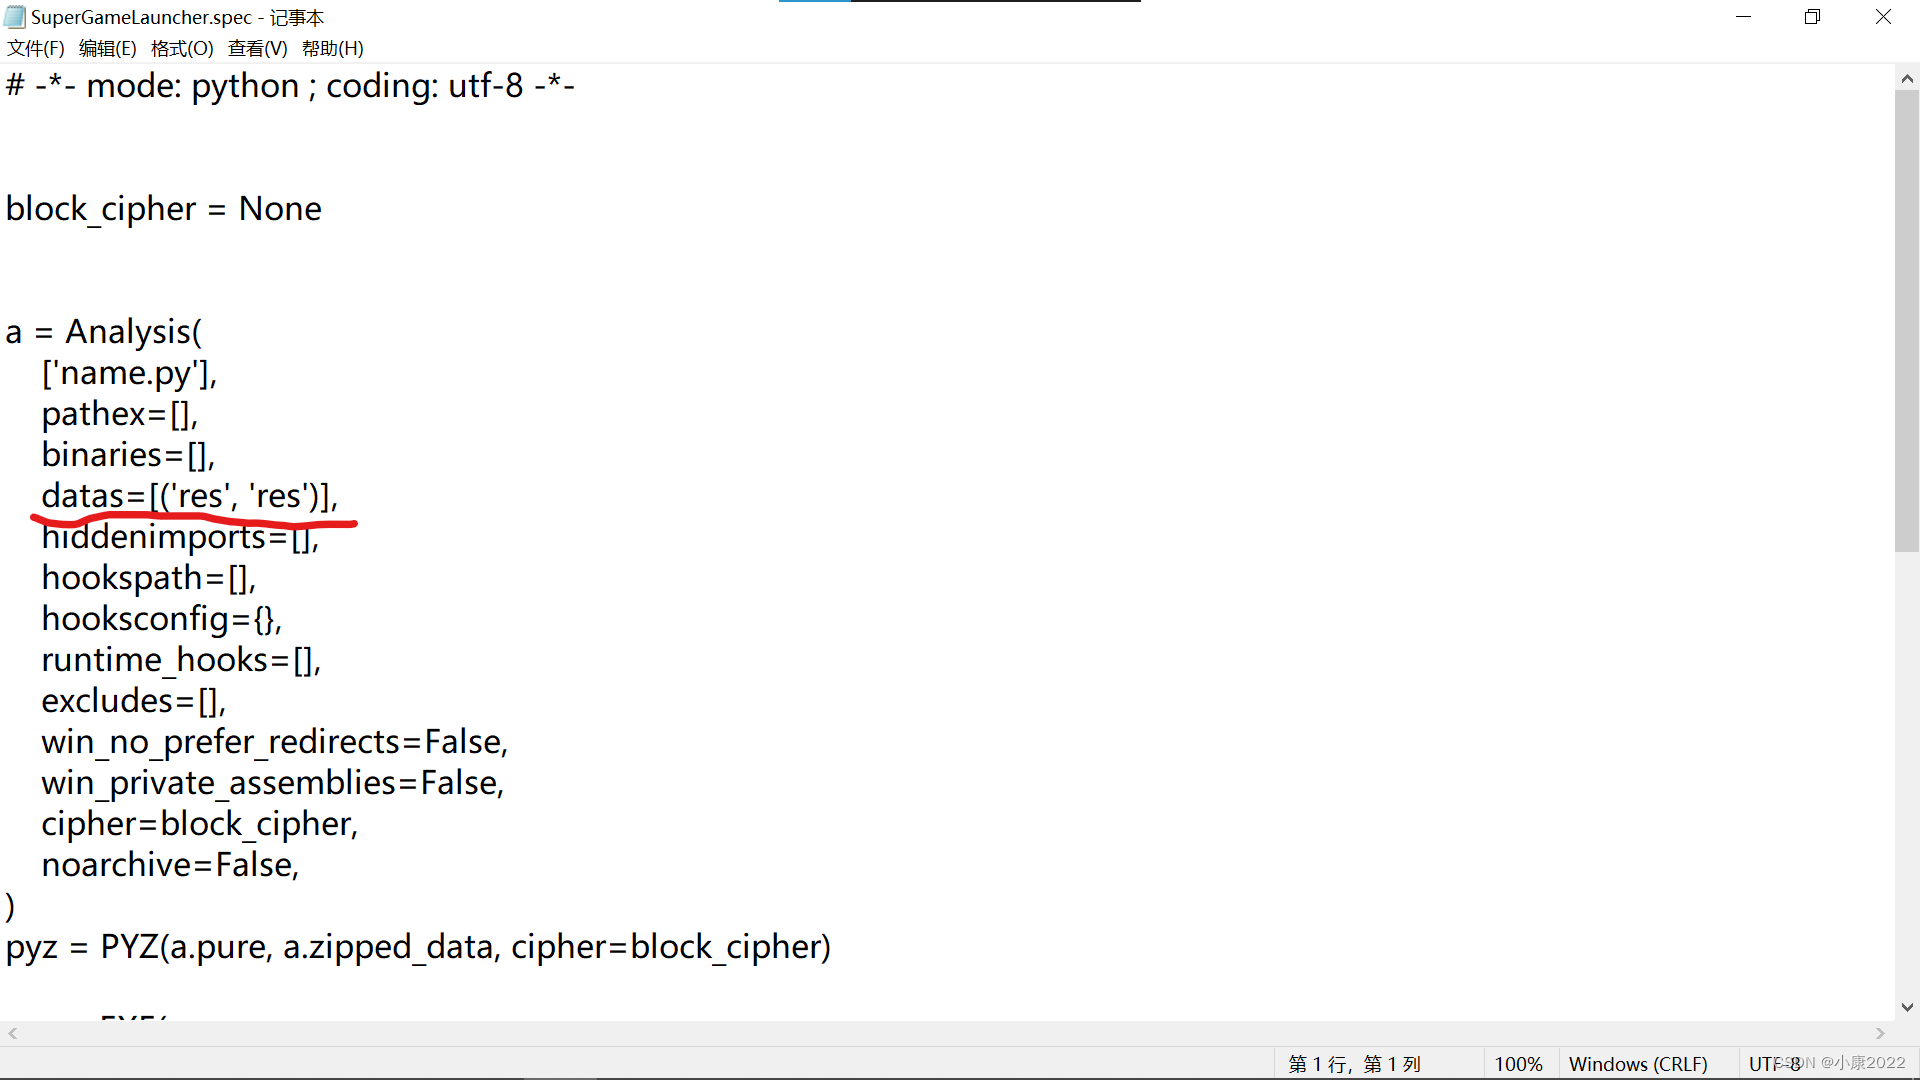
改完记得保存!
2、修改文件打开函数
这里有三种方法,前两种是我的方法,最后一种是网上别人的方法。
① 引入特定的模块
这个模块的代码很简单,放在下面,一定要将模块命名为 _.py,并在引用其他第三方模块之前就引用它,但又一定要在下划线开头的模块之后引用(否则会有 BUG),它在主 Python 文件里引用一次即可(其他的文件不用引用)!它可以将 open 函数改成我们想要的,而且原来的代码还完全不用修改!
- import builtins
-
-
- def wrapper(function):
- def _open(*args, **kw):
- """ 修改路径 """
- _args = list(args)
- _args[0] = __file__[:-4] + args[0]
- if kw.get('file'):
- kw['file'] = __file__[:-4] + kw['file']
- return function(*_args, **kw)
- return _open
-
-
- setattr(builtins, 'open', wrapper(open))

这里的 __file__ 是 Python 文件的属性,是一个字符串,为该文件的绝对路径,不管该文件在哪里,__file__ 都是对应的绝对路径。然后我们用写一个 wrapper 函数充当装饰器,将内置的 open 函数包装一下。再引入 builtins 模块(内置函数和类的模块),给其添加一个名为 open 新属性以覆盖原来的 open 函数,并对该项目整体生效即可!
这种方法的好处在于,它只需要在主文件里引用一次即可,其他的什么都不用改!(④ 特别注意 里的除外)
② 自己手动修改 open 函数修改路径
这个修改是在源代码中修改的(每一个用到了 open 函数的 Python 文件都要改一次),目的就是要让相对路径变成会根据主 Python 文件的路径而变化的绝对路径。修改的装饰器如下:
- # 编写装饰器
- def wrapper(function):
- def _open(*args, **kw):
- """ 修改路径 """
- args_list = list(args)
- key = '/'.join(__file__.split('\\')[:-1]) + '/'
- args_list[0] = key + args[0]
- if kw.get('file'):
- kw['file'] = key + kw['file']
- return function(*args_list, **kw)
- return _open
-
-
- # 装饰内置函数open
- open = wrapper(open)
把这段代码写在文件的开头即可(或者说在使用open函数之前)。
③ 网友的其他方法
他们就是写了这样一个函数来代替 open,也是手动修改的 open 函数,不得不说,看起来有点麻烦(每个用了 open 函数的 Python 文件都要引入 os 和 sys 模块)。
- import os
- import sys
-
-
- def get_resource_path(relative_path):
- if hasattr(sys, '_MEIPASS'):
- return os.path.join(sys._MEIPASS, relative_path)
- return os.path.join(os.path.abspath("."), relative_path)
其他的都是一样的。
④ 特别注意
这里还要提一下,无论是前面的哪一种方法,只要你使用了参数为路径的其他函数时,也要改一下,其实就是在相对路径前面加上方法②中的 key 即可。
其实直接方法③来代替也可以,但是功能上容易出错,而且如果 Python 文件较多,那么每个 Python 文件都这样引用两个模块(sys 和 os),看起来比较麻烦。
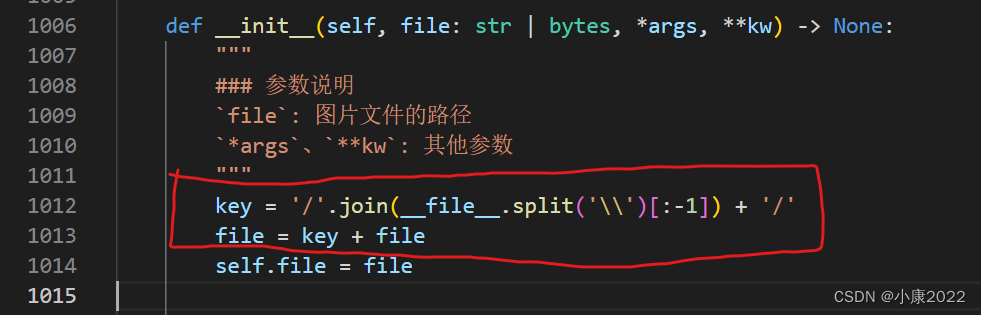
当我们使用了 tkinter 模块的时候,PhotoImage 类就是要这样写的一个例子(其中的 __init__ 方法用到了路径):
- class PhotoImage(tkinter.PhotoImage):
-
- def __init__(self, *args, **kw):
- if kw.get('file'):
- key = '/'.join(__file__.split('\\')[:-1]) + '/'
- kw['file'] = key + kw['file']
- tkinter.PhotoImage.__init__(self, *args, **kw)
这个代码就要写在使用 PhotoImage 的开头,后续调用时就用这个 PhotoImage,使用其他模块时,遇到参数为路径的函数或类,都要这样修改。
最后一步,和之前的方法一样,打包你的程序即可!
打包实战
我这里以一个我的半成品为例,进行打包。项目是一个图形化界面的程序。我们要将其打包成只含有一个 exe 的文件。
打包方式的选择
我的项目里面包含多个 Python 文件,要用多 Python 文件打包方式;
项目比较大,为节省打包时间,并追求极致的 exe 大小,采用虚拟环境打包方式;
项目含有资源文件夹,采用包含资源文件的打包方式。
打包方式选择好了,开始打包!
打包全过程
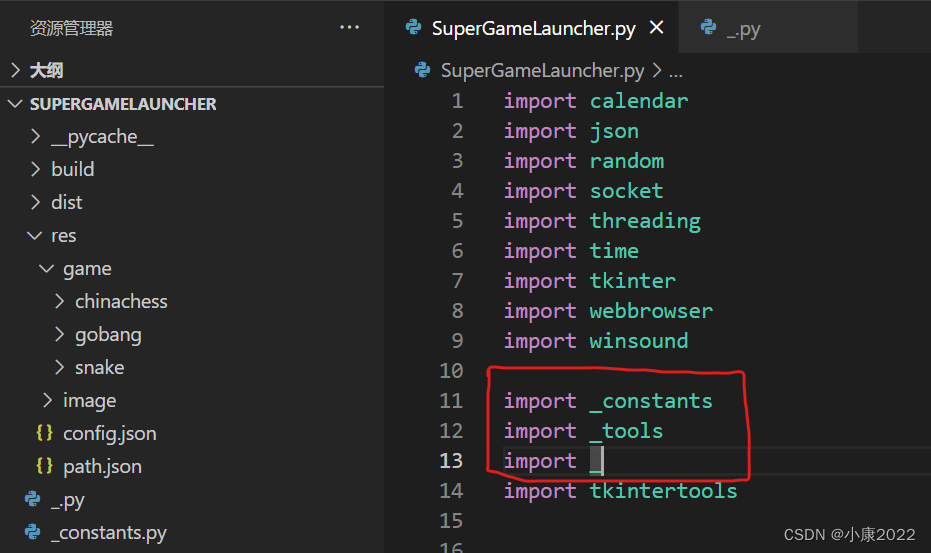
项目全部文件(蓝色背景的是主文件)

包含四个 Python 文件、一个资源文件夹(res),资源文件夹里面又包含了一些子文件夹和 json 文件。
第一步:启动 Anaconda Prompt,切换至目标文件夹路径位置
cd C:\Users\小康\Desktop\SuperGameLauncher
第二步:启动虚拟环境(我的是一个纯净的、第三方包只有 Pyinstaller 的环境)
conda activate e1
第三步:生成 spec 文件(我的 Pyinstaller 已经安装好了)
pyi-makespec -F -w SuperGameLauncher.py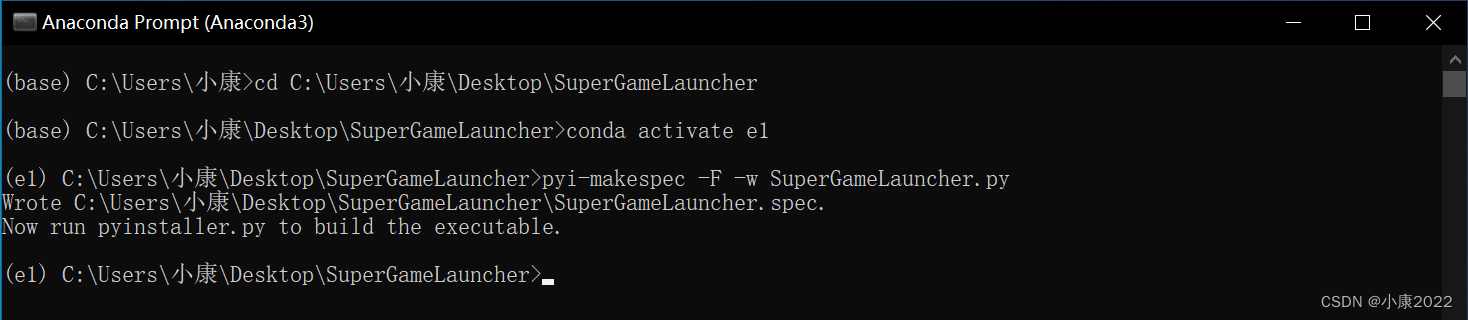
第四步:引入 _.py 模块(我的程序用到了大量 open 函数且涉及多文件)

处理特殊的情况(tkintertools 模块里面有参数为路径的类):
第五步:编辑 spec 文件
修改图中标识的两处地方(_.py 不要忘记了)。
第六步:打包项目(注意这里的对象是 spec 文件)
Pyinstaller SuperGameLauncher.spec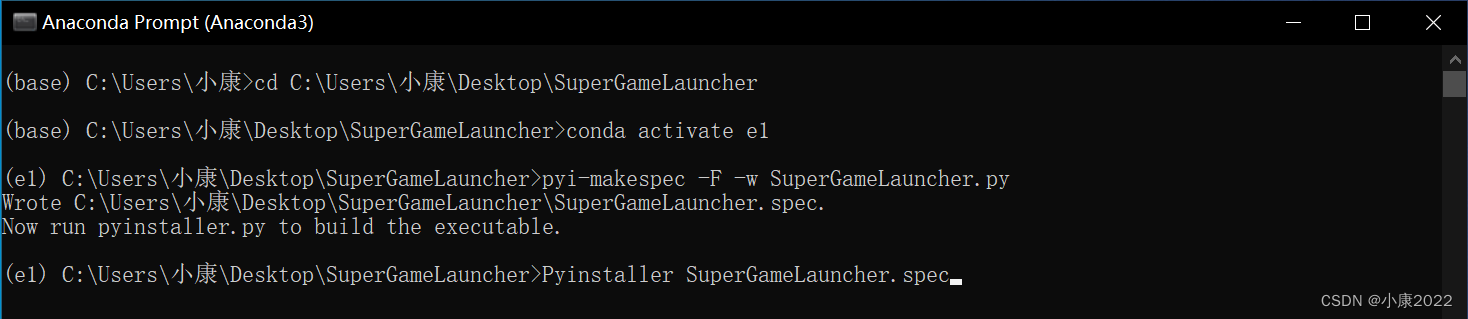
Packed successfully!

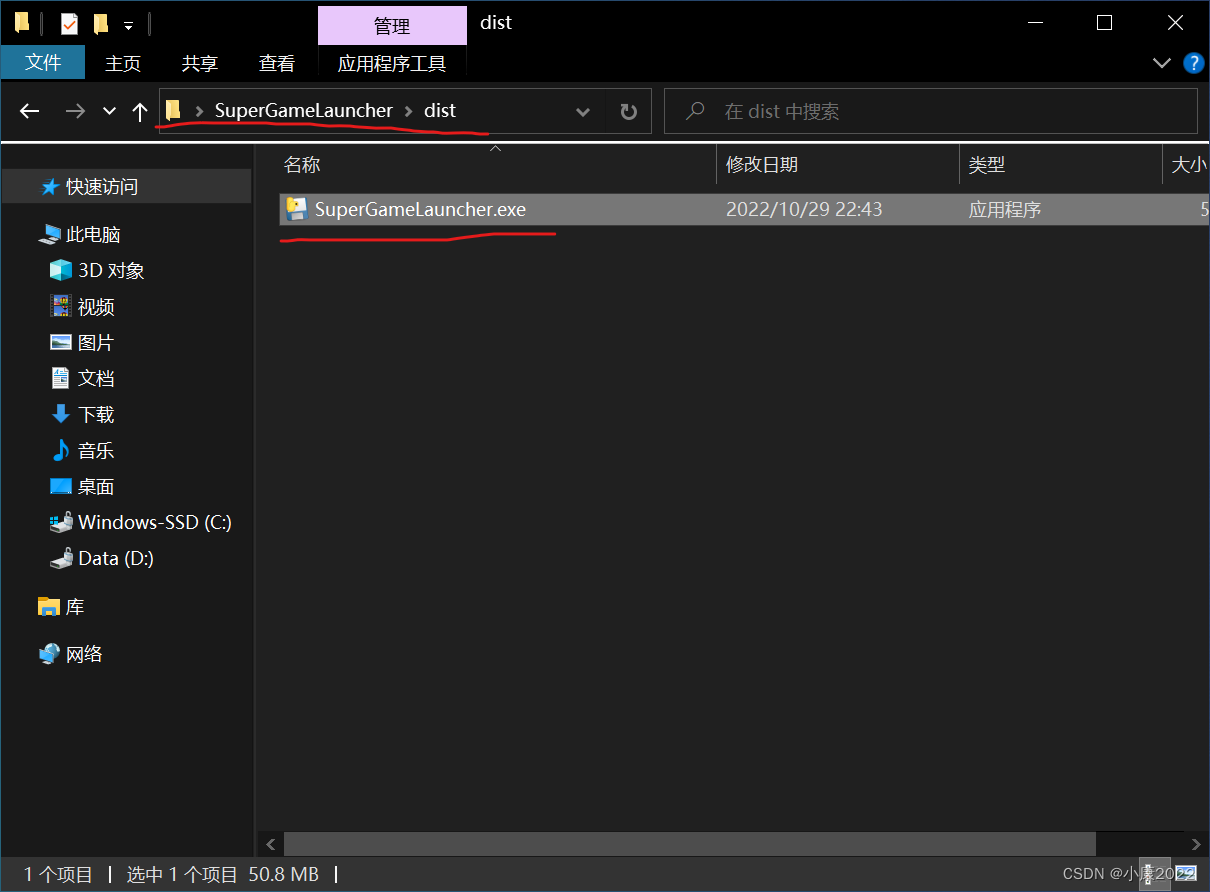
Step 7: Check the packaging effect
Find the dist folder in the project, and there will be an exe file after opening. For my project, this is already a very small size (50.8MB). After all, the resource file is 42.2MB. That is to say, the source code occupies 8.6MB without the resource file! How about it, isn't it great?
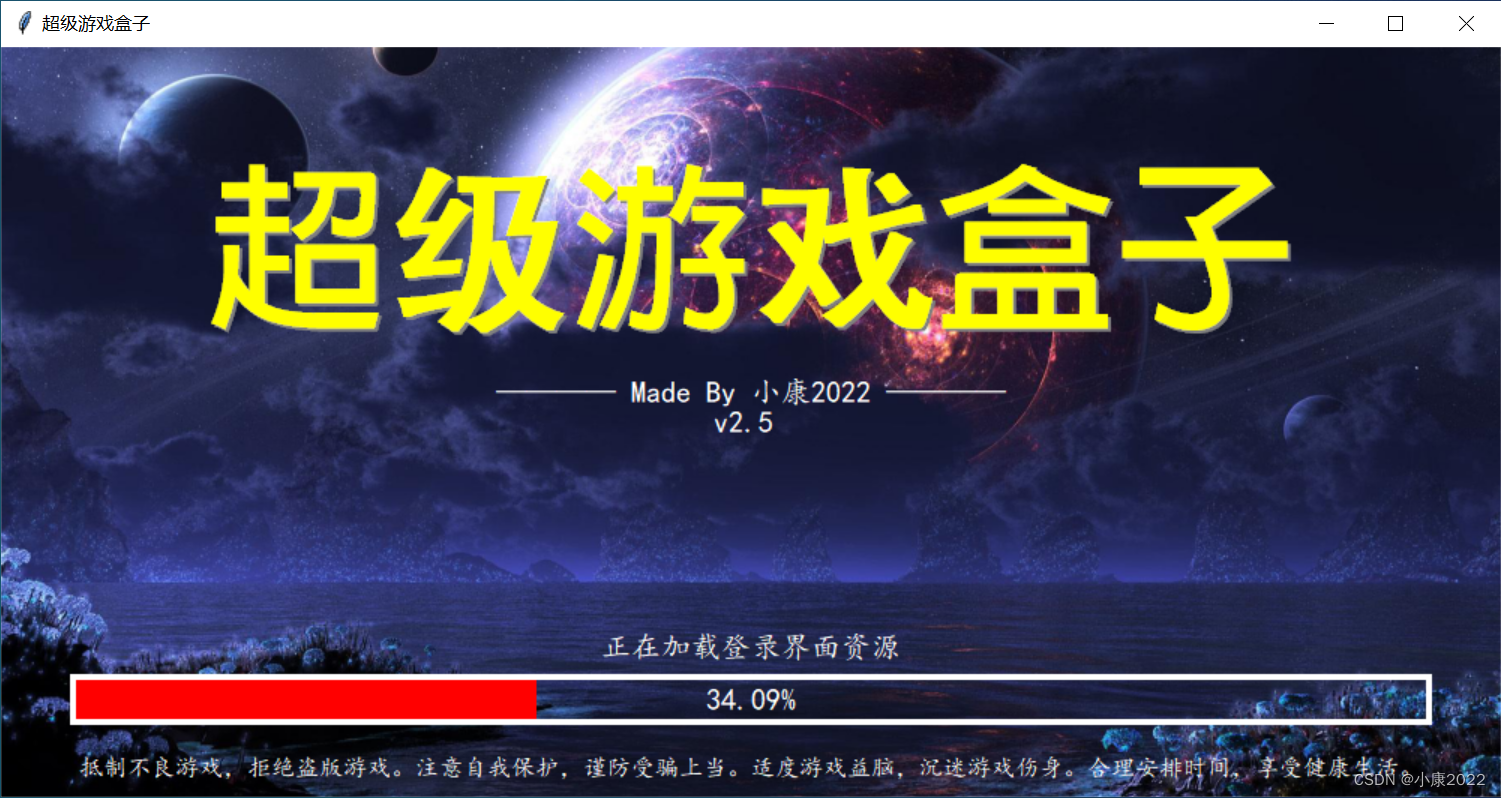
Double click to run!
[After reading so much, I want you to give it a thumbs up, it’s not too much to collect it]
Category of website: technical article > Blog
Author:kimi
link:http://www.pythonblackhole.com/blog/article/345/27586e7a68129cced507/
source:python black hole net
Please indicate the source for any form of reprinting. If any infringement is discovered, it will be held legally responsible.
name:
Comment content: (supports up to 255 characters)
no articles