
Jetson Nano部署YOLOv5与Tensorrtx加速——(自己走一遍全过程记录)
posted on 2023-06-06 11:29 read(1027) comment(0) like(21) collect(2)
say up front
After working with Jetson nano and YOLOv5, most of the information on the Internet is repetitive and there are many pitfalls. I struggled for several days during the configuration process, and decided to write this tutorial for my own memo after getting out of the pit.
It is stated in advance that many of the contents of this article are not original, but the literature in the configuration process has been collected and sorted out, but all steps are 1:1 replicas of my configuration process, including errors and solutions, but Everyone's equipment and packages on the network are constantly updated. There is no guarantee that the version after writing this article will have no compatibility problems. In short, I wish myself good luck in advance!
1. Burn image
1. Mirror selection
Here I choose Yabo Smart, which has already configured most of the mirroring.
Get the link: (extraction code: o6a4)
download address of the image
The following things have been installed in it:
CUDA10.2, CUDNNv8, tensorRT, opencv4.1.1, python2, python3, tensorflow2.3, jetpack4.4.1, yolov4-tiny and yolov4, jetson-inference package (including the training model in the data ), jetson-gpio library, install pytorch1.6 and torchvesion0.7, install node v15.0.1, npm7.0.3, jupterlab, jetcham, VNC service has been turned on.
2. Image burning method
Refer to this article for the burning method, it is very simple.
Image burning method
3. Jetson nano system initialization settings
Insert card! power on! It's better to connect to the screen, it's not bad for the money. Many subsequent commands require root privileges, and we need to enable the root user.
sudo passwd root
Then set the password
The development board needs to be plugged in with a network cable or a driver-free wireless network card for networking! ! !
① Make a small backup
sudo cp /etc/apt/sources.list /etc/apt/sources.list.bak
sudo gedit /etc/apt/sources.list
②Delete all and replace with the following
deb http://mirrors.tuna.tsinghua.edu.cn/ubuntu-ports/ bionic main multiverse restricted universe
deb http://mirrors.tuna.tsinghua.edu.cn/ubuntu-ports/ bionic-security main multiverse restricted universe
deb http://mirrors.tuna.tsinghua.edu.cn/ubuntu-ports/ bionic-updates main multiverse restricted universe
deb http://mirrors.tuna.tsinghua.edu.cn/ubuntu-ports/ bionic-backports main multiverse restricted universe
deb-src http://mirrors.tuna.tsinghua.edu.cn/ubuntu-ports/ bionic main multiverse restricted universe
deb-src http://mirrors.tuna.tsinghua.edu.cn/ubuntu-ports/ bionic-security main multiverse restricted universe
deb-src http://mirrors.tuna.tsinghua.edu.cn/ubuntu-ports/ bionic-updates main multiverse restricted universe
deb-src http://mirrors.tuna.tsinghua.edu.cn/ubuntu-ports/ bionic-backports main multiverse restricted universe
Digression: How to replace the source?
The image burned by Jetson Nano is a foreign source. The speed of installing software and upgrading software packages is very slow, and even network errors often occur. The steps to replace the source are as follows:
①Back up the original source.list file first.
sudo cp /etc/apt/sources.list /etc/apt/sources.list.bak
②Edit source.list, and replace the domestic source.
sudo gedit /etc/apt/sources.list
③Press "i" to start typing, delete all content, copy and replace the source. (Choose one of Tsinghua University or University of Science and Technology of China here, and save it)
# 清华源
deb http://mirrors.tuna.tsinghua.edu.cn/ubuntu-ports/ bionic main multiverse restricted universe
deb http://mirrors.tuna.tsinghua.edu.cn/ubuntu-ports/ bionic-security main multiverse restricted universe
deb http://mirrors.tuna.tsinghua.edu.cn/ubuntu-ports/ bionic-updates main multiverse restricted universe
deb http://mirrors.tuna.tsinghua.edu.cn/ubuntu-ports/ bionic-backports main multiverse restricted universe
deb-src http://mirrors.tuna.tsinghua.edu.cn/ubuntu-ports/ bionic main multiverse restricted universe
deb-src http://mirrors.tuna.tsinghua.edu.cn/ubuntu-ports/ bionic-security main multiverse restricted universe
deb-src http://mirrors.tuna.tsinghua.edu.cn/ubuntu-ports/ bionic-updates main multiverse restricted universe
deb-src http://mirrors.tuna.tsinghua.edu.cn/ubuntu-ports/ bionic-backports main multiverse restricted universe

# 中科大源
deb http://mirrors.ustc.edu.cn/ubuntu-ports/ bionic-updates main restricted
deb http://mirrors.ustc.edu.cn/ubuntu-ports/ bionic universe
deb http://mirrors.ustc.edu.cn/ubuntu-ports/ bionic-updates universe
deb http://mirrors.ustc.edu.cn/ubuntu-ports/ bionic multiverse
deb http://mirrors.ustc.edu.cn/ubuntu-ports/ bionic-updates multiverse
deb http://mirrors.ustc.edu.cn/ubuntu-ports/ bionic-backports main restricted universe multiverse
deb http://mirrors.ustc.edu.cn/ubuntu-ports/ bionic-security main restricted
deb http://mirrors.ustc.edu.cn/ubuntu-ports/ bionic-security universe
deb http://mirrors.ustc.edu.cn/ubuntu-ports/ bionic-security multiverse

④ Update software
# 更新软件
sudo apt-get update
sudo apt-get upgrade
2. Start to configure the required environment and install various support packages
1. Configure CUDA
Jetson nano has built-in CUDA, but you need to configure environment variables to use it. Just open the command line and add environment variables. Here I am CUDA10.2. If you don’t use my image, you need to fill in the path according to your CUDA version.
#打开终端,输入命令
vi .bashrc
Pull to the end and add these at the end
export PATH=/usr/local/cuda-10.2/bin${PATH:+:${PATH}}
export LD_LIBRARY_PATH=/usr/local/cuda-10.2/lib64${LD_LIBRARY_PATH:+:${LD_LIBRARY_PATH}}
export CUDA_ROOT=/usr/local/cuda
Apply the current configuration (refresh it)
source ~/.bashrc
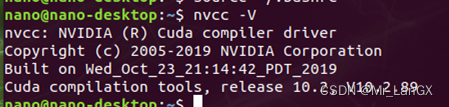
Check whether the configuration is successful
nvcc -V
2. Install pip3
sudo apt-get update
sudo apt-get install python3-pip python3-dev -y
3. Install jtop
Install the jtop library, which can monitor the working status of your own device CPU and GPU
sudo -H pip3 install jetson-stats
sudo jtop		#运行jtop(第一次可能不行,第二次就好了)  按【q】退出
4. Configure the libraries that may be needed
sudo apt-get install build-essential make cmake cmake-curses-gui -y
sudo apt-get install git g++ pkg-config curl -y
sudo apt-get install libatlas-base-dev gfortran libcanberra-gtk-module libcanberra-gtk3-module -y
sudo apt-get install libhdf5-serial-dev hdf5-tools -y
sudo apt-get install nano locate screen -y
5. Install the required dependent environment
sudo apt-get install libfreetype6-dev -y
sudo apt-get install protobuf-compiler libprotobuf-dev openssl -y
sudo apt-get install libssl-dev libcurl4-openssl-dev -y
sudo apt-get install cython3 -y
6. Install the system-level dependencies of opencv, some codec libraries
sudo apt-get install build-essential -y
sudo apt-get install cmake git libgtk2.0-dev pkg-config libavcodec-dev libavformat-dev libswscale-dev -y
sudo apt-get install python-dev python-numpy libtbb2 libtbb-dev libjpeg-dev libpng-dev libtiff5-dev libdc1394-22-dev -y
sudo apt-get install libavcodec-dev libavformat-dev libswscale-dev libv4l-dev liblapacke-dev -y
sudo apt-get install libxvidcore-dev libx264-dev -y
sudo apt-get install libatlas-base-dev gfortran -y
sudo apt-get install ffmpeg -y
7. Update CMake
This step is necessary, because many things of the ARM architecture must be compiled from source code
wget http://www.cmake.org/files/v3.13/cmake-3.13.0.tar.gz
tar xpvf cmake-3.13.0.tar.gz cmake-3.13.0/  #解压
cd cmake-3.13.0/
./bootstrap --system-curl	# 漫长的等待,做一套眼保健操...
make -j4 #编译  同样是漫长的等待...
echo 'export PATH=~/cmake-3.13.0/bin/:$PATH' >> ~/.bashrc
source ~/.bashrc #更新.bashrc
8. Compatible with U disk
The next steps may need to use a USB flash drive to copy large files to the development board, but for large-capacity devices, it may fail to mount, and an installation command can solve it.
sudo apt-get install exfat-utils
3. Install pytorch
The Linux on Jetson nano is actually not an x86 architecture, but an ARM architecture similar to mobile phones, which leads to many packages on it not being common to those on ordinary Linux . It is also one of the pits that have been stepped on. The package downloaded from the pytorch official website cannot call the graphics card of the development board in actual use (this is a big problem, the computing power of the development board without the graphics card plummets!). The PyTorch here and the following torchvision and other packages need to install the version given by Nvidia's official website.
1. Download PyTorch1.8
I have already downloaded it, here is the download link of the ready-made installation package: (extraction code: yvex)
installation package
2. Install PyTorch1.8
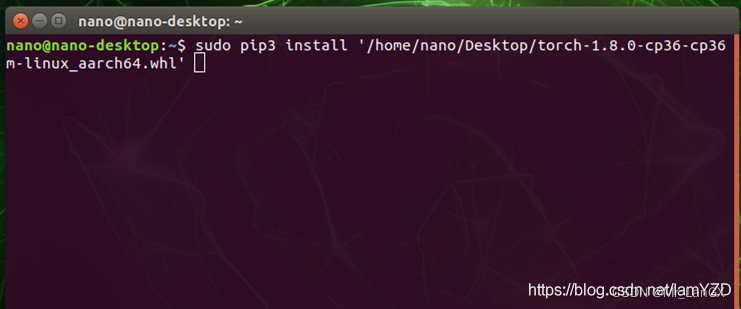
and copy the downloaded things to the Jetson nano development board with a U disk. It is recommended to put it on the desktop for easy finding.
sudo pip3 install …# Drag the .whl directly into the command window and let it automatically fill in the file location.
It takes a long time to wait for the installation.
4. Install torchvision 0.9.0 version
The versions of PyTorch and torchvision need to be corresponding, and the one downloaded in the previous step is exactly corresponding.
1. Install the dependencies we need in advance
sudo apt-get install libopenmpi2
sudo apt-get install libopenblas-dev
sudo apt-get install libjpeg-dev zlib1g-dev
2. Installing torchvision 0.9.0
also requires a special version that matches Jetson nano. This torchvision is included in the personal link in step 3. Copy the downloaded package to the development board, and it is also recommended to put it on the desktop.
cd torchvision	# 进入到这个包的目录下
export BUILD_VERSION=0.9.0
sudo python3 setup.py install		# 安装(估计要20、30分钟不止吧)
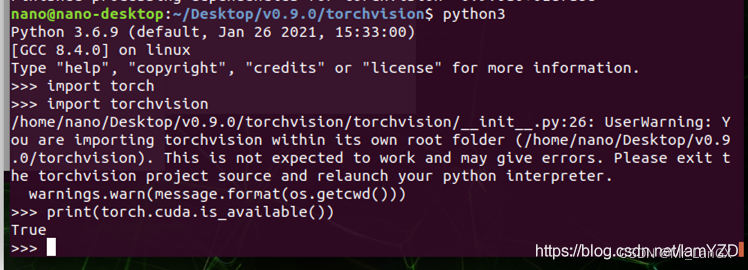
3. Check whether the installation is successful
python3
import torch
import torchvision
print(torch.cuda.is_available())	# 这一步如果输出True那么就成功了!
quit()	# 最后退出python编译
5. Download YOLOv5-5.0 source code
Train well on your own computer or on a server. How to train here, without too much explanation, you can go to station B to find some videos to learn. My project is to detect elevator buttons. Students who need data sets and training weights, as well as various yolov5 improved codes can contact me via Didi private message.
6. Install the packages that need to be depended on to make YOLOv5 run successfully
Note: If the download process fails due to network reasons, you can add -i https://pypi.tuna.tsinghua.edu.cn/simple after the command to use the Tsinghua mirror source
1,
sudo pip3 install matplotlib==3.2.2
sudo pip3 install --upgrade Cython	#更新一下这个包
2. numpy is a bit special, it already comes with it, but it was installed by apt-get, so uninstall the original one first, and it is also convenient for later package management
sudo apt-get remove python-numpy
sudo pip3 install numpy==1.19.4
sudo pip3 install scipy==1.4.1.	# 这个包安装巨慢,耐心等待
3. I did not specify the version of some packages after this when I installed them. The instructions here are based on the later pip3 list.
sudo pip3 install tqdm==4.61.2
sudo pip3 install seaborn==0.11.1
sudo pip3 install scikit-build==0.11.1	# 安装opencv需要这个包
sudo pip3 install opencv-python==4.5.3.56	# 不出意外也是一个相当漫长的过程
sudo pip3 install tensorboard==2.5.0 -i https://pypi.tuna.tsinghua.edu.cn/simple
sudo pip3 install --upgrade PyYAML	# 我升级到了5.4.1 也可以sudo pip3 install PyYAML==5.4.1
sudo pip3 install thop
sudo pip3 install pycocotools
4. According to the list of required installation packages given by the YOLOv5 official, carefully compare and install the missing ones.
安装命令输入格式:sudo pip3 install  .................
# base ----------------------------------------
matplotlib>=3.2.2
numpy>=1.18.5
opencv-python>=4.1.2
Pillow
PyYAML>=5.3.1
scipy>=1.4.1
torch>=1.7.0
torchvision>=0.8.1
tqdm>=4.41.0

# logging -------------------------------------
tensorboard>=2.4.1
wandb

# plotting ------------------------------------
seaborn>=0.11.0
pandas

# export --------------------------------------
coremltools>=4.1
onnx>=1.8.1
scikit-learn==0.19.2  # for coreml quantization

# extras --------------------------------------
thop  # FLOPS computation
pycocotools>=2.0  # COCO mAP
5. Run the detection script
In the same directory as the source code detect.py, open the terminal and run the following command.
The effect is not bad, but it takes a long time to start the model, and the prediction effect is not bad. After that, you can see your predicted picture in the output in your own inference.
Then open the detecy.py detection script, modify the detection resource parameters, and instead call the camera for real-time video prediction, about 10fps, it should be said that it is not bad, but there are ways to improve it.
python3 detect.py --source /path/to/xxx.jpg --weights /path/to/best.pt --conf-thres 0.7
或者是:
python3 detect.py
7. A wave of TensorRT acceleration?
1. Install pycuda-2019
① (Use this method when the network is good)
Install pycuda online
pip3 install pycuda
② (Use the following method when your network is not good)
Extraction code: t94b download link
Unzip after downloading.
Enter the extracted file.
tar zxvf pycuda-2019.1.2.tar.gz
cd pycuda-2019.1.2/
python3 configure.py --cuda-root=/usr/local/cuda-10.2
sudo python3 setup.py install
If this appears, it means that the file is being compiled and installed, and the installation can be completed after a period of time.
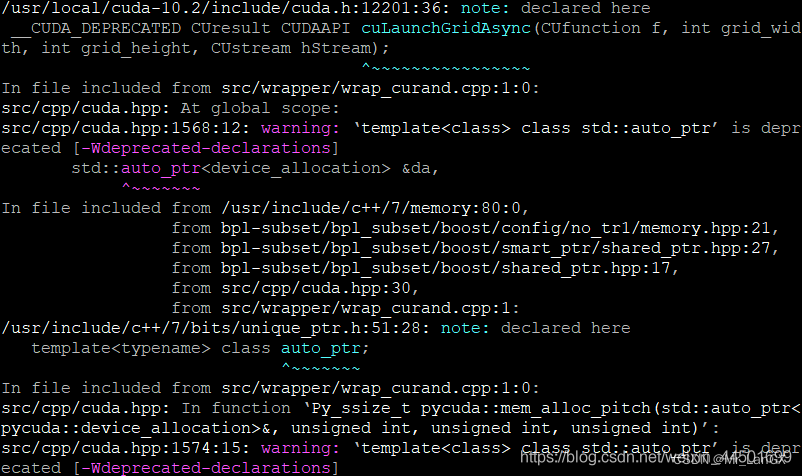
After the installation is complete:
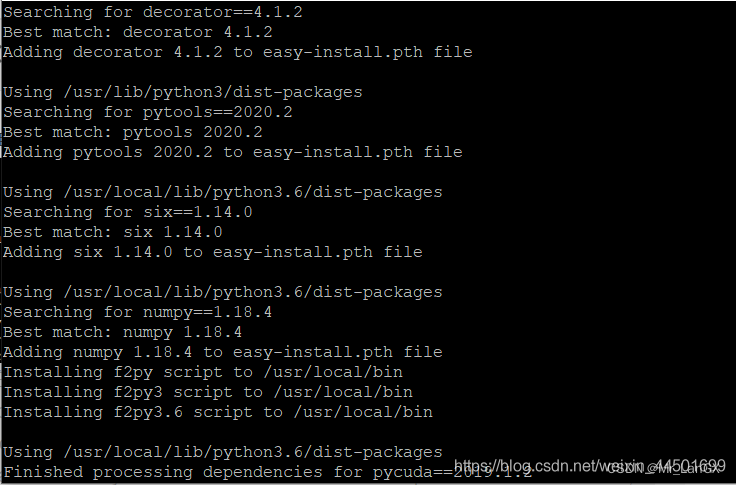
it means that the installation is successful.
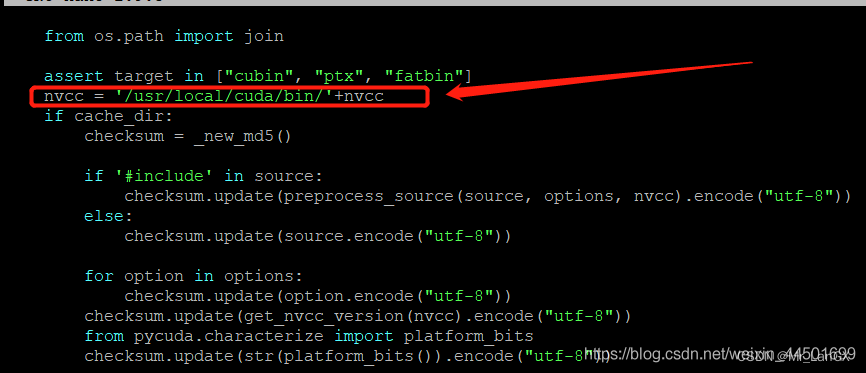
But when using it, you have to configure some necessary things, otherwise you will get an error:
FileNotFoundError: [Errno 2] No such file or directory: ‘nvcc’
Hardcode the full path of nvcc into compile_plain() in Pycuda's compiler.py file
, and add the following piece of code at about line 73!
nvcc = '/usr/local/cuda/bin/'+nvcc
2. TensorRT acceleration
At this time we will use a big guy's open source, the GitHub address is as follows:
https://github.com/wang-xinyu/tensorrtx/tree/master/yolov5
大佬是真的牛批,好好看一下吧。不仅有yolov5的,还有好多算法的,大佬都给做了相关的加速,大佬给他的项目起名叫TensorRTx,比原版的TensorRT加速更好用。
需要下载两个东西:
第一是:YOLOv5原版的开源程序(选择v5.0版本)
第二是:将大佬开源的项目tensorrtx,下载到自己的windows电脑上
然后,把tensorrtx文件夹整体,复制粘贴到yolov5-5.0原版程序的文件夹中。
我为了自己理解方便,和之后的操作,稍微改了一下文件夹名称:
(当然我都把东西准备好了,下载就行: 提取码:私信聊)
下载
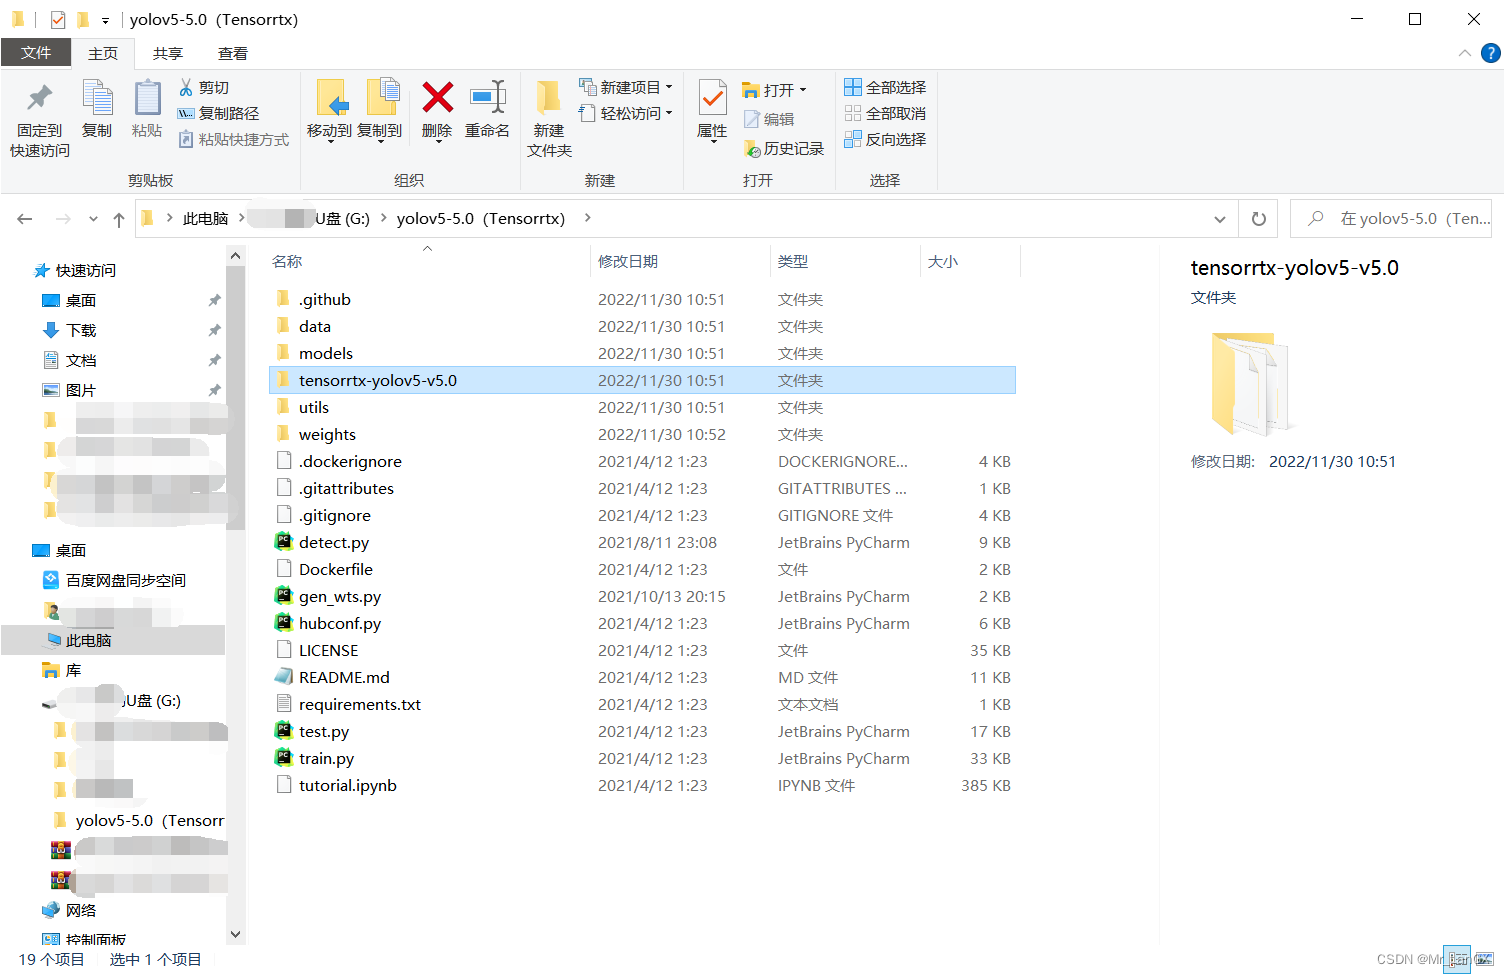
YOLOv5原版程序文件夹改名为yolov5(Tensorrtx)如下图所示:
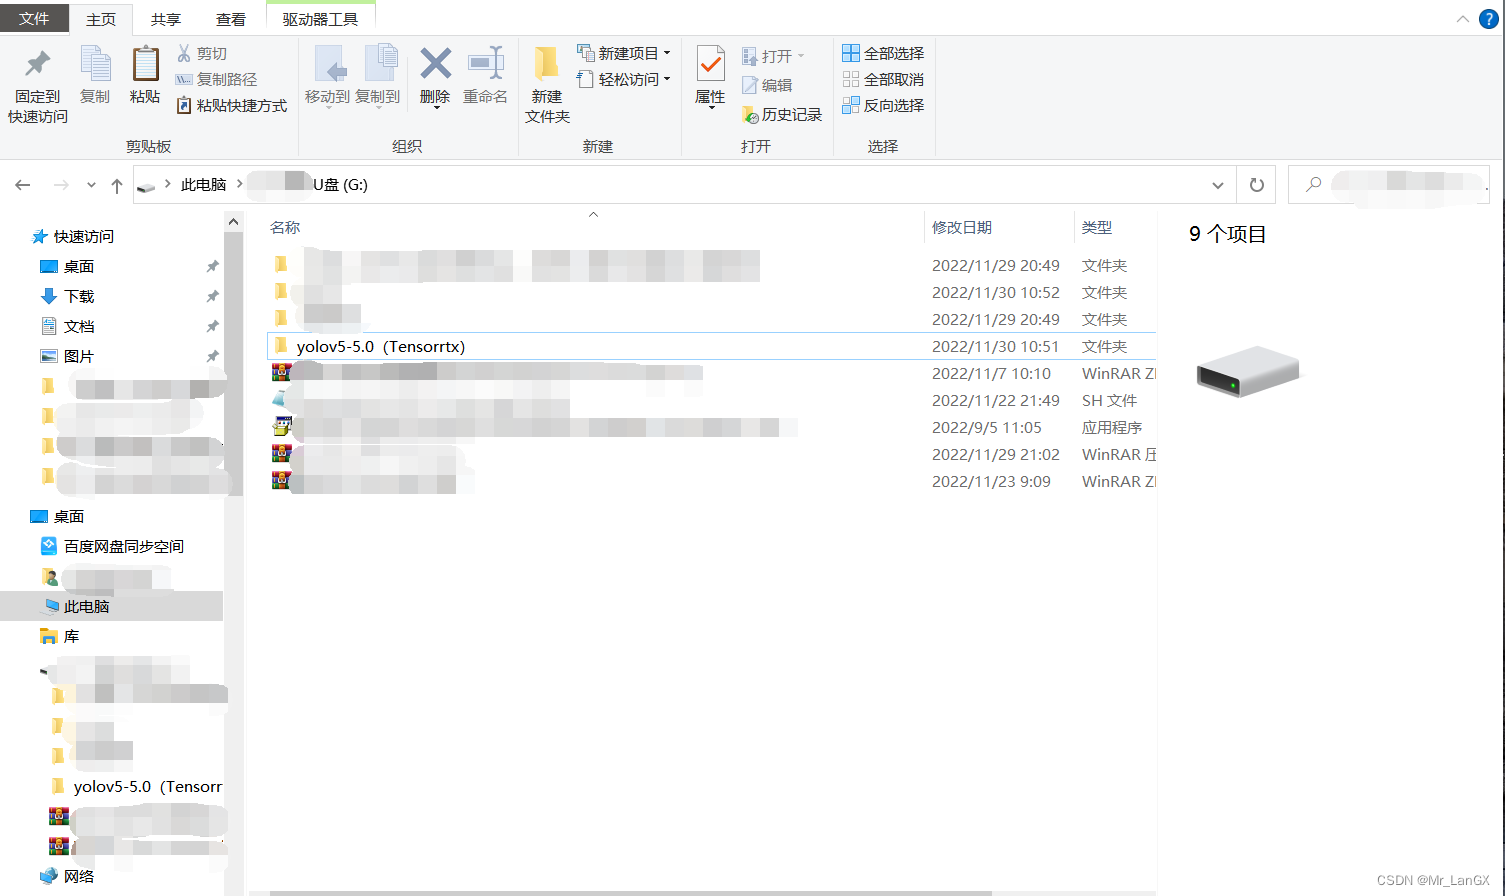
把tenserrtx文件夹整体改名为:tensorrtx-yolov5-v5.0,复制粘贴到yolov5(Tensorrtx)的文件夹中,如下图所示:
下面开始真正的操作了:
①生成.wts文件(在windows电脑上操作即可)
1.将训练得到的.pt权重文件改名为yolov5s.pt(必须改成这个名,没有为什么),把它放到yolov5(Tenserrtx)文件夹中。
2.将这个文件 yolov5-5.0(Tensorrtx)\tensorrtx-yolov5-v5.0\yolov5\gen_wts.py
复制粘贴到yolov5(Tensorrtx)文件夹中。
注意: 此时yolov5(Tensorrtx)文件夹中有了 yolov5s.pt和gen_wts.py这两个文件。
然后,在yolov5(Tensorrtx)文件夹中右击鼠标,打开终端,激活在anaconda中自己创建的虚拟环境
比如:conda activate torch1.10 。
然后输入命令:
python gen_wts.py -w yolov5s.pt -o yolov5s.wts
(问题:在anaconda中自己创建虚拟环境不会?那你就去B站找视频自己学一下。YOLOv5的权重都训练好了,这个不可能不会的。)
文件内会生成一个文件:yolov5s.wts
② build(在Jetson nano上弄)(这一步是生成引擎文件)
1.将上述生成的.wts文件用U盘复制到Jetson nano里的yolov5-5.0(Tensorrtx)\tensorrtx-yolov5-v5.0\yolov5文件夹中。
2.打开上述文件夹里的yololayer.h文件,修改CLASS_NUM的数量(根据自己训练模型的类的个数来设,我的是55)。
3.此时上述文件夹里有(.wts 是在windows电脑上生成的)(yolov5.cpp 未进行过改动)(yololayer.h 已经改为自己训练的类数了)这三个。
4.在上述文件夹中打开终端,依次运行指令:
mkdir build
cd build
cmake ..
make
sudo ./yolov5 -s ../yolov5s.wts yolov5s.engine s
稍微等待之后,在build文件夹中便通过tensorrtx生成了基于C++的engine引擎部署文件了。但是我C++水平不怎么样,对它有种心理上的抵触,把他搞成python的吧。
③USB摄像头实时检测加速
由于本人C++语言很一般,所以只能硬着头皮修改了下yolov5-5.0(Tensorrtx)\tensorrtx-yolov5-v5.0\yolov5文件夹中的yolov5_trt.py脚本,脚本的代码格式较差,但是能够实现加速,有需要的可以作为一个参考。 在文件夹下新建一个yolo_trt_test.py文件。复制下面 v4.0或者v5.0的代码到yolo_trt_test.py。
需要自行更改的地方:yolov5s.engine的路径要改成自己的、检测物体的类别名称要改为自己的。
①v5.0代码
"""
An example that uses TensorRT's Python api to make inferences.
"""
import ctypes
import os
import shutil
import random
import sys
import threading
import time
import cv2
import numpy as np
import pycuda.autoinit
import pycuda.driver as cuda
import tensorrt as trt
import torch
import torchvision
import argparse

CONF_THRESH = 0.5
IOU_THRESHOLD = 0.4


def get_img_path_batches(batch_size, img_dir):
    ret = []
    batch = []
    for root, dirs, files in os.walk(img_dir):
        for name in files:
            if len(batch) == batch_size:
                ret.append(batch)
                batch = []
            batch.append(os.path.join(root, name))
    if len(batch) > 0:
        ret.append(batch)
    return ret

def plot_one_box(x, img, color=None, label=None, line_thickness=None):
    """
    description: Plots one bounding box on image img,
                 this function comes from YoLov5 project.
    param:
        x:      a box likes [x1,y1,x2,y2]
        img:    a opencv image object
        color:  color to draw rectangle, such as (0,255,0)
        label:  str
        line_thickness: int
    return:
        no return
    """
    tl = (
        line_thickness or round(0.002 * (img.shape[0] + img.shape[1]) / 2) + 1
    )  # line/font thickness
    color = color or [random.randint(0, 255) for _ in range(3)]
    c1, c2 = (int(x[0]), int(x[1])), (int(x[2]), int(x[3]))
    cv2.rectangle(img, c1, c2, color, thickness=tl, lineType=cv2.LINE_AA)
    if label:
        tf = max(tl - 1, 1)  # font thickness
        t_size = cv2.getTextSize(label, 0, fontScale=tl / 3, thickness=tf)[0]
        c2 = c1[0] + t_size[0], c1[1] - t_size[1] - 3
        cv2.rectangle(img, c1, c2, color, -1, cv2.LINE_AA)  # filled
        cv2.putText(
            img,
            label,
            (c1[0], c1[1] - 2),
            0,
            tl / 3,
            [225, 255, 255],
            thickness=tf,
            lineType=cv2.LINE_AA,
        )


class YoLov5TRT(object):
    """
    description: A YOLOv5 class that warps TensorRT ops, preprocess and postprocess ops.
    """

    def __init__(self, engine_file_path):
        # Create a Context on this device,
        self.ctx = cuda.Device(0).make_context()
        stream = cuda.Stream()
        TRT_LOGGER = trt.Logger(trt.Logger.INFO)
        runtime = trt.Runtime(TRT_LOGGER)

        # Deserialize the engine from file
        with open(engine_file_path, "rb") as f:
            engine = runtime.deserialize_cuda_engine(f.read())
        context = engine.create_execution_context()

        host_inputs = []
        cuda_inputs = []
        host_outputs = []
        cuda_outputs = []
        bindings = []

        for binding in engine:
            print('bingding:', binding, engine.get_binding_shape(binding))
            size = trt.volume(engine.get_binding_shape(binding)) * engine.max_batch_size
            dtype = trt.nptype(engine.get_binding_dtype(binding))
            # Allocate host and device buffers
            host_mem = cuda.pagelocked_empty(size, dtype)
            cuda_mem = cuda.mem_alloc(host_mem.nbytes)
            # Append the device buffer to device bindings.
            bindings.append(int(cuda_mem))
            # Append to the appropriate list.
            if engine.binding_is_input(binding):
                self.input_w = engine.get_binding_shape(binding)[-1]
                self.input_h = engine.get_binding_shape(binding)[-2]
                host_inputs.append(host_mem)
                cuda_inputs.append(cuda_mem)
            else:
                host_outputs.append(host_mem)
                cuda_outputs.append(cuda_mem)

        # Store
        self.stream = stream
        self.context = context
        self.engine = engine
        self.host_inputs = host_inputs
        self.cuda_inputs = cuda_inputs
        self.host_outputs = host_outputs
        self.cuda_outputs = cuda_outputs
        self.bindings = bindings
        self.batch_size = engine.max_batch_size

    def infer(self, input_image_path):
        threading.Thread.__init__(self)
        # Make self the active context, pushing it on top of the context stack.
        self.ctx.push()
        self.input_image_path = input_image_path
        # Restore
        stream = self.stream
        context = self.context
        engine = self.engine
        host_inputs = self.host_inputs
        cuda_inputs = self.cuda_inputs
        host_outputs = self.host_outputs
        cuda_outputs = self.cuda_outputs
        bindings = self.bindings
        # Do image preprocess
        batch_image_raw = []
        batch_origin_h = []
        batch_origin_w = []
        batch_input_image = np.empty(shape=[self.batch_size, 3, self.input_h, self.input_w])

        input_image, image_raw, origin_h, origin_w = self.preprocess_image(input_image_path
                                                                           )


        batch_origin_h.append(origin_h)
        batch_origin_w.append(origin_w)
        np.copyto(batch_input_image, input_image)
        batch_input_image = np.ascontiguousarray(batch_input_image)

        # Copy input image to host buffer
        np.copyto(host_inputs[0], batch_input_image.ravel())
        start = time.time()
        # Transfer input data  to the GPU.
        cuda.memcpy_htod_async(cuda_inputs[0], host_inputs[0], stream)
        # Run inference.
        context.execute_async(batch_size=self.batch_size, bindings=bindings, stream_handle=stream.handle)
        # Transfer predictions back from the GPU.
        cuda.memcpy_dtoh_async(host_outputs[0], cuda_outputs[0], stream)
        # Synchronize the stream
        stream.synchronize()
        end = time.time()
        # Remove any context from the top of the context stack, deactivating it.
        self.ctx.pop()
        # Here we use the first row of output in that batch_size = 1
        output = host_outputs[0]
        # Do postprocess
        result_boxes, result_scores, result_classid = self.post_process(
            output, origin_h, origin_w)
        # Draw rectangles and labels on the original image
        for j in range(len(result_boxes)):
            box = result_boxes[j]
            plot_one_box(
                box,
                image_raw,
                label="{}:{:.2f}".format(
                    categories[int(result_classid[j])], result_scores[j]
                ),
            )
        return image_raw, end - start

    def destroy(self):
        # Remove any context from the top of the context stack, deactivating it.
        self.ctx.pop()

    def get_raw_image(self, image_path_batch):
        """
        description: Read an image from image path
        """
        for img_path in image_path_batch:
            yield cv2.imread(img_path)

    def get_raw_image_zeros(self, image_path_batch=None):
        """
        description: Ready data for warmup
        """
        for _ in range(self.batch_size):
            yield np.zeros([self.input_h, self.input_w, 3], dtype=np.uint8)

    def preprocess_image(self, input_image_path):
        """
        description: Convert BGR image to RGB,
                     resize and pad it to target size, normalize to [0,1],
                     transform to NCHW format.
        param:
            input_image_path: str, image path
        return:
            image:  the processed image
            image_raw: the original image
            h: original height
            w: original width
        """
        image_raw = input_image_path
        h, w, c = image_raw.shape
        image = cv2.cvtColor(image_raw, cv2.COLOR_BGR2RGB)
        # Calculate widht and height and paddings
        r_w = self.input_w / w
        r_h = self.input_h / h
        if r_h > r_w:
            tw = self.input_w
            th = int(r_w * h)
            tx1 = tx2 = 0
            ty1 = int((self.input_h - th) / 2)
            ty2 = self.input_h - th - ty1
        else:
            tw = int(r_h * w)
            th = self.input_h
            tx1 = int((self.input_w - tw) / 2)
            tx2 = self.input_w - tw - tx1
            ty1 = ty2 = 0
        # Resize the image with long side while maintaining ratio
        image = cv2.resize(image, (tw, th))
        # Pad the short side with (128,128,128)
        image = cv2.copyMakeBorder(
            image, ty1, ty2, tx1, tx2, cv2.BORDER_CONSTANT, (128, 128, 128)
        )
        image = image.astype(np.float32)
        # Normalize to [0,1]
        image /= 255.0
        # HWC to CHW format:
        image = np.transpose(image, [2, 0, 1])
        # CHW to NCHW format
        image = np.expand_dims(image, axis=0)
        # Convert the image to row-major order, also known as "C order":
        image = np.ascontiguousarray(image)
        return image, image_raw, h, w

    def xywh2xyxy(self, origin_h, origin_w, x):
        """
        description:    Convert nx4 boxes from [x, y, w, h] to [x1, y1, x2, y2] where xy1=top-left, xy2=bottom-right
        param:
            origin_h:   height of original image
            origin_w:   width of original image
            x:          A boxes tensor, each row is a box [center_x, center_y, w, h]
        return:
            y:          A boxes tensor, each row is a box [x1, y1, x2, y2]
        """
        y = torch.zeros_like(x) if isinstance(x, torch.Tensor) else np.zeros_like(x)
        r_w = self.input_w / origin_w
        r_h = self.input_h / origin_h
        if r_h > r_w:
            y[:, 0] = x[:, 0] - x[:, 2] / 2
            y[:, 2] = x[:, 0] + x[:, 2] / 2
            y[:, 1] = x[:, 1] - x[:, 3] / 2 - (self.input_h - r_w * origin_h) / 2
            y[:, 3] = x[:, 1] + x[:, 3] / 2 - (self.input_h - r_w * origin_h) / 2
            y /= r_w
        else:
            y[:, 0] = x[:, 0] - x[:, 2] / 2 - (self.input_w - r_h * origin_w) / 2
            y[:, 2] = x[:, 0] + x[:, 2] / 2 - (self.input_w - r_h * origin_w) / 2
            y[:, 1] = x[:, 1] - x[:, 3] / 2
            y[:, 3] = x[:, 1] + x[:, 3] / 2
            y /= r_h

        return y

    def post_process(self, output, origin_h, origin_w):
        """
        description: postprocess the prediction
        param:
            output:     A tensor likes [num_boxes,cx,cy,w,h,conf,cls_id, cx,cy,w,h,conf,cls_id, ...]
            origin_h:   height of original image
            origin_w:   width of original image
        return:
            result_boxes: finally boxes, a boxes tensor, each row is a box [x1, y1, x2, y2]
            result_scores: finally scores, a tensor, each element is the score correspoing to box
            result_classid: finally classid, a tensor, each element is the classid correspoing to box
        """
        # Get the num of boxes detected
        num = int(output[0])
        # Reshape to a two dimentional ndarray
        pred = np.reshape(output[1:], (-1, 6))[:num, :]
        # to a torch Tensor
        pred = torch.Tensor(pred).cuda()
        # Get the boxes
        boxes = pred[:, :4]
        # Get the scores
        scores = pred[:, 4]
        # Get the classid
        classid = pred[:, 5]
        # Choose those boxes that score > CONF_THRESH
        si = scores > CONF_THRESH
        boxes = boxes[si, :]
        scores = scores[si]
        classid = classid[si]
        # Trandform bbox from [center_x, center_y, w, h] to [x1, y1, x2, y2]
        boxes = self.xywh2xyxy(origin_h, origin_w, boxes)
        # Do nms
        indices = torchvision.ops.nms(boxes, scores, iou_threshold=IOU_THRESHOLD).cpu()
        result_boxes = boxes[indices, :].cpu()
        result_scores = scores[indices].cpu()
        result_classid = classid[indices].cpu()
        return result_boxes, result_scores, result_classid


class inferThread(threading.Thread):
    def __init__(self, yolov5_wrapper):
        threading.Thread.__init__(self)
        self.yolov5_wrapper = yolov5_wrapper
    def infer(self , frame):
        batch_image_raw, use_time = self.yolov5_wrapper.infer(frame)

        # for i, img_path in enumerate(self.image_path_batch):
        #     parent, filename = os.path.split(img_path)
        #     save_name = os.path.join('output', filename)
        #     # Save image
        #     cv2.imwrite(save_name, batch_image_raw[i])
        # print('input->{}, time->{:.2f}ms, saving into output/'.format(self.image_path_batch, use_time * 1000))
        return batch_image_raw,use_time

class warmUpThread(threading.Thread):
    def __init__(self, yolov5_wrapper):
        threading.Thread.__init__(self)
        self.yolov5_wrapper = yolov5_wrapper

    def run(self):
        batch_image_raw, use_time = self.yolov5_wrapper.infer(self.yolov5_wrapper.get_raw_image_zeros())
        print('warm_up->{}, time->{:.2f}ms'.format(batch_image_raw[0].shape, use_time * 1000))


if __name__ == "__main__":
    # load custom plugins
    parser = argparse.ArgumentParser()
    parser.add_argument('--engine', nargs='+', type=str, default="build/yolov5s.engine", help='.engine path(s)') #改为自己的路径
    parser.add_argument('--save', type=int, default=0, help='save?')
    opt = parser.parse_args()
    PLUGIN_LIBRARY = "build/libmyplugins.so"
    engine_file_path = opt.engine

    ctypes.CDLL(PLUGIN_LIBRARY)

    # load coco labels

    categories = ["person", "bicycle", "car", "motorcycle", "airplane", "bus", "train", "truck", "boat", "traffic light",
            "fire hydrant", "stop sign", "parking meter", "bench", "bird", "cat", "dog", "horse", "sheep", "cow",
            "elephant", "bear", "zebra", "giraffe", "backpack", "umbrella", "handbag", "tie", "suitcase", "frisbee",
            "skis", "snowboard", "sports ball", "kite", "baseball bat", "baseball glove", "skateboard", "surfboard",
            "tennis racket", "bottle", "wine glass", "cup", "fork", "knife", "spoon", "bowl", "banana", "apple",
            "sandwich", "orange", "broccoli", "carrot", "hot dog", "pizza", "donut", "cake", "chair", "couch",
            "potted plant", "bed", "dining table", "toilet", "tv", "laptop", "mouse", "remote", "keyboard", "cell phone",
            "microwave", "oven", "toaster", "sink", "refrigerator", "book", "clock", "vase", "scissors", "teddy bear",
            "hair drier", "toothbrush"] #改为自己的检测类别名称
    # a YoLov5TRT instance
    yolov5_wrapper = YoLov5TRT(engine_file_path)
    cap = cv2.VideoCapture(0)
    try:
        thread1 = inferThread(yolov5_wrapper)
        thread1.start()
        thread1.join()
        while 1:
            _,frame = cap.read()
            img,t=thread1.infer(frame)
            cv2.imshow("result", img)
            if cv2.waitKey(1) & 0XFF == ord('q'):  # 1 millisecond
                break


    finally:
        # destroy the instance
        cap.release()
        cv2.destroyAllWindows()
        yolov5_wrapper.destroy()
②v4.0代码
"""
An example that uses TensorRT's Python api to make inferences.
"""
import ctypes
import os
import random
import sys
import threading
import time

import cv2
import numpy as np
import pycuda.autoinit
import pycuda.driver as cuda
import tensorrt as trt
import torch
import torchvision

INPUT_W = 608
INPUT_H = 608
CONF_THRESH = 0.15
IOU_THRESHOLD = 0.45
int_box=[0,0,0,0]
int_box1=[0,0,0,0]
fps1=0.0
def plot_one_box(x, img, color=None, label=None, line_thickness=None):
    """
    description: Plots one bounding box on image img,
                 this function comes from YoLov5 project.
    param:
        x:      a box likes [x1,y1,x2,y2]
        img:    a opencv image object
        color:  color to draw rectangle, such as (0,255,0)
        label:  str
        line_thickness: int
    return:
        no return
    """
    tl = (
        line_thickness or round(0.002 * (img.shape[0] + img.shape[1]) / 2) + 1
    )  # line/font thickness
    color = color or [random.randint(0, 255) for _ in range(3)]
    c1, c2 = (int(x[0]), int(x[1])), (int(x[2]), int(x[3]))
    C2 = c2
    cv2.rectangle(img, c1, c2, color, thickness=tl, lineType=cv2.LINE_AA)
    if label:
        tf = max(tl - 1, 1)  # font thickness
        t_size = cv2.getTextSize(label, 0, fontScale=tl / 3, thickness=tf)[0]
        c2 = c1[0] + t_size[0], c1[1] + t_size[1] + 8
        cv2.rectangle(img, c1, c2, color, -1, cv2.LINE_AA)  # filled
        cv2.putText(
            img,
            label,
            (c1[0], c1[1]+t_size[1] + 5),
            0,
            tl / 3,
            [255,255,255],
            thickness=tf,
            lineType=cv2.LINE_AA,
        )


class YoLov5TRT(object):
    """
    description: A YOLOv5 class that warps TensorRT ops, preprocess and postprocess ops.
    """

    def __init__(self, engine_file_path):
        # Create a Context on this device,
        self.cfx = cuda.Device(0).make_context()
        stream = cuda.Stream()
        TRT_LOGGER = trt.Logger(trt.Logger.INFO)
        runtime = trt.Runtime(TRT_LOGGER)

        # Deserialize the engine from file
        with open(engine_file_path, "rb") as f:
            engine = runtime.deserialize_cuda_engine(f.read())
        context = engine.create_execution_context()

        host_inputs = []
        cuda_inputs = []
        host_outputs = []
        cuda_outputs = []
        bindings = []

        for binding in engine:
            size = trt.volume(engine.get_binding_shape(binding)) * engine.max_batch_size
            dtype = trt.nptype(engine.get_binding_dtype(binding))
            # Allocate host and device buffers
            host_mem = cuda.pagelocked_empty(size, dtype)
            cuda_mem = cuda.mem_alloc(host_mem.nbytes)
            # Append the device buffer to device bindings.
            bindings.append(int(cuda_mem))
            # Append to the appropriate list.
            if engine.binding_is_input(binding):
                host_inputs.append(host_mem)
                cuda_inputs.append(cuda_mem)
            else:
                host_outputs.append(host_mem)
                cuda_outputs.append(cuda_mem)

        # Store
        self.stream = stream
        self.context = context
        self.engine = engine
        self.host_inputs = host_inputs
        self.cuda_inputs = cuda_inputs
        self.host_outputs = host_outputs
        self.cuda_outputs = cuda_outputs
        self.bindings = bindings


    def infer(self, input_image_path):
        global int_box,int_box1,fps1
        # threading.Thread.__init__(self)
        # Make self the active context, pushing it on top of the context stack.
        self.cfx.push()
        # Restore
        stream = self.stream
        context = self.context
        engine = self.engine
        host_inputs = self.host_inputs
        cuda_inputs = self.cuda_inputs
        host_outputs = self.host_outputs
        cuda_outputs = self.cuda_outputs
        bindings = self.bindings

        # Do image preprocess
        input_image, image_raw, origin_h, origin_w = self.preprocess_image(
            input_image_path
        )
        # Copy input image to host buffer
        np.copyto(host_inputs[0], input_image.ravel())
        # Transfer input data  to the GPU.
        cuda.memcpy_htod_async(cuda_inputs[0], host_inputs[0], stream)
        # Run inference.
        context.execute_async(bindings=bindings, stream_handle=stream.handle)
        # Transfer predictions back from the GPU.
        cuda.memcpy_dtoh_async(host_outputs[0], cuda_outputs[0], stream)
        # Synchronize the stream
        stream.synchronize()
        # Remove any context from the top of the context stack, deactivating it.
        self.cfx.pop()
        # Here we use the first row of output in that batch_size = 1
        output = host_outputs[0]
        # Do postprocess
        result_boxes, result_scores, result_classid = self.post_process(
            output, origin_h, origin_w
        )
        # Draw rectangles and labels on the original image
        for i in range(len(result_boxes)):
            box1 = result_boxes[i]
            plot_one_box(
                box1,
                image_raw,
                label="{}:{:.2f}".format(
                    categories[int(result_classid[i])], result_scores[i]
                ),
            )
        return image_raw

        # parent, filename = os.path.split(input_image_path)
        # save_name = os.path.join(parent, "output_" + filename)
        # #  Save image
        # cv2.imwrite(save_name, image_raw)

    def destroy(self):
        # Remove any context from the top of the context stack, deactivating it.
        self.cfx.pop()

    def preprocess_image(self, input_image_path):
        """
        description: Read an image from image path, convert it to RGB,
                     resize and pad it to target size, normalize to [0,1],
                     transform to NCHW format.
        param:
            input_image_path: str, image path
        return:
            image:  the processed image
            image_raw: the original image
            h: original height
            w: original width
        """
        image_raw = input_image_path
        h, w, c = image_raw.shape
        image = cv2.cvtColor(image_raw, cv2.COLOR_BGR2RGB)
        # Calculate widht and height and paddings
        r_w = INPUT_W / w
        r_h = INPUT_H / h
        if r_h > r_w:
            tw = INPUT_W
            th = int(r_w * h)
            tx1 = tx2 = 0
            ty1 = int((INPUT_H - th) / 2)
            ty2 = INPUT_H - th - ty1
        else:
            tw = int(r_h * w)
            th = INPUT_H
            tx1 = int((INPUT_W - tw) / 2)
            tx2 = INPUT_W - tw - tx1
            ty1 = ty2 = 0
        # Resize the image with long side while maintaining ratio
        image = cv2.resize(image, (tw, th))
        # Pad the short side with (128,128,128)
        image = cv2.copyMakeBorder(
            image, ty1, ty2, tx1, tx2, cv2.BORDER_CONSTANT, (128, 128, 128)
        )
        image = image.astype(np.float32)
        # Normalize to [0,1]
        image /= 255.0
        # HWC to CHW format:
        image = np.transpose(image, [2, 0, 1])
        # CHW to NCHW format
        image = np.expand_dims(image, axis=0)
        # Convert the image to row-major order, also known as "C order":
        image = np.ascontiguousarray(image)
        return image, image_raw, h, w

    def xywh2xyxy(self, origin_h, origin_w, x):
        """
        description:    Convert nx4 boxes from [x, y, w, h] to [x1, y1, x2, y2] where xy1=top-left, xy2=bottom-right
        param:
            origin_h:   height of original image
            origin_w:   width of original image
            x:          A boxes tensor, each row is a box [center_x, center_y, w, h]
        return:
            y:          A boxes tensor, each row is a box [x1, y1, x2, y2]
        """
        y = torch.zeros_like(x) if isinstance(x, torch.Tensor) else np.zeros_like(x)
        r_w = INPUT_W / origin_w
        r_h = INPUT_H / origin_h
        if r_h > r_w:
            y[:, 0] = x[:, 0] - x[:, 2] / 2
            y[:, 2] = x[:, 0] + x[:, 2] / 2
            y[:, 1] = x[:, 1] - x[:, 3] / 2 - (INPUT_H - r_w * origin_h) / 2
            y[:, 3] = x[:, 1] + x[:, 3] / 2 - (INPUT_H - r_w * origin_h) / 2
            y /= r_w
        else:
            y[:, 0] = x[:, 0] - x[:, 2] / 2 - (INPUT_W - r_h * origin_w) / 2
            y[:, 2] = x[:, 0] + x[:, 2] / 2 - (INPUT_W - r_h * origin_w) / 2
            y[:, 1] = x[:, 1] - x[:, 3] / 2
            y[:, 3] = x[:, 1] + x[:, 3] / 2
            y /= r_h

        return y

    def post_process(self, output, origin_h, origin_w):
        """
        description: postprocess the prediction
        param:
            output:     A tensor likes [num_boxes,cx,cy,w,h,conf,cls_id, cx,cy,w,h,conf,cls_id, ...]
            origin_h:   height of original image
            origin_w:   width of original image
        return:
            result_boxes: finally boxes, a boxes tensor, each row is a box [x1, y1, x2, y2]
            result_scores: finally scores, a tensor, each element is the score correspoing to box
            result_classid: finally classid, a tensor, each element is the classid correspoing to box
        """
        # Get the num of boxes detected
        num = int(output[0])
        # Reshape to a two dimentional ndarray
        pred = np.reshape(output[1:], (-1, 6))[:num, :]
        # to a torch Tensor
        pred = torch.Tensor(pred).cuda()
        # Get the boxes
        boxes = pred[:, :4]
        # Get the scores
        scores = pred[:, 4]
        # Get the classid
        classid = pred[:, 5]
        # Choose those boxes that score > CONF_THRESH
        si = scores > CONF_THRESH
        boxes = boxes[si, :]
        scores = scores[si]
        classid = classid[si]
        # Trandform bbox from [center_x, center_y, w, h] to [x1, y1, x2, y2]
        boxes = self.xywh2xyxy(origin_h, origin_w, boxes)
        # Do nms
        indices = torchvision.ops.nms(boxes, scores, iou_threshold=IOU_THRESHOLD).cpu()
        result_boxes = boxes[indices, :].cpu()
        result_scores = scores[indices].cpu()
        result_classid = classid[indices].cpu()
        return result_boxes, result_scores, result_classid


class myThread(threading.Thread):
    def __init__(self, func, args):
        threading.Thread.__init__(self)
        self.func = func
        self.args = args

    def run(self):
        self.func(*self.args)


if __name__ == "__main__":
    # load custom plugins
    PLUGIN_LIBRARY = "build/libmyplugins.so"
    ctypes.CDLL(PLUGIN_LIBRARY)
    engine_file_path = "yolov5s.engine"

    # load coco labels

    categories = ["person", "bicycle", "car", "motorcycle", "airplane", "bus", "train", "truck", "boat", "traffic light",
            "fire hydrant", "stop sign", "parking meter", "bench", "bird", "cat", "dog", "horse", "sheep", "cow",
            "elephant", "bear", "zebra", "giraffe", "backpack", "umbrella", "handbag", "tie", "suitcase", "frisbee",
            "skis", "snowboard", "sports ball", "kite", "baseball bat", "baseball glove", "skateboard", "surfboard",
            "tennis racket", "bottle", "wine glass", "cup", "fork", "knife", "spoon", "bowl", "banana", "apple",
            "sandwich", "orange", "broccoli", "carrot", "hot dog", "pizza", "donut", "cake", "chair", "couch",
            "potted plant", "bed", "dining table", "toilet", "tv", "laptop", "mouse", "remote", "keyboard", "cell phone",
            "microwave", "oven", "toaster", "sink", "refrigerator", "book", "clock", "vase", "scissors", "teddy bear",
            "hair drier", "toothbrush"]

    # a  YoLov5TRT instance
    yolov5_wrapper = YoLov5TRT(engine_file_path)
    cap = cv2.VideoCapture(0)
    while 1:
        _,image =cap.read()
        img=yolov5_wrapper.infer(image)
        cv2.imshow("result", img)
        if cv2.waitKey(1) & 0XFF == ord('q'):  # 1 millisecond
            break
    cap.release()
    cv2.destroyAllWindows()
    yolov5_wrapper.destroy()
After the modification is complete, open the terminal in the yolov5-5.0 (Tensorrtx)\tensorrtx-yolov5-v5.0\yolov5 folder
and run the command line:
python3 yolo_trt_test.py
at last
The detection effect is still very good, and the effect video or animation will be uploaded later.
Category of website: technical article > Blog
Author:Fiee
link:http://www.pythonblackhole.com/blog/article/80563/c06e9bf3404e9829ad61/
source:python black hole net
Please indicate the source for any form of reprinting. If any infringement is discovered, it will be held legally responsible.
name:
Comment content: (supports up to 255 characters)
no articles