
Image classification tasks using Pytorch
posted on 2023-05-03 21:06 read(318) comment(0) like(15) collect(3)
Overview:
This article will organize your own training data, use the Pytorch deep learning framework to train your own model, and finally realize your own image classification! This article takes the identification of balconies as an example to describe.
1. Data preparation
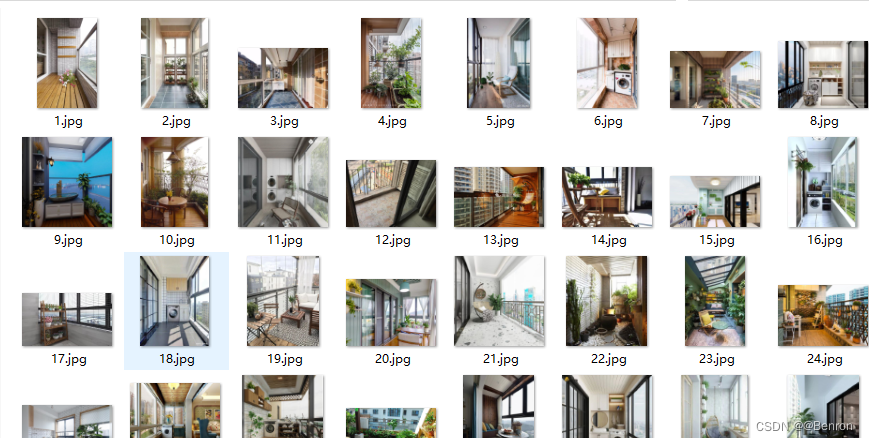
The basis of deep learning is data. To complete image classification, of course data is also essential. First use the crawler to crawl 1200 balcony pictures and 1200 non-balcony pictures. The names of the pictures are edited from 0.jpg to 2400.jpg, and the crawled pictures are placed in the same folder and named image (as shown in Figure 1 below Show).
The crawler code for Baidu pictures is also put here for your convenience. The code can crawl any custom pictures:
- import requests
- import os
- import urllib
-
-
- class Spider_baidu_image():
- def __init__(self):
- self.url = 'http://image.baidu.com/search/acjson?'
- self.headers = {
- 'User-Agent': 'Mozilla/5.0 (Windows NT 10.0; WOW64) AppleWebKit/537.36 (KHTML, like Gecko) Chrome/69.0.\
- 3497.81 Safari/537.36'}
- self.headers_image = {
- 'User-Agent': 'Mozilla/5.0 (Windows NT 10.0; WOW64) AppleWebKit/537.36 (KHTML, like Gecko) Chrome/69.0.\
- 3497.81 Safari/537.36',
- 'Referer': 'http://image.baidu.com/search/index?tn=baiduimage&ipn=r&ct=201326592&cl=2&lm=-1&st=-1&fm=result&fr=&sf=1&fmq=1557124645631_R&pv=&ic=&nc=1&z=&hd=1&latest=0©right=0&se=1&showtab=0&fb=0&width=&height=&face=0&istype=2&ie=utf-8&sid=&word=%E8%83%A1%E6%AD%8C'}
- self.keyword = input("请输入搜索图片关键字:")
- self.paginator = int(input("请输入搜索页数,每页30张图片:"))
-
-
- def get_param(self):
- """
- 获取url请求的参数,存入列表并返回
- :return:
- """
- keyword = urllib.parse.quote(self.keyword)
- params = []
- for i in range(1, self.paginator + 1):
- params.append(
- 'tn=resultjson_com&ipn=rj&ct=201326592&is=&fp=result&queryWord={}&cl=2&lm=-1&ie=utf-8&oe=utf-8&adpicid=&st=-1&z=&ic=&hd=1&latest=0©right=0&word={}&s=&se=&tab=&width=&height=&face=0&istype=2&qc=&nc=1&fr=&expermode=&force=&cg=star&pn={}&rn=30&gsm=78&1557125391211='.format(
- keyword, keyword, 30 * i))
- return params
-
- def get_urls(self, params):
- """
- 由url参数返回各个url拼接后的响应,存入列表并返回
- :return:
- """
- urls = []
- for i in params:
- urls.append(self.url + i)
- return urls
-
- def get_image_url(self, urls):
- image_url = []
- for url in urls:
- json_data = requests.get(url, headers=self.headers).json()
- json_data = json_data.get('data')
- for i in json_data:
- if i:
- image_url.append(i.get('thumbURL'))
- return image_url
-
- def get_image(self, image_url):
- """
- 根据图片url,在本地目录下新建一个以搜索关键字命名的文件夹,然后将每一个图片存入。
- :param image_url:
- :return:
- """
- cwd = os.getcwd()
- file_name = os.path.join(cwd, self.keyword)
- if not os.path.exists(self.keyword):
- os.mkdir(file_name)
- for index, url in enumerate(image_url, start=1):
- with open(file_name + '\\{}.jpg'.format(index), 'wb') as f:
- f.write(requests.get(url, headers=self.headers_image).content)
- if index != 0 and index % 30 == 0:
- print('{}第{}页下载完成'.format(self.keyword, index / 30))
-
- def __call__(self, *args, **kwargs):
- params = self.get_param()
- urls = self.get_urls(params)
- image_url = self.get_image_url(urls)
- self.get_image(image_url)
-
-
- if __name__ == '__main__':
- spider = Spider_baidu_image()
- spider()

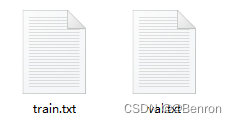
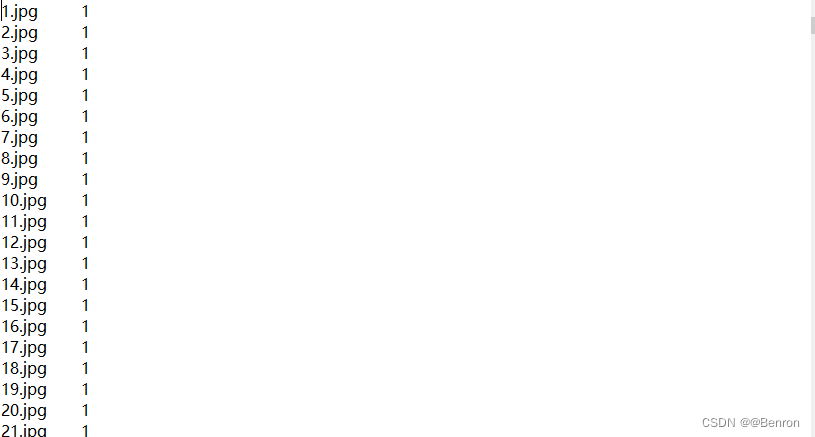
Each picture needs to be tagged accordingly, so in the txt file, select the name of the picture and add a tag after it. The label is 1 if it is a balcony, and 0 if it is not a balcony. Among the 2400 pictures, it is divided into two txt documents as the training set and the verification set "train.txt" and "val.txt" (as shown in Figures 2 and 3 below)
通过观察自己爬取的图片,可以发现阳台各式各样,有的半开放,有的是封闭式的,有的甚至和其他可识别物体花,草混在一起。同时,图片尺寸也不一致,有的是竖放的长方形,有的是横放的长方形,但我们最终需要是合理尺寸的正方形。所以我们使用Resize的库用于给图像进行缩放操作,我这里把图片缩放到84*84的级别。除缩放操作以外还需对数据进行预处理:
torchvision.transforms是pytorch中的图像预处理包
一般用Compose把多个步骤整合到一起:
比如说
transforms.CenterCrop(84),
transforms.ToTensor(),
])
这样就把两个步骤整合到一起
CenterCrop用于从中心裁剪图片,目标是一个长宽都为84的正方形,方便后续的计算。除CenterCrop外补充一个RandomCrop是在一个随机的位置进行裁剪。
ToTenser()这个函数的目的就是读取图片像素并且转化为0-1的数字(进行归一化操作)。
代码如下:
- data_transforms = {
- 'train': transforms.Compose([
- transforms.Resize(84),
- transforms.CenterCrop(84),
- # 转换成tensor向量
- transforms.ToTensor(),
- # 对图像进行归一化操作
- # [0.485, 0.456, 0.406],RGB通道的均值与标准差
- transforms.Normalize([0.485, 0.456, 0.406], [0.229, 0.224, 0.225])
- ]),
- 'val': transforms.Compose([
- transforms.Resize(84),
- transforms.CenterCrop(84),
- transforms.ToTensor(),
- transforms.Normalize([0.485, 0.456, 0.406], [0.229, 0.224, 0.225])
- ]),
- }
解决对图像的处理过后,想要开始训练网络模型,首先要解决的就是图像数据的读入,Pytorch使用DataLoader来实现图像数据读入,代码如下:
- class my_Data_Set(nn.Module):
- def __init__(self, txt, transform=None, target_transform=None, loader=None):
- super(my_Data_Set, self).__init__()
- # 打开存储图像名与标签的txt文件
- fp = open(txt, 'r')
- images = []
- labels = []
- # 将图像名和图像标签对应存储起来
- for line in fp:
- line.strip('\n')
- line.rstrip()
- information = line.split()
- images.append(information[0])
- labels.append(int(information[1]))
- self.images = images
- self.labels = labels
- self.transform = transform
- self.target_transform = target_transform
- self.loader = loader
-
- # 重写这个函数用来进行图像数据的读取
- def __getitem__(self, item):
- # 获取图像名和标签
- imageName = self.images[item]
- label = self.labels[item]
- # 读入图像信息
- image = self.loader(imageName)
- # 处理图像数据
- if self.transform is not None:
- image = self.transform(image)
- return image, label
-
- # 重写这个函数,来看数据集中含有多少数据
- def __len__(self):
- return len(self.images)
-
-
- # 生成Pytorch所需的DataLoader数据输入格式
- train_dataset = my_Data_Set('train.txt', transform=data_transforms['train'], loader=Load_Image_Information)
- test_dataset = my_Data_Set('val.txt', transform=data_transforms['val'], loader=Load_Image_Information)
- train_loader = DataLoader(train_dataset, batch_size=10, shuffle=True)
- test_loader = DataLoader(test_dataset, batch_size=10, shuffle=True)
可验证是否生成了DataLoader格式数据:
- # 验证是否生成DataLoader格式数据
- for data in train_loader:
- inputs, labels = data
- print(inputs)
- print(labels)
- for data in test_loader:
- inputs, labels = data
- print(inputs)
- print(labels)
二.定义一个卷积神经网络
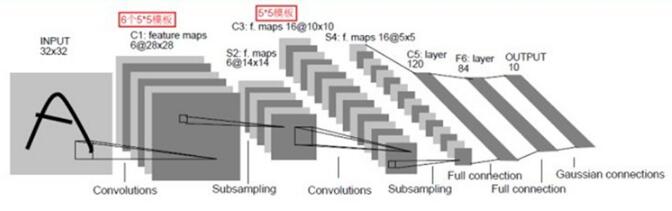
卷积神经网络一种典型的多层神经网络,擅长处理图像特别是大图像的相关机器学习问题。卷积神经网络通过一系列的方法,成功地将大数据量的图像识别问题不断降维,最终使其能够被训练。卷积神经网络(CNN)最早由Yann LeCun提出并应用在手写体识别上。
一个典型的CNN网络架构如下图4:
首先导入Python需要的库:
- import torch
- from torch.utils.data import DataLoader
- from torchvision import transforms, datasets
- import torch.nn as nn
- import torch.nn.functional as F
- import torch.optim as optim
- from torch.autograd import Variable
- from torch.utils.data import Dataset
- import numpy as np
- import os
- from PIL import Image
- import warnings
- import matplotlib.pyplot as plt
- warnings.filterwarnings("ignore")
-
- plt.ion()
定义一个卷积神经网络:
- class Net(nn.Module):
- def __init__(self):
- super(Net, self).__init__()
-
- self.conv1 = nn.Conv2d(3, 6, 5)
- self.pool = nn.MaxPool2d(2, 2)
- self.conv2 = nn.Conv2d(6, 16, 5)
- self.fc1 = nn.Linear(16 * 18 * 18, 800)
- self.fc2 = nn.Linear(800, 120)
- self.fc3 = nn.Linear(120, 10)
-
- def forward(self, x):
- x = self.pool(F.relu(self.conv1(x)))
- x = self.pool(F.relu(self.conv2(x)))
- x = x.view(-1, 16 * 18 * 18)
- x = F.relu(self.fc1(x))
- x = F.relu(self.fc2(x))
- x = self.fc3(x)
-
- return x
-
- net = Net()
我们首先定义了一个Net类,它封装了所以训练的步骤,包括卷积、池化、激活以及全连接操作。
__init__函数首先定义了所需要的所有函数,这些函数都会在forward中调用。从conv1说起,conv1实际上就是定义一个卷积层,3代表的是输入图像的像素数组的层数,一般来说就是输入的图像的通道数,比如这里使用的图像都是彩色图像,由R、G、B三个通道组成,所以数值为3;6代表的是我们希望进行6次卷积,每一次卷积都能生成不同的特征映射数组,用于提取图像的6种特征。每一个特征映射结果最终都会被堆叠在一起形成一个图像输出,再作为下一步的输入;5就是过滤框架的尺寸,表示我们希望用一个5 *5的矩阵去和图像中相同尺寸的矩阵进行点乘再相加,形成一个值。定义好了卷基层,我们接着定义池化层。池化层所做的事说来简单,其实就是因为大图片生成的像素矩阵实在太大了,我们需要用一个合理的方法在降维的同时又不失去物体特征,所以使用池化的技术,每四个元素合并成一个元素,用这一个元素去代表四个元素的值,所以图像体积会降为原来的四分之一。再往下一行,我们又一次碰见了一个卷基层:conv2,和conv1一样,它的输入也是一个多层像素数组,输出也是一个多层像素数组,不同的是这一次完成的计算量更大了,我们看这里面的参数分别是6,16,5。之所以为6是因为conv1的输出层数为6,所以这里输入的层数就是6;16代表conv2的输出层数,和conv1一样,16代表着这一次卷积操作将会学习图片的16种映射特征,特征越多理论上能学习的效果就越好。conv2使用的过滤框尺寸和conv1一样,所以不再重复。
For fc1, 16 is easy to understand, because the height of the image matrix generated by the last convolution is 16 layers. We cut the training image into a square size of 84 * 84, so the earliest input of the image is a 3 * 84 * 84 array. After the first 5*5 convolution, we can conclude that the result of the convolution is a 6*80*80 matrix, where 80 is because we use a 5*5 filter frame, when it is from the upper left After the first element of the corner is convolved, the center of the filter frame is from 2 to 78, not from 0 to 79, so the result is an 80*80 image. After a pooling layer, the width and height of the image size are reduced to 1/2 of the original size, so it becomes 40 * 40. Then another convolution was performed, and as last time, the length and width were reduced by 4 to become 36 * 36, and then the last layer of pooling was applied, and the final size was 18 * 18. So the size of the input data of the first fully connected layer is 16 * 18 * 18. What the three fully connected layers do is very similar, that is, continuous training, and finally output a binary classification value.
The forward function of the net class represents the entire process of forward calculation. forward accepts an input and returns a network output value, and the intermediate process is a process of calling the layer defined in the init function.
F.relu is an activation function that converts all non-zero values into zero values. The last critical step in this image recognition is the real loop training operation.
- #训练
- cirterion = nn.CrossEntropyLoss()
- optimizer = optim.SGD(net.parameters(), lr=0.001, momentum=0.5)
- for epoch in range(50):
- running_loss = 0.0
- for i, data in enumerate(train_loader, 0):
- inputs, labels = data
- inputs, labels = Variable(inputs), Variable(labels)
- optimizer.zero_grad() # 优化器清零
- outputs = net(inputs)
- loss = cirterion(outputs, labels)
- loss.backward()
- optimizer.step() #优化
- running_loss += loss.item()
- if i % 200 == 199:
- print('[%d %5d] loss: %.3f' % (epoch + 1, i + 1, running_loss / 200))
- running_loss = 0.0
-
- print('finished training!')
Here we have conducted 50 trainings, and each training is to obtain the training data in the train_loader in batches, clear the gradient, calculate the output value, calculate the error, backpropagate and correct the model. We take the average error of every 200 calculations as observations.
The following test phase:
- #测试
- correct = 0
- total = 0
- with torch.no_grad():
- for data in test_loader:
- images, labels = data
- outputs = net(Variable(images))
- _, predicted = torch.max(outputs.data, dim=1)
- total += labels.size(0)
- correct += (predicted == labels).sum()
- print('Accuracy of the network on the 400 test images: %d %%' % (100 * correct / total))
Finally, a recognition accuracy rate will be obtained.
3. The complete code is as follows:
- import torch
- from torch.utils.data import DataLoader
- from torchvision import transforms, datasets
- import torch.nn as nn
- import torch.nn.functional as F
- import torch.optim as optim
- from torch.autograd import Variable
- from torch.utils.data import Dataset
- import numpy as np
- import os
- from PIL import Image
- import warnings
- import matplotlib.pyplot as plt
- warnings.filterwarnings("ignore")
-
- plt.ion()
-
-
-
- data_transforms = {
- 'train': transforms.Compose([
- transforms.Resize(84),
- transforms.CenterCrop(84),
- # 转换成tensor向量
- transforms.ToTensor(),
- # 对图像进行归一化操作
- # [0.485, 0.456, 0.406],RGB通道的均值与标准差
- transforms.Normalize([0.485, 0.456, 0.406], [0.229, 0.224, 0.225])
- ]),
- 'val': transforms.Compose([
- transforms.Resize(84),
- transforms.CenterCrop(84),
- transforms.ToTensor(),
- transforms.Normalize([0.485, 0.456, 0.406], [0.229, 0.224, 0.225])
- ]),
- }
- def Load_Image_Information(path):
- # 图像存储路径
- image_Root_Dir= r'C:/Users/wbl/Desktop/pythonProject1/image/'
- # 获取图像的路径
- iamge_Dir = os.path.join(image_Root_Dir, path)
- # 以RGB格式打开图像
- # Pytorch DataLoader就是使用PIL所读取的图像格式
- return Image.open(iamge_Dir).convert('RGB')
-
-
- class my_Data_Set(nn.Module):
- def __init__(self, txt, transform=None, target_transform=None, loader=None):
- super(my_Data_Set, self).__init__()
- # 打开存储图像名与标签的txt文件
- fp = open(txt, 'r')
- images = []
- labels = []
- # 将图像名和图像标签对应存储起来
- for line in fp:
- line.strip('\n')
- line.rstrip()
- information = line.split()
- images.append(information[0])
- labels.append(int(information[1]))
- self.images = images
- self.labels = labels
- self.transform = transform
- self.target_transform = target_transform
- self.loader = loader
-
- # 重写这个函数用来进行图像数据的读取
- def __getitem__(self, item):
- # 获取图像名和标签
- imageName = self.images[item]
- label = self.labels[item]
- # 读入图像信息
- image = self.loader(imageName)
- # 处理图像数据
- if self.transform is not None:
- image = self.transform(image)
- return image, label
-
- # 重写这个函数,来看数据集中含有多少数据
- def __len__(self):
- return len(self.images)
-
-
- # 生成Pytorch所需的DataLoader数据输入格式
- train_dataset = my_Data_Set('train.txt', transform=data_transforms['train'], loader=Load_Image_Information)
- test_dataset = my_Data_Set('val.txt', transform=data_transforms['val'], loader=Load_Image_Information)
- train_loader = DataLoader(train_dataset, batch_size=10, shuffle=True)
- test_loader = DataLoader(test_dataset, batch_size=10, shuffle=True)
-
- '''
- # 验证是否生成DataLoader格式数据
- for data in train_loader:
- inputs, labels = data
- print(inputs)
- print(labels)
- for data in test_loader:
- inputs, labels = data
- print(inputs)
- print(labels)
- '''
-
- class Net(nn.Module):
- def __init__(self):
- super(Net, self).__init__()
-
- self.conv1 = nn.Conv2d(3, 6, 5)
- self.pool = nn.MaxPool2d(2, 2)
- self.conv2 = nn.Conv2d(6, 16, 5)
- self.fc1 = nn.Linear(16 * 18 * 18, 800)
- self.fc2 = nn.Linear(800, 120)
- self.fc3 = nn.Linear(120, 10)
-
- def forward(self, x):
- x = self.pool(F.relu(self.conv1(x)))
- x = self.pool(F.relu(self.conv2(x)))
- x = x.view(-1, 16 * 18 * 18)
- x = F.relu(self.fc1(x))
- x = F.relu(self.fc2(x))
- x = self.fc3(x)
-
- return x
-
- net = Net()
-
- #训练
- cirterion = nn.CrossEntropyLoss()
- optimizer = optim.SGD(net.parameters(), lr=0.001, momentum=0.5)
- for epoch in range(50):
- running_loss = 0.0
- for i, data in enumerate(train_loader, 0):
- inputs, labels = data
- inputs, labels = Variable(inputs), Variable(labels)
- optimizer.zero_grad() # 优化器清零
- outputs = net(inputs)
- loss = cirterion(outputs, labels)
- loss.backward()
- optimizer.step() #优化
- running_loss += loss.item()
- if i % 200 == 199:
- print('[%d %5d] loss: %.3f' % (epoch + 1, i + 1, running_loss / 200))
- running_loss = 0.0
-
- print('finished training!')
-
- #测试
- correct = 0
- total = 0
- with torch.no_grad():
- for data in test_loader:
- images, labels = data
- outputs = net(Variable(images))
- _, predicted = torch.max(outputs.data, dim=1)
- total += labels.size(0)
- correct += (predicted == labels).sum()
- print('Accuracy of the network on the 400 test images: %d %%' % (100 * correct / total))
Welcome everyone to criticize and correct~
Category of website: technical article > Blog
Author:cindy
link:http://www.pythonblackhole.com/blog/article/274/ae7ac89a31c498a5b64b/
source:python black hole net
Please indicate the source for any form of reprinting. If any infringement is discovered, it will be held legally responsible.
name:
Comment content: (supports up to 255 characters)
no articles