
YOLOv5添加注意力机制的具体步骤
posted on 2023-05-03 20:07 read(1112) comment(0) like(28) collect(5)
This article takes the addition process of CBAM and SE attention mechanism as an example, and mainly introduces the specific steps of adding attention mechanism to YOLOv5
Based on this blog, this article adds the attention mechanism yolov5 model training to the YOLOv5 -5.0 version code
- using yolov5 to train your own data set
This article mainly includes the following contents
Adding the attention mechanism to YOLOv5 can be divided into the following three steps:
1. Adding the attention module to common.py
2. Adding judgment conditions to yolo.py
3. Adding the corresponding module to the yaml file
1. Adding CBAM attention mechanism
(1) Add a callable CBAM module in common.py
1. Open the common.py file in the models folder
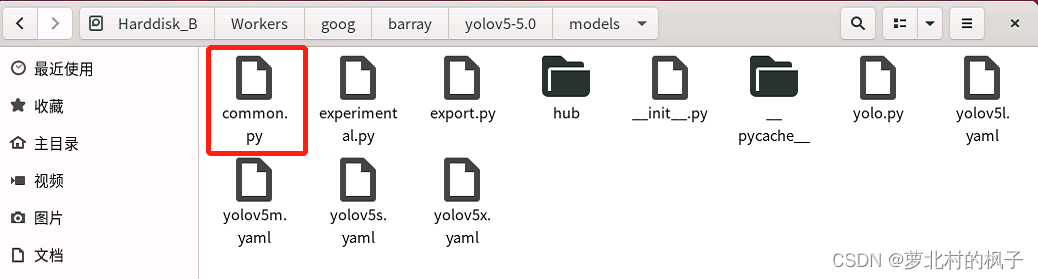
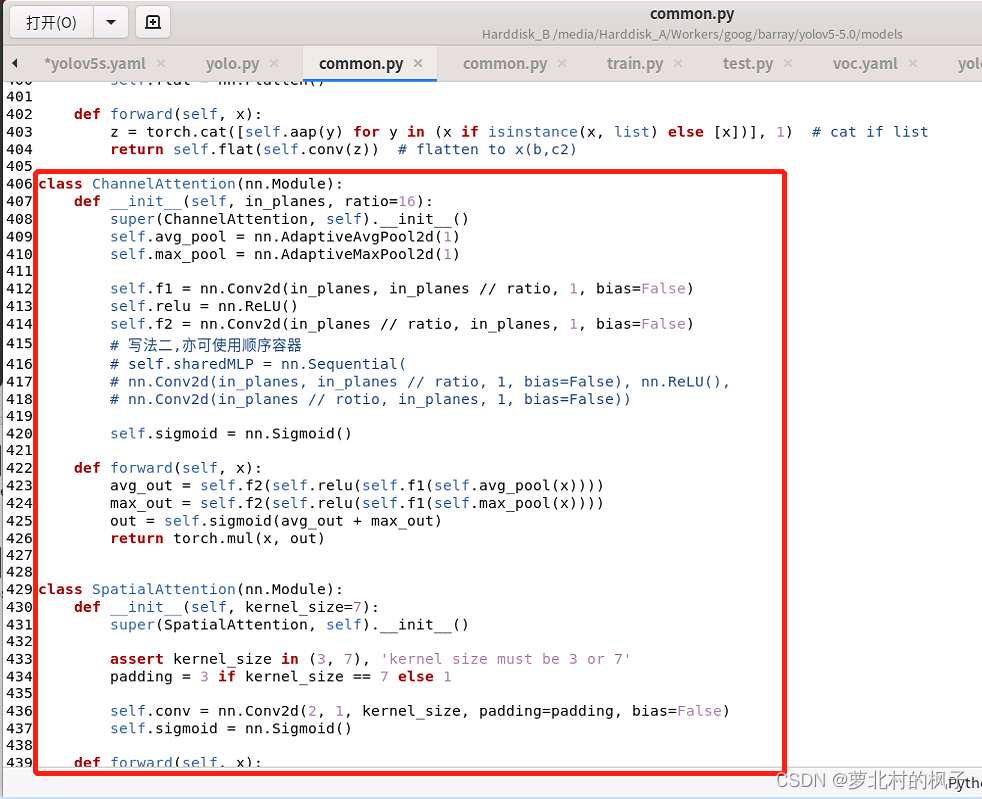
2. Copy and paste the CBAMC3 code below into the common.py file
class ChannelAttention(nn.Module):
    def __init__(self, in_planes, ratio=16):
        super(ChannelAttention, self).__init__()
        self.avg_pool = nn.AdaptiveAvgPool2d(1)
        self.max_pool = nn.AdaptiveMaxPool2d(1)

        self.f1 = nn.Conv2d(in_planes, in_planes // ratio, 1, bias=False)
        self.relu = nn.ReLU()
        self.f2 = nn.Conv2d(in_planes // ratio, in_planes, 1, bias=False)
        # 写法二,亦可使用顺序容器
        # self.sharedMLP = nn.Sequential(
        # nn.Conv2d(in_planes, in_planes // ratio, 1, bias=False), nn.ReLU(),
        # nn.Conv2d(in_planes // rotio, in_planes, 1, bias=False))

        self.sigmoid = nn.Sigmoid()

    def forward(self, x):
        avg_out = self.f2(self.relu(self.f1(self.avg_pool(x))))
        max_out = self.f2(self.relu(self.f1(self.max_pool(x))))
        out = self.sigmoid(avg_out + max_out)
        return torch.mul(x, out)


class SpatialAttention(nn.Module):
    def __init__(self, kernel_size=7):
        super(SpatialAttention, self).__init__()

        assert kernel_size in (3, 7), 'kernel size must be 3 or 7'
        padding = 3 if kernel_size == 7 else 1

        self.conv = nn.Conv2d(2, 1, kernel_size, padding=padding, bias=False)
        self.sigmoid = nn.Sigmoid()

    def forward(self, x):
        avg_out = torch.mean(x, dim=1, keepdim=True)
        max_out, _ = torch.max(x, dim=1, keepdim=True)
        out = torch.cat([avg_out, max_out], dim=1)
        out = self.sigmoid(self.conv(out))
        return torch.mul(x, out)


class CBAMC3(nn.Module):
    # CSP Bottleneck with 3 convolutions
    def __init__(self, c1, c2, n=1, shortcut=True, g=1, e=0.5):  # ch_in, ch_out, number, shortcut, groups, expansion
        super(CBAMC3, self).__init__()
        c_ = int(c2 * e)  # hidden channels
        self.cv1 = Conv(c1, c_, 1, 1)
        self.cv2 = Conv(c1, c_, 1, 1)
        self.cv3 = Conv(2 * c_, c2, 1)
        self.m = nn.Sequential(*[Bottleneck(c_, c_, shortcut, g, e=1.0) for _ in range(n)])
        self.channel_attention = ChannelAttention(c2, 16)
        self.spatial_attention = SpatialAttention(7)

        # self.m = nn.Sequential(*[CrossConv(c_, c_, 3, 1, g, 1.0, shortcut) for _ in range(n)])

    def forward(self, x):
   		# 将最后的标准卷积模块改为了注意力机制提取特征
        return self.spatial_attention(
            self.channel_attention(self.cv3(torch.cat((self.m(self.cv1(x)), self.cv2(x)), dim=1))))

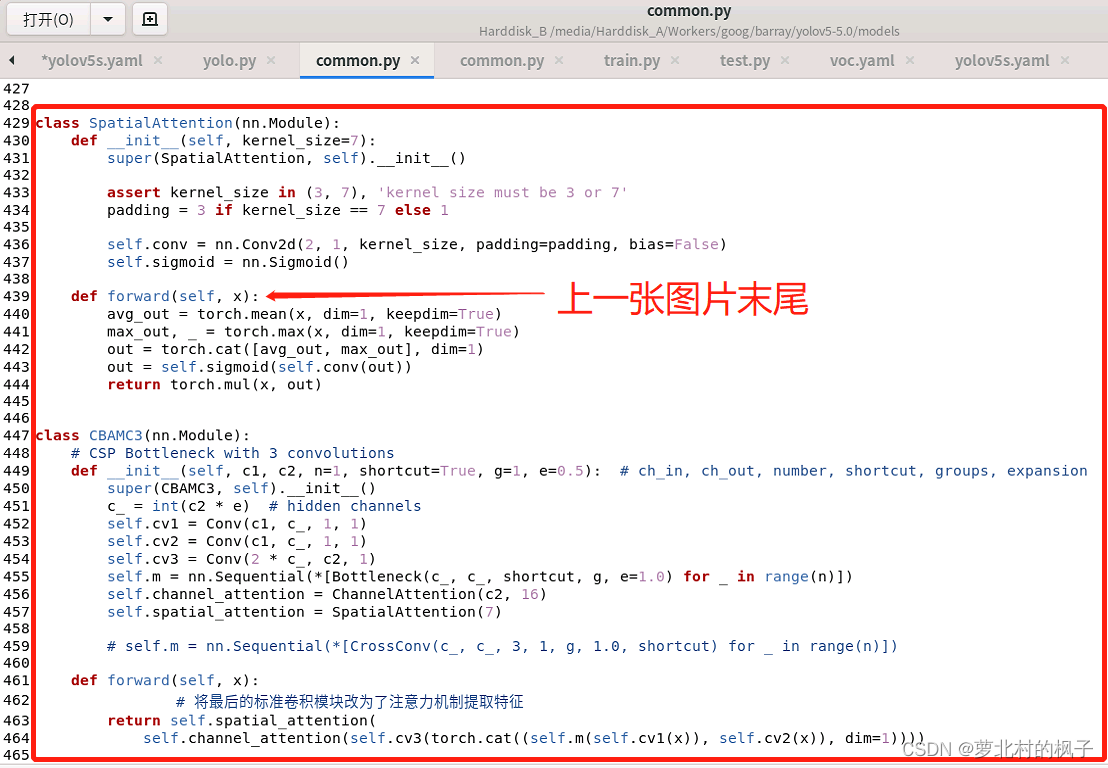
如下图所示,本文这里是将其粘贴到了common.py的末尾
(图片长度过长,所以截取了两张,以及记得点击保存)
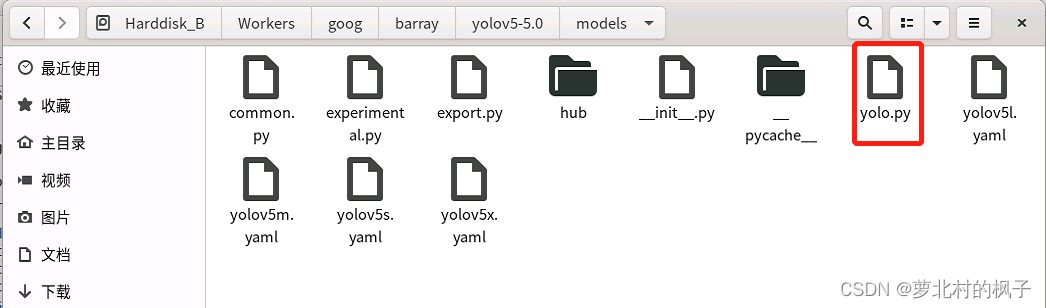
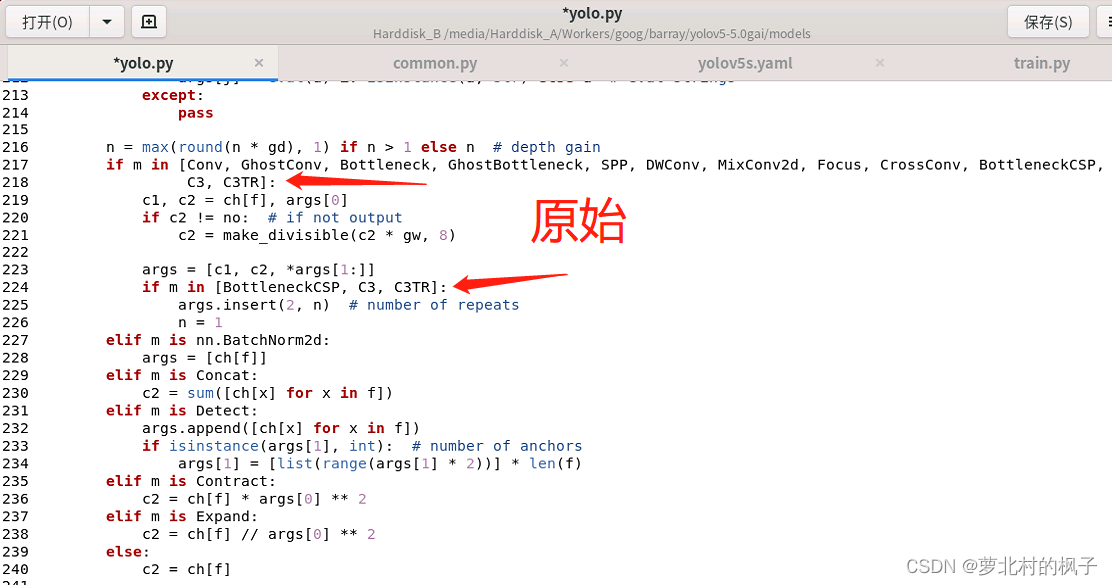
(2)向yolo.py文件添加CBAMC3判断语句
1.打开models文件夹中的yolo.py文件
2.分别在218行和224行添加CBAMC3,如下图所示
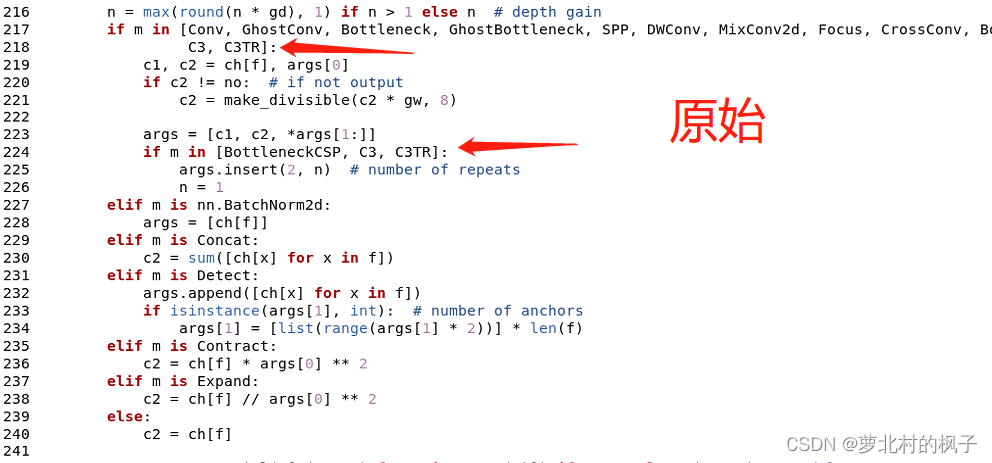
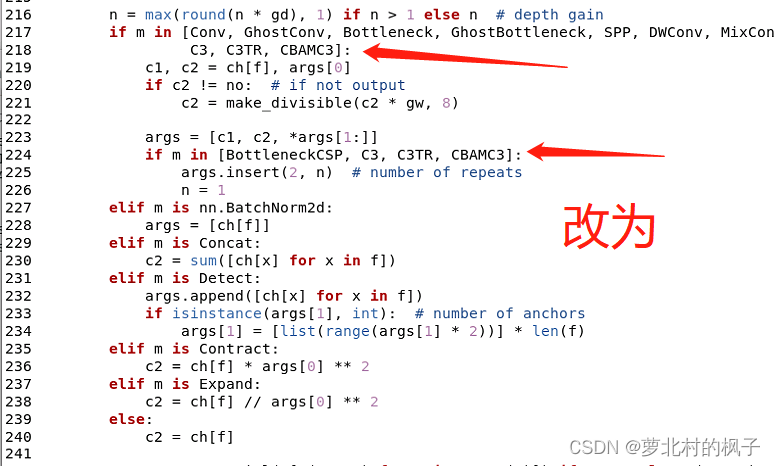
同样改完之后记得点保存
(3)修改yaml文件
注意力机制可以添加在backbone,Neck,Head等部分,大家可以在yaml文件中修改网络的结构、添加其他模块等等,接下来本文将以向主干网络(backbone)添加CBAM模块为例,本文介绍的只是其中一种添加方式
1.在yolov5-5.0工程文件夹下,找到models文件夹下的yolov5s.yaml文件
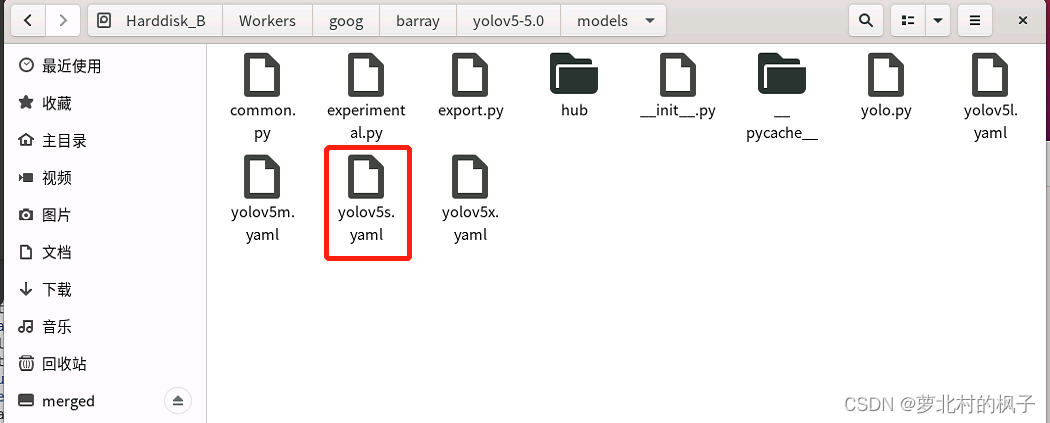
2.backbone主干网络中的4个C3模块改为CBAMC3,如下图所示:
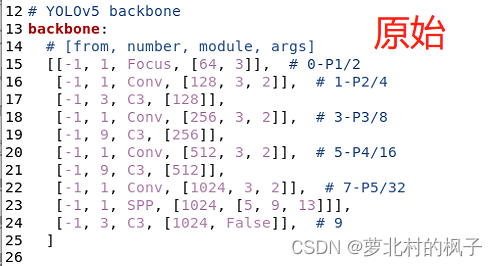
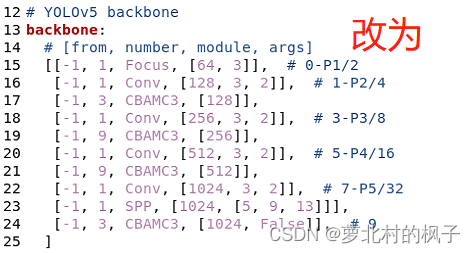
这样我们就在yolov5s主干网络中添加了CBAM注意力机制
(在服务器上跑代码修改后,记得点击文本编辑器右上角的保存)
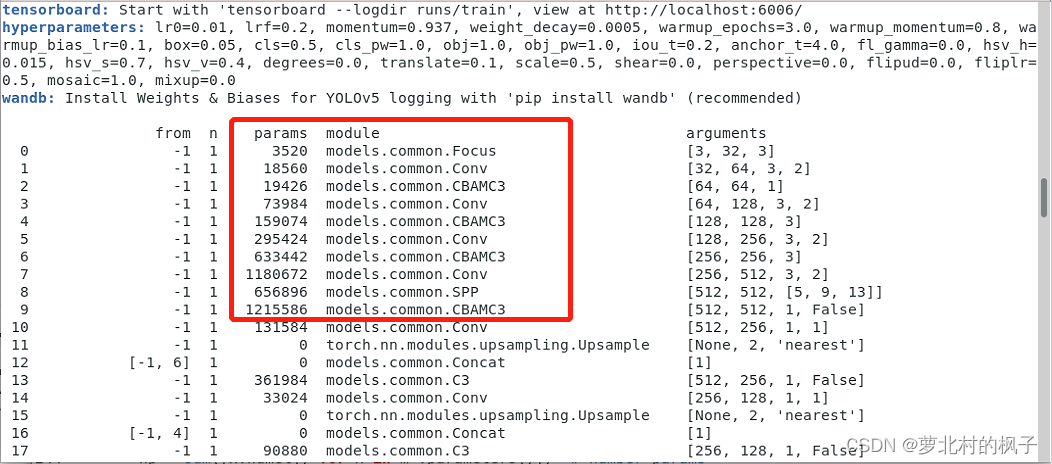
接下来开始训练模型,我们就可以看到CBAMC3模块已经成功添加到主干网络中了
二、SE注意力机制添加
(步骤和CBAM相似)
(1)在common.py中添加可调用的SE模块
1.打开models文件夹中的common.py文件
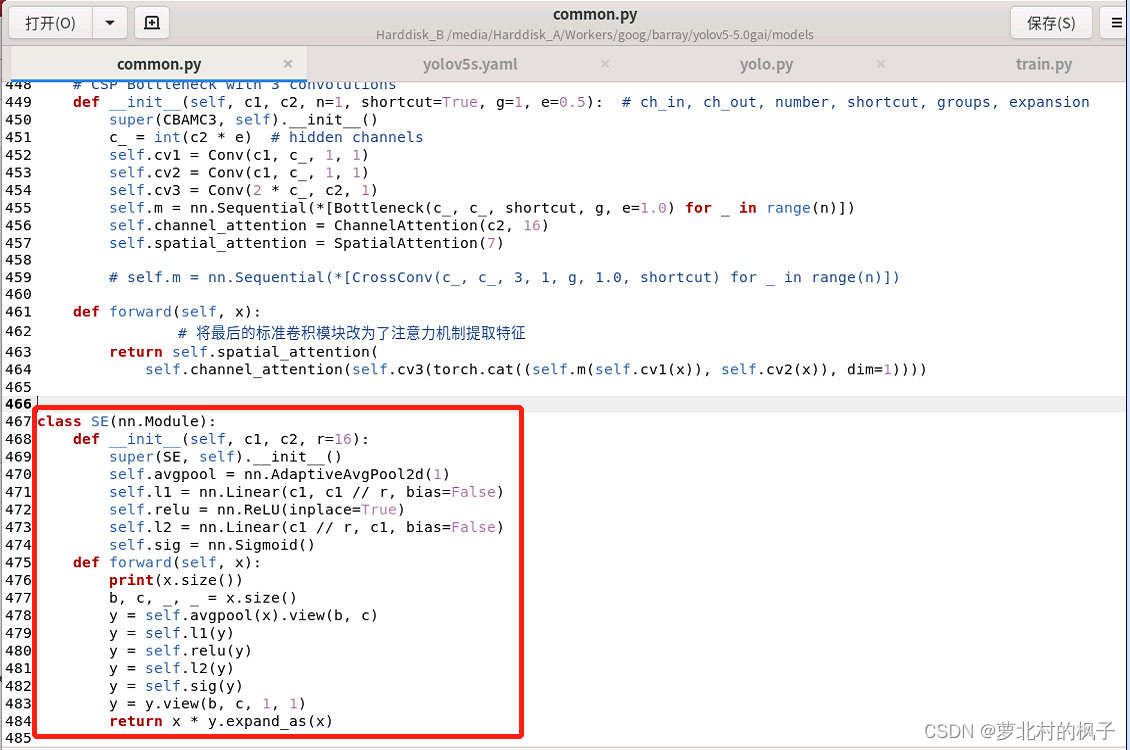
2.将下面的SE代码复制粘贴到common.py文件中
class SE(nn.Module):
    def __init__(self, c1, c2, r=16):
        super(SE, self).__init__()
        self.avgpool = nn.AdaptiveAvgPool2d(1)
        self.l1 = nn.Linear(c1, c1 // r, bias=False)
        self.relu = nn.ReLU(inplace=True)
        self.l2 = nn.Linear(c1 // r, c1, bias=False)
        self.sig = nn.Sigmoid()
    def forward(self, x):
        print(x.size())
        b, c, _, _ = x.size()
        y = self.avgpool(x).view(b, c)
        y = self.l1(y)
        y = self.relu(y)
        y = self.l2(y)
        y = self.sig(y)
        y = y.view(b, c, 1, 1)
        return x * y.expand_as(x)
如下图所示,本文这里是将其粘贴到了common.py的末尾
(2)向yolo.py文件添加SE判断语句
1.打开models文件夹中的yolo.py文件
2.分别在218行和224行添加SE,如下图所示
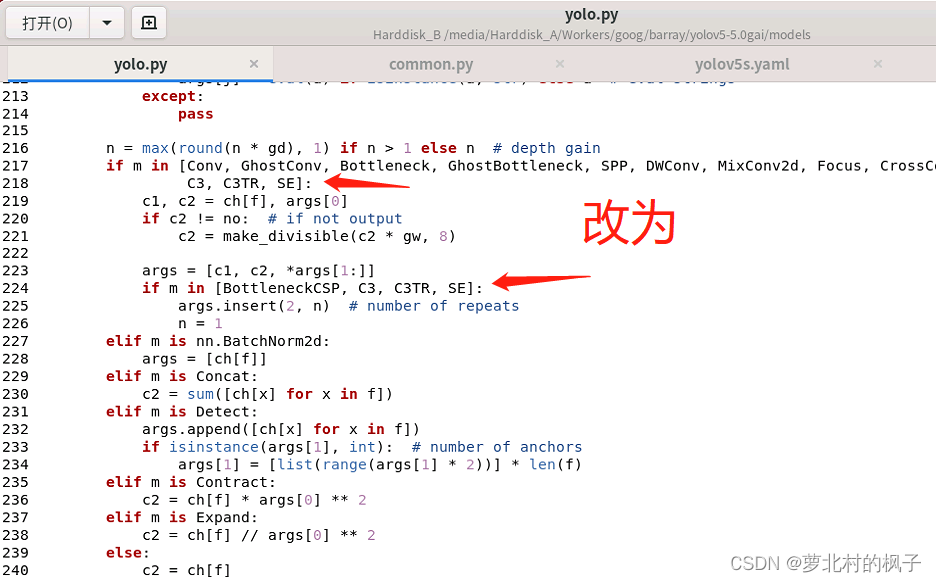
同样改完之后记得点保存
(3)修改yaml文件
注意力机制可以添加在backbone,Neck,Head等部分,大家可以在yaml文件中修改网络的结构、添加其他模块等等。与CBAM的添加过程一样,接下来本文将以向主干网络(backbone)添加SE模块为例,本文介绍的只是其中一种添加方式
1.在yolov5-5.0工程文件夹下,找到models文件夹下的yolov5s.yaml文件
2.backbone主干网络末尾添加下面的代码,如下图所示:
(注意逗号是英文,以及注意对齐)
[-1, 1, SE, [1024, 4]],
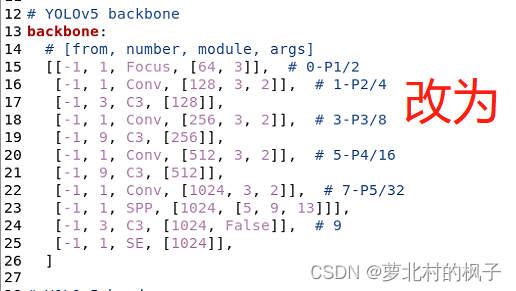
这样我们就在yolov5s主干网络中添加了SE注意力机制
(在服务器上跑代码修改后,记得点击文本编辑器右上角的保存)
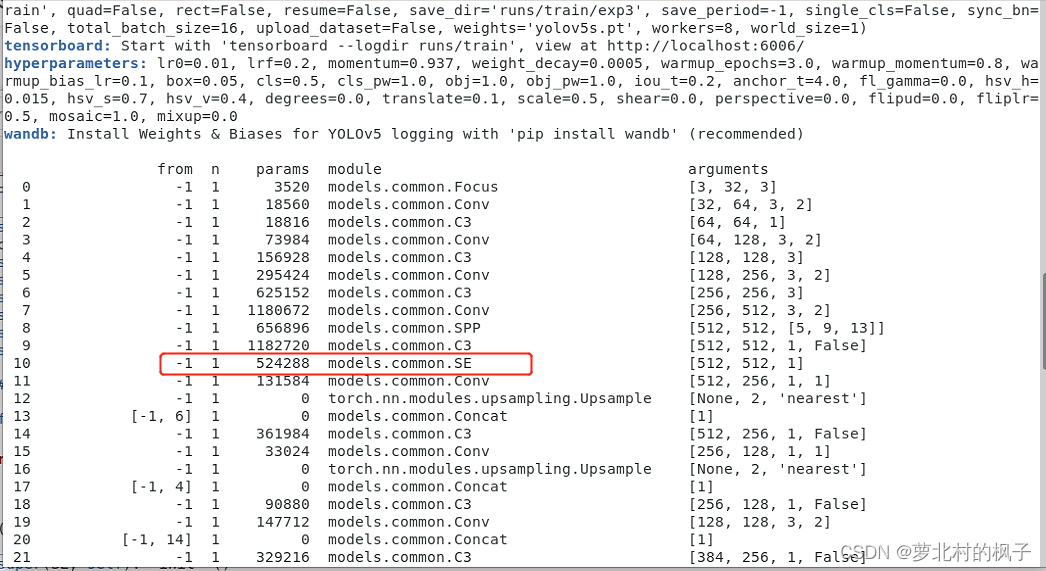
接下来开始训练模型,我们就可以看到SE模块已经成功添加到主干网络中了
三、其他几种注意力机制代码
添加过程不再赘述,模仿上方CBAM和SE的添加过程即可
(1)ECA注意力机制代码
 class eca_layer(nn.Module):
     """Constructs a ECA module.
     Args:
         channel: Number of channels of the input feature map
         k_size: Adaptive selection of kernel size
     """
     def __init__(self, channel, k_size=3):
         super(eca_layer, self).__init__()
         self.avg_pool = nn.AdaptiveAvgPool2d(1)
         self.conv = nn.Conv1d(1, 1, kernel_size=k_size, padding=(k_size - 1) // 2, bias=False)
         self.sigmoid = nn.Sigmoid()

     def forward(self, x):
         # feature descriptor on the global spatial information
         y = self.avg_pool(x)

         # Two different branches of ECA module
         y = self.conv(y.squeeze(-1).transpose(-1, -2)).transpose(-1, -2).unsqueeze(-1)

         # Multi-scale information fusion
         y = self.sigmoid(y)
         x=x*y.expand_as(x)

         return x * y.expand_as(x)
(2)CA注意力机制代码:
 class h_sigmoid(nn.Module):
     def __init__(self, inplace=True):
         super(h_sigmoid, self).__init__()
         self.relu = nn.ReLU6(inplace=inplace)

     def forward(self, x):
         return self.relu(x + 3) / 6


 class h_swish(nn.Module):
     def __init__(self, inplace=True):
         super(h_swish, self).__init__()
         self.sigmoid = h_sigmoid(inplace=inplace)

     def forward(self, x):
         return x * self.sigmoid(x)


 class CoordAtt(nn.Module):
     def __init__(self, inp, oup, reduction=32):
         super(CoordAtt, self).__init__()
         self.pool_h = nn.AdaptiveAvgPool2d((None, 1))
         self.pool_w = nn.AdaptiveAvgPool2d((1, None))

         mip = max(8, inp // reduction)

         self.conv1 = nn.Conv2d(inp, mip, kernel_size=1, stride=1, padding=0)
         self.bn1 = nn.BatchNorm2d(mip)
         self.act = h_swish()

         self.conv_h = nn.Conv2d(mip, oup, kernel_size=1, stride=1, padding=0)
         self.conv_w = nn.Conv2d(mip, oup, kernel_size=1, stride=1, padding=0)

     def forward(self, x):
         identity = x

         n, c, h, w = x.size()
         x_h = self.pool_h(x)
         x_w = self.pool_w(x).permute(0, 1, 3, 2)

         y = torch.cat([x_h, x_w], dim=2)
         y = self.conv1(y)
         y = self.bn1(y)
         y = self.act(y)

         x_h, x_w = torch.split(y, [h, w], dim=2)
         x_w = x_w.permute(0, 1, 3, 2)

         a_h = self.conv_h(x_h).sigmoid()
         a_w = self.conv_w(x_w).sigmoid()

         out = identity * a_w * a_h

         return out
Category of website: technical article > Blog
Author:Sweethess
link:http://www.pythonblackhole.com/blog/article/263/043182148c7bcb1662b4/
source:python black hole net
Please indicate the source for any form of reprinting. If any infringement is discovered, it will be held legally responsible.
name:
Comment content: (supports up to 255 characters)
no articles