原力计划
posted on 2023-05-21 17:49 read(1254) comment(0) like(15) collect(5)
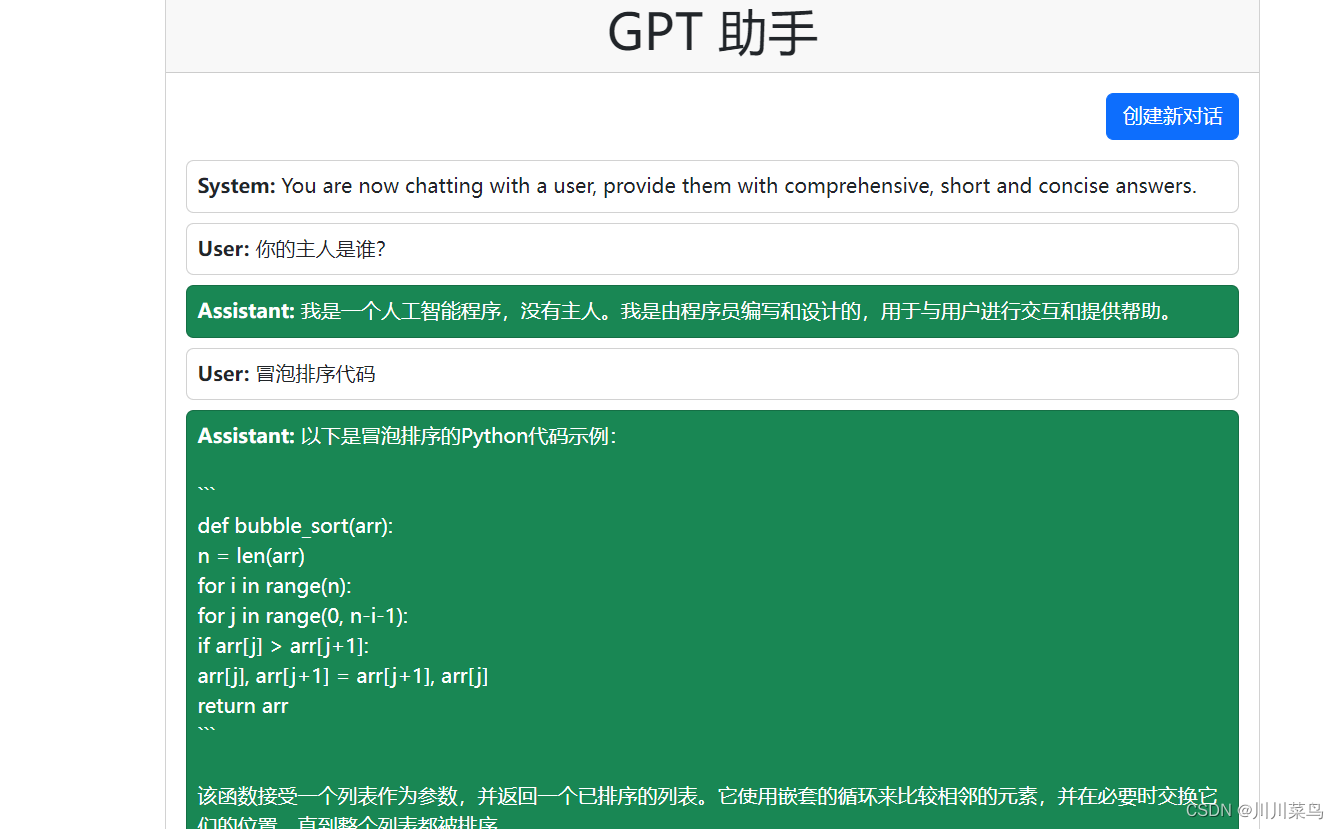
Environment installation
pip install django openai
Create main project and application
With the environment of the project taken care of, let's create the main project now, run this command in the client:
django-admin startproject webassistant
According to the Django documentation, django-admin is a command-line utility for administrative tasks. Switch to the project folder and use the command as follows
cd webassistant
And to create the application assistant, run the command:
python manage.py startapp assistant
By now, you should have a folder structure that looks like this:
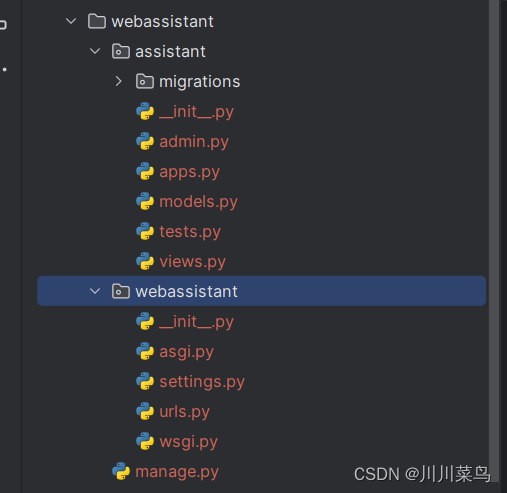
Let's end this section by testing that Django installed successfully, by running this command in a terminal:
python manage.py runserver
The above command is used to start the Django local server, if the server runs successfully, please copy the URL address: http://127.0.0.1:8000/ and paste it in your web browser. Make sure you get this result in your browser:

Congrats on Django installation !
Register the application in the settings.py file
With Django, any number of applications can be created in a project, but each project must be registered. In Django, all applications are registered in a file called settings.py, which can be found in the project folder.
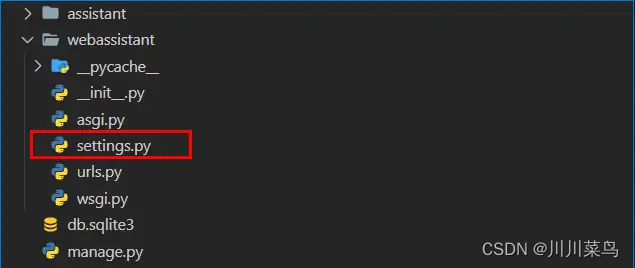
This file is responsible for all the configuration of the project, be careful when editing it because one single line of messy code can break your entire project. Open it and scroll down to the list INSTALLED_APPS, add the assistant application like this:
INSTALLED_APPS = [
    'django.contrib.admin',
    'django.contrib.auth',
    'django.contrib.contenttypes',
    'django.contrib.sessions',
    'django.contrib.messages',
    'django.contrib.staticfiles',
    # 注册APP
    'assistant',
]
Create views for the application in the views.py file
In Django, the views.py file plays an important role, it handles all the business logic of the application, such as capturing and validating form data, authenticating users, sending requests to API, etc. The file views.py is located inside the application's folder:
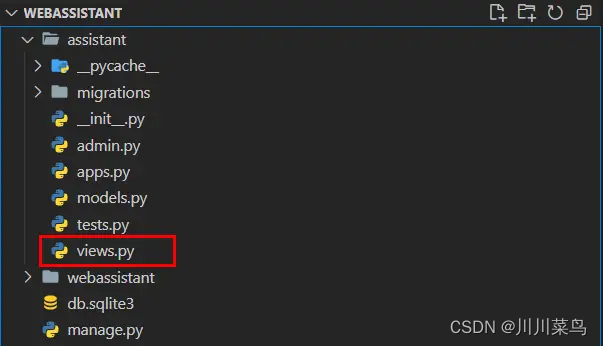
Our application will have two views, home() and error_handler(), open the views.py file and make it look like this:
from django.shortcuts import render
# import HttpResponse from django.urls
from django.http import HttpResponse


# this is the home view for handling home page logic
def home(request):
    return HttpResponse('The Home Page')


# this is the view for handling errors
def error_handler(request):
    return HttpResponse('404 Page')
In the code snippet, we have two functions that both return a string as a response, this is done with the help of a function that takes the HttpResponse () string as input.
Configure the URL of the application
Now that we have our views ready, let's register the URL. urls.py inside the folder create a file called assistant, don't name it anything else as that's how Django does things The
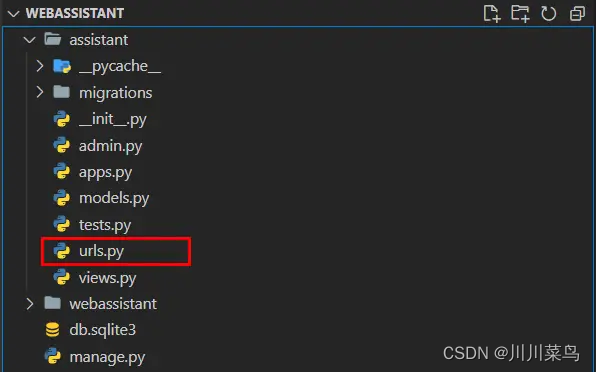
main purpose of this file urls.py is to register the views in the file views.py, open it and paste this code:
# here we are import path from in-built django-urls
from django.urls import path
# here we are importing all the Views from the views.py file
from . import views

# a list of all the urls
urlpatterns = [
    path('', views.home, name='home'),
    path('new_chat/', views.new_chat, name='new_chat'),
    path('error-handler/', views.error_handler, name='error_handler'),
]
Now, these newly created URLs must be registered so that the project is aware of them. Inside the webassistant folder, there is also a urls.py file:
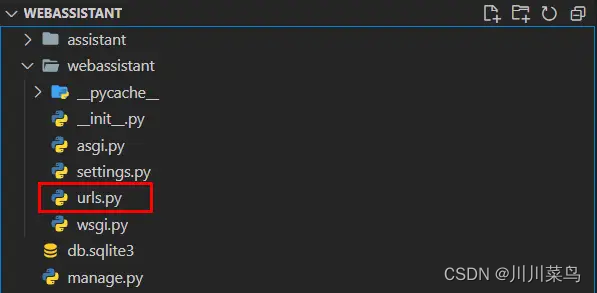
Now here's something worth noting that your app's urls.py file is not the same as your project's urls.py file. The file urls.py in the assistant folder is used to register the views of all applications, and the file webassistant in the file urls.py folder is used to register the URLs of all applications. Open it up so it looks like this:
from django.contrib import admin
from django.urls import path, include

# a list of all the projects urls
urlpatterns = [
    # the url to the admin site
    path('admin/', admin.site.urls),
    # registering all the assistant application urls
    path('', include('assistant.urls')),
]
In the code, we have a urlpatterns list containing two paths, one for the admin site and one for the application. To register the application URLs, we use the path() function which takes a string as the pathname, and the include() function which takes all application URLs as input.
Create and render templates
In this section, we will create and render our template. We'll be using HTML and styling, and we'll be using the Bootstrap 5.3 framework. Inside the assistant folder, create a new folder called templates, don't misspell it because that's how Django does things, otherwise you'll get errors. Inside that templates folder, create another folder called assistant where all the templates will be located.
Our application will have three templates, home.html, 404.html, and base.html like this:
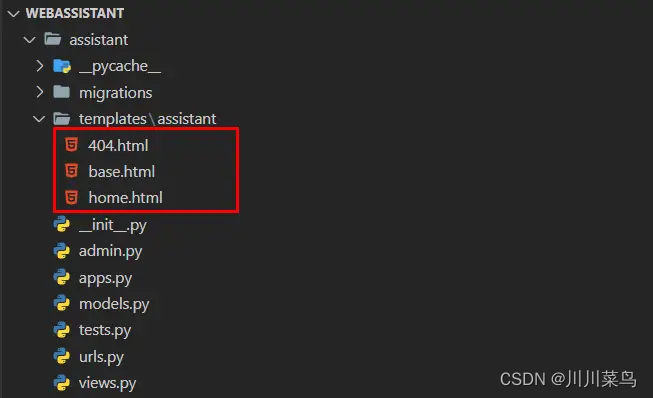
Let's start with the base.html template, open it and paste the following code:
<!DOCTYPE html>
<html lang="en">
<head>
    <meta charset="UTF-8">
    <meta http-equiv="X-UA-Compatible" content="IE=edge">
    <meta name="viewport" content="width=device-width, initial-scale=1.0">
    <title>Web Assistant | {% block title %}  {% endblock %}</title>
    <link href="https://cdn.jsdelivr.net/npm/bootstrap@5.3.0-alpha1/dist/css/bootstrap.min.css" rel="stylesheet">
</head>
<body>
    {% block content %}
    {% endblock %}
</body>
</html>
This is HTML boilerplate to which Bootstrap5.3 CSS has been added via link.
home.html:
{% extends 'assistant/base.html' %}
{% block title %} Home {% endblock %}
{% block content %}
<div class="row justify-content-center my-4">
    <div class="col-md-7 mt-4">
        <div class="card">
            <h1 class="card-header text-center">A.I WEB ASSISTANT</h1>
            <div class="card-body">
              <div class="d-flex justify-content-end">
                <button type="button" class="btn btn-primary mb-3" onclick="location.href='{% url 'new_chat' %}'">New Chat +</button>
              </div>
              <div class="chat-history mb-3">
                {% for message in messages %}
                  <div class="card mb-2 {% if message.role == 'assistant' %}bg-success text-white{% endif %}">
                    <div class="card-body p-2">
                      <strong>{{ message.role|title }}:</strong> {{ message.content|linebreaksbr }}
                    </div>
                  </div>
                {% endfor %}
              </div>
              <form action="." method="POST">
                <!-- this secures the form from malicious attacks during submission -->
                {% csrf_token %}
                <input class="form-control mb-2" required type="text" autofocus="autofocus" name="prompt" value="{{ prompt }}" id="">
                <label for="temperature" class="form-label">Temperature:</label>
                <input class="form-control mb-2" type="number" step="0.01" min="0" max="2" name="temperature" value="{{ temperature }}" id="temperature">
                <button class="btn btn-success fw-bold" type="submit">
                     GENERATE
                </button>
              </form>
            </div>
        </div>
    </div>
</div>
{% endblock %}
404.html
{% extends 'assistant/base.html' %}
{% block title %} 404 {% endblock %}
{% block content %}
<div class="row justify-content-center my-4">
    <div class="col-md-7 mt-4">
        <h1>Page Not Found</h1>
        <p>Make sure you are connected to the internet or your query is correct</p>
        <a href="{% url 'home' %}" class="btn btn-secondary">Go Home</a>
    </div>
</div>
{% endblock %}
The views.py file code is as follows:
from django.shortcuts import render

# this is the home view for handling home page logic
def home(request):
    return render(request, 'assistant/home.html')

# this is the view for handling errors
def error_handler(request):
    return render(request, 'assistant/404.html')
KEY
Create a file
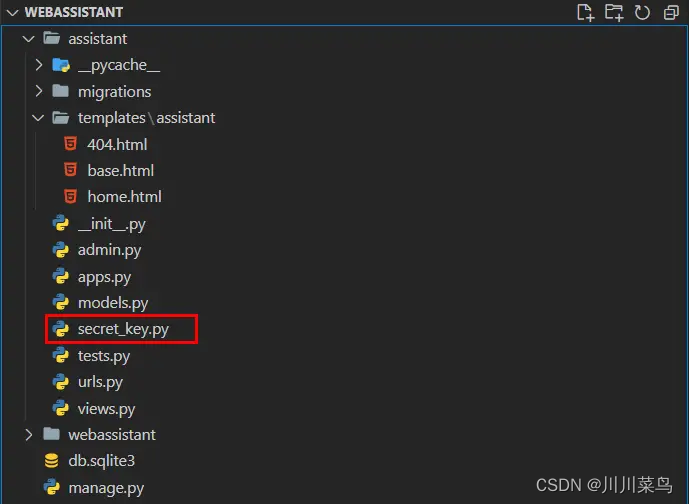
to fill in the KEY for secret_key.py:
API_KEY = 'put your API key here'
Realize the sending reminder function
Now that we have designed the interface for the web assistant and we have successfully generated an API key, let's integrate this API with our Django application. Open up the views.py file and make it look like this:
# 导入 render 和 redirect
from django.shortcuts import render, redirect
# 导入 openai API
import openai
# 从 secret_key 文件导入生成的 API 密钥
from .secret_key import API_KEY
# 从 secret_key 文件加载 API 密钥
openai.api_key = API_KEY

# 这是处理主页逻辑的主页视图
def home(request):
    try:
        # 如果会话中没有包含 messages 键,则创建一个
        if 'messages' not in request.session:
            request.session['messages'] = [
                {"role": "系统", "content": "您现在正在与用户聊天,为他们提供全面、简短和简洁的答案."},
            ]

        if request.method == 'POST':
            # 从表单获取提示
            prompt = request.POST.get('prompt')
            # 从表单获取温度
            temperature = float(request.POST.get('temperature', 0.1))
            # 将提示添加到 messages 列表
            request.session['messages'].append({"role": "user", "content": prompt})
            # 将会话设置为已修改
            request.session.modified = True
            # 调用 openai API
            response = openai.ChatCompletion.create(
                model="gpt-3.5-turbo",
                messages=request.session['messages'],
                temperature=temperature,
                max_tokens=1000,
            )
            # 格式化响应
            formatted_response = response['choices'][0]['message']['content']
            # 将响应添加到 messages 列表
            request.session['messages'].append({"role": "assistant", "content": formatted_response})
            request.session.modified = True
            # 重定向到主页
            context = {
                'messages': request.session['messages'],
                'prompt': '',
                'temperature': temperature,
            }
            return render(request, 'assistant/home.html', context)
        else:
            # 如果请求不是 POST 请求,渲染主页
            context = {
                'messages': request.session['messages'],
                'prompt': '',
                'temperature': 0.1,
            }
            return render(request, 'assistant/home.html', context)
    except Exception as e:
        print(e)
        # 如果有错误,重定向到错误处理器
        return redirect('error_handler')

def new_chat(request):
    # 清除 messages 列表
    request.session.pop('messages', None)
    return redirect('home')

# 这是处理错误的视图
def error_handler(request):
    return render(request, 'assistant/404.html')
Precautions
Since the request is an official interface, magic needs to be turned on.
我的工具箱:https://openai.nm.cn/
full source code
gong 众 号:川川带你学AI
回复:230422
Category of website: technical article > Blog
Author:Sweethess
link:http://www.pythonblackhole.com/blog/article/25355/186895545670dcab74b7/
source:python black hole net
Please indicate the source for any form of reprinting. If any infringement is discovered, it will be held legally responsible.
name:
Comment content: (supports up to 255 characters)
no articles
