1. Basic introduction of Django
posted on 2023-05-21 16:37 read(669) comment(0) like(1) collect(4)
1. Introduction to Django
There are many different web frameworks under Python. Django is the most representative of the heavyweights. Many successful websites and apps are based on Django. Django is an open source web application framework written in Python. Django complies with BSD copyright, was first released in July 2005, and released the first official version 1.0 in September 2008.
Django learning circuit
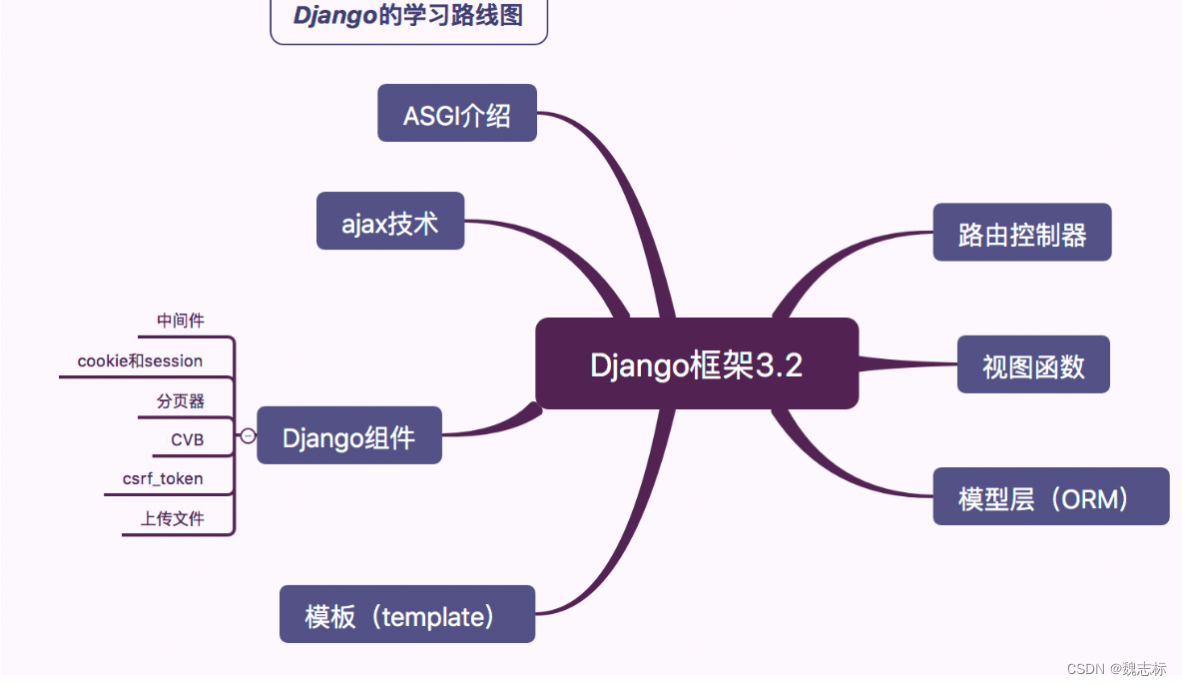
Django uses the MVT software design pattern, namely model (Model), view (View) and template (Template).
This MVT pattern is not the first of its kind in django, and there are similar design patterns MVC in other languages. It can even be said that the MVT in django is actually derived from the MVC pattern .
M,Model,模型,是用于完成操作数据库的。

V,View,视图,里面的代码就是用于展示给客户端的页面效果。

C,Controller,控制器,是一个类或者函数,里面的代码就是用于项目功能逻辑的,一般用于调用模型来获取数据,获取到的数据通过调用视图文件返回给客户端。
And MVT refers to:
M全拼为Model,与MVC中的M功能相同,负责和数据库交互,进行数据处理。

V全拼为View,与MVC中的C功能相同,接收请求,进行业务处理,返回应答。

T全拼为Template,与MVC中的V功能相同,负责封装构造要返回的html。
Workflow of the MVT model
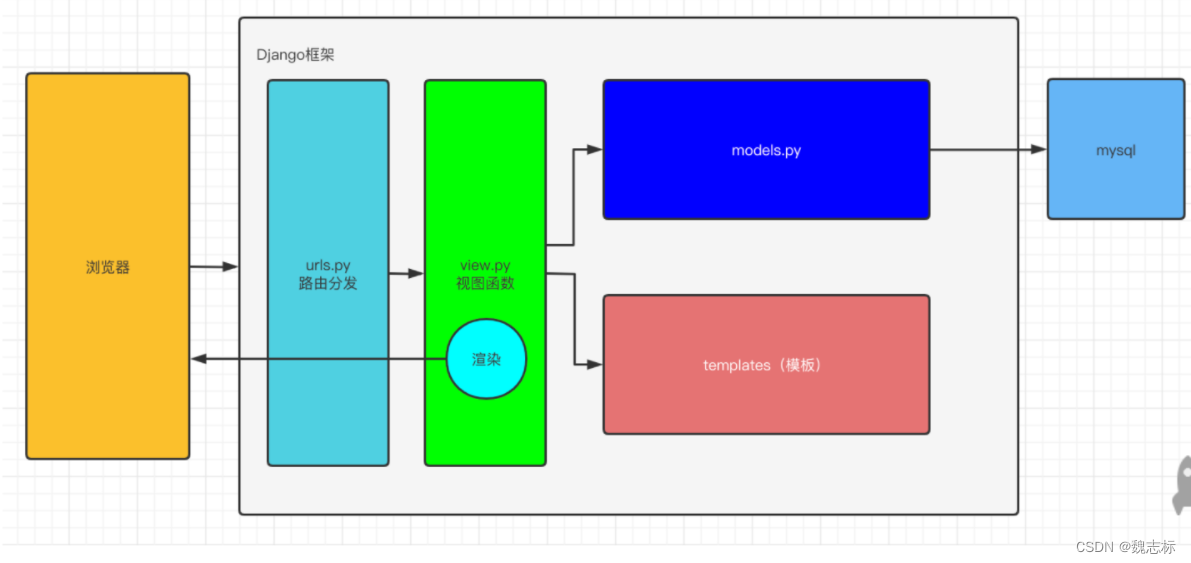
路由控制器将请求转发给对应的视图函数,完成业务逻辑,视图函数将从model中获取的数据嵌入到template中的模板文件(html)渲染成一个页面字符串,返回给客户端的流程。
Two, install django
pip install django     默认安装最新版本
pip install django==3.2  指定版本安装
3. Run Django
1: pycharm creates a django project
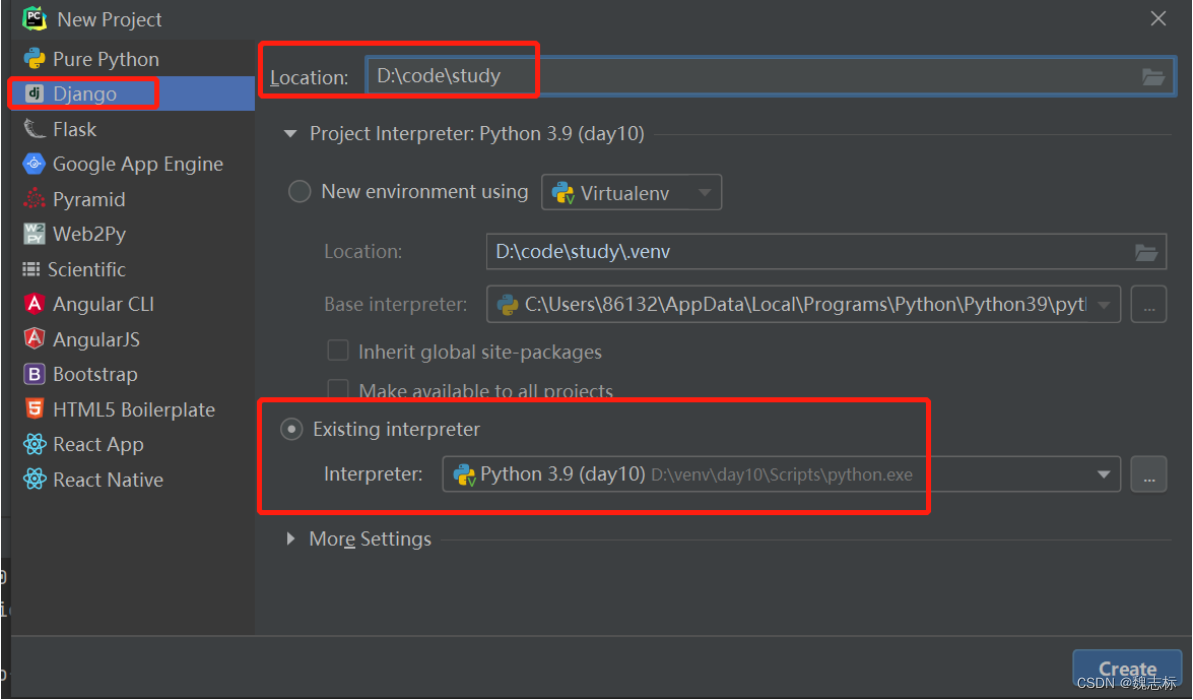

2: Run the test, using the command line
python manage.py runserver
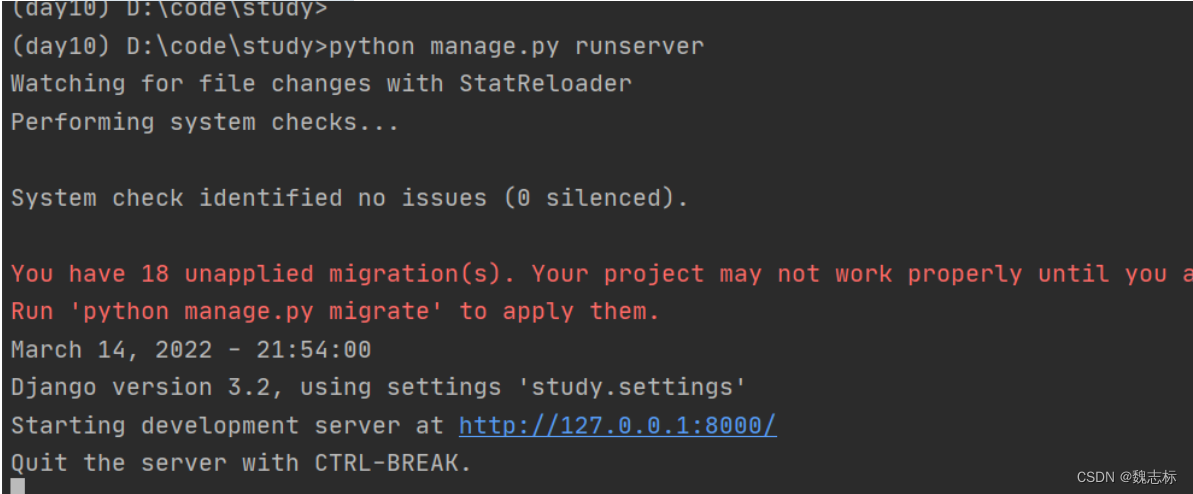
Click to connect to the web page to test

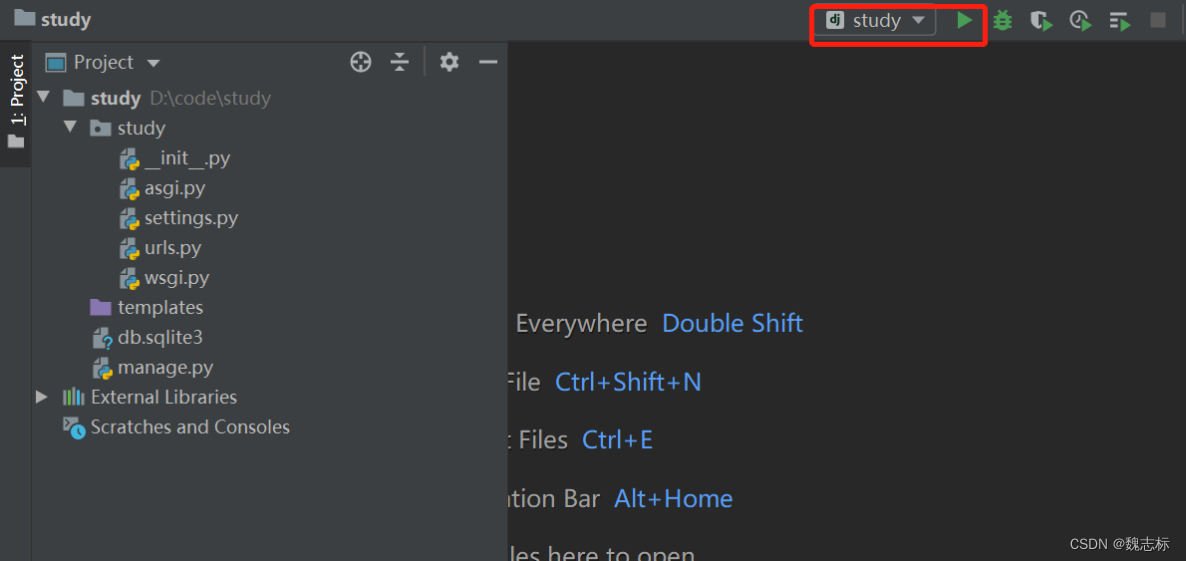
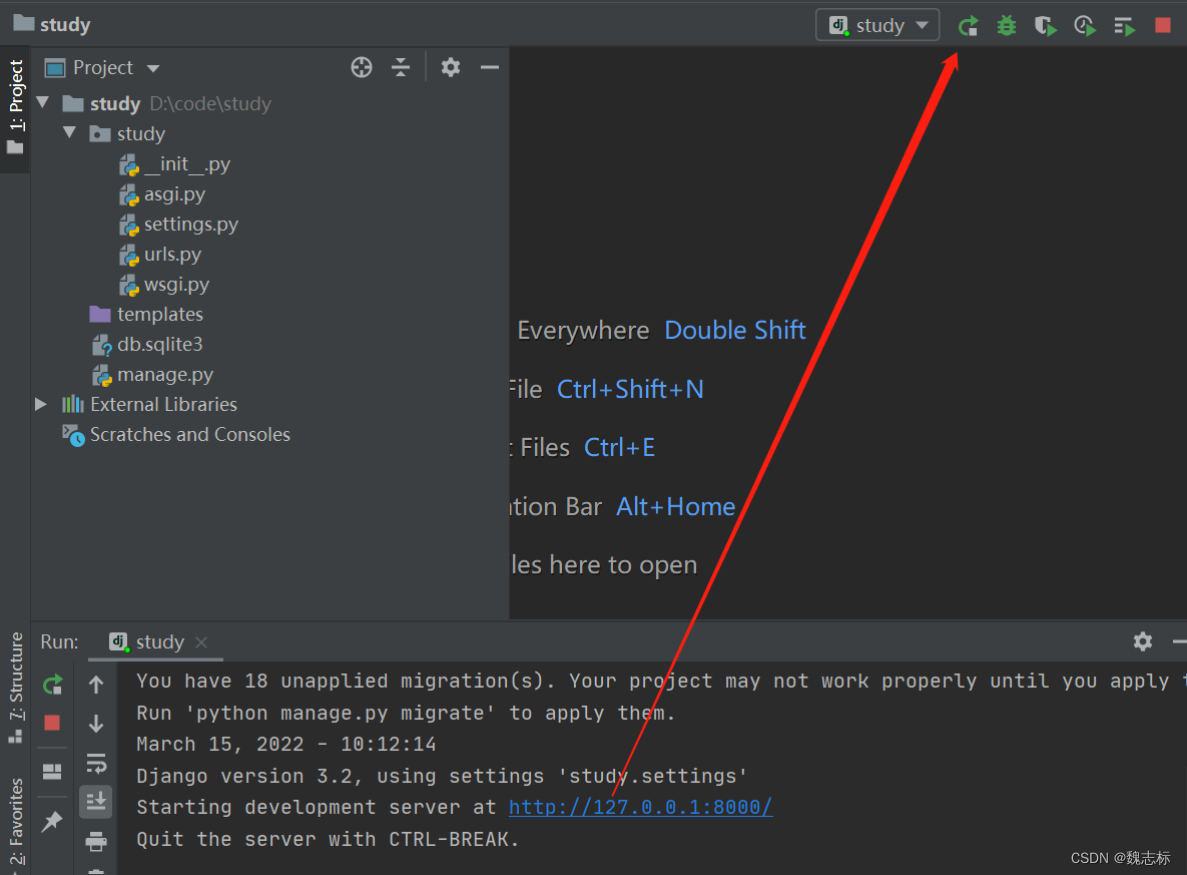
3: Run the test, use pycharm to run
Four, Django directory structure
Create a django project with the following files:
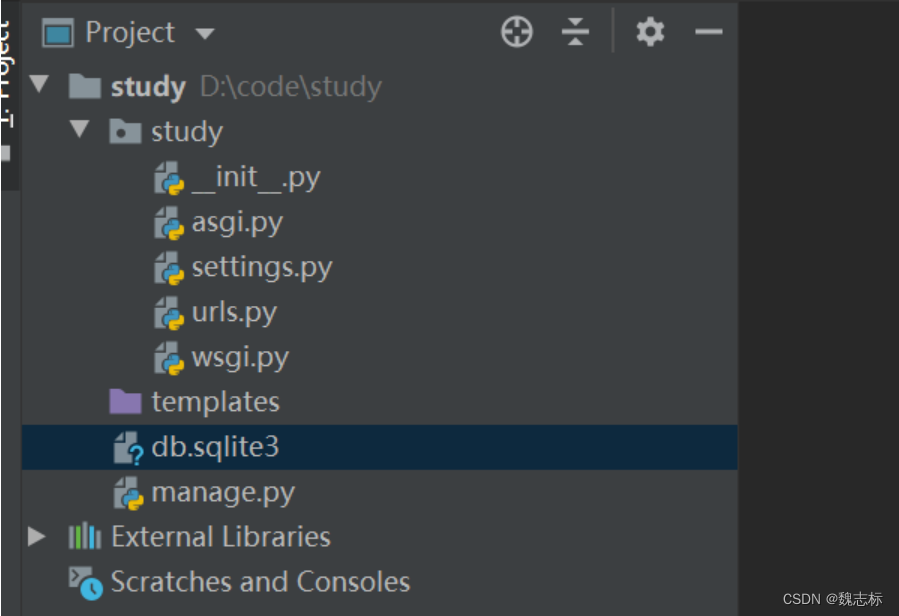
│─ manage.py    # 终端脚本命令,提供了一系列用于生成文件或者目录的命令,也叫脚手架
|- templates    # 用于存放模板html文件的目录,可先删除,使用时再进行创建。
└─ study/       # 主应用开发目录,保存了项目中的所有开发人员编写的代码, 目录是生成项目时指定的
    │- asgi.py      # django3.0以后新增的,用于让django运行在异步编程模式的一个web应用对象
    │- settings.py  # 默认开发配置文件
    │- urls.py      # 路由列表目录,用于绑定视图和url的映射关系
    │- wsgi.py      # wsgi就是项目运行在wsgi服务器时的入口文件
    └- __init__.py
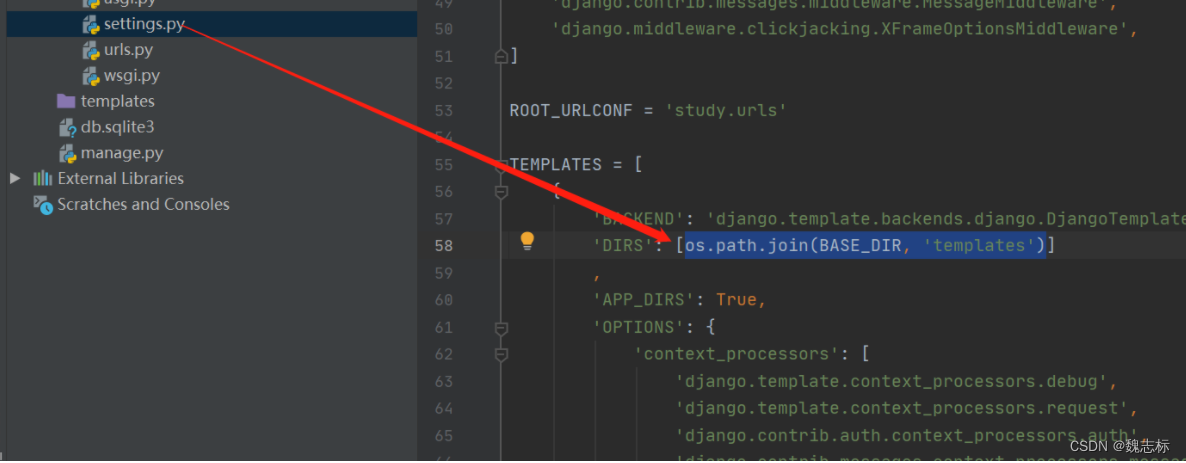
Delete the DIRS content in the settings.py file, which is the storage path of the default templates directory
5. Create an app
Run the following command:
python manage.py startapp app01
After running, you can see the app01 folder
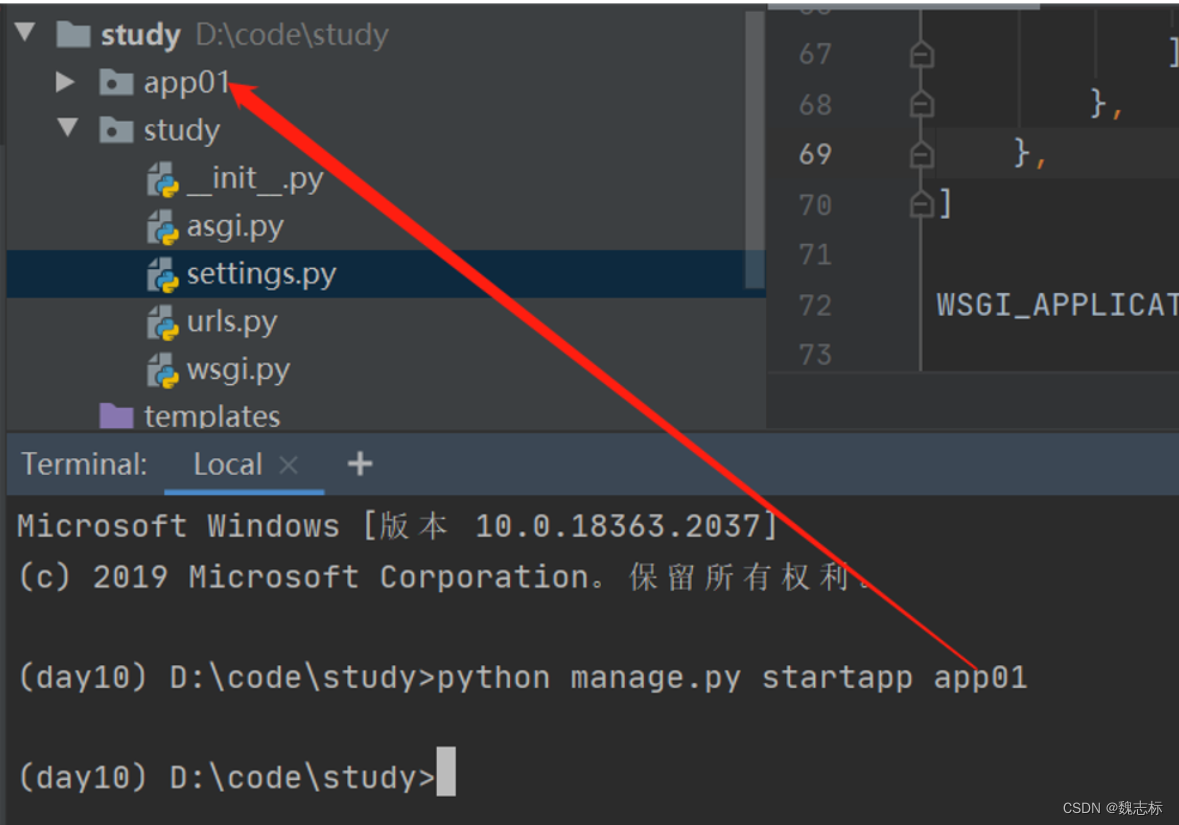

app directory explanation under the study project:
└─ app01         # 子应用名称
    |- migrations # 存放数据库的更新操作记录
    │- models    # 主要应用于数据库的操作
    │- views     # 该应用的视图模块,实现具体功能
    │- tests     # 该应用的单元测试模块
    │- apps      # 该应用的一些配置,自动生成
    │- admin.py  # 该应用的后台管理系统配置
Register app01

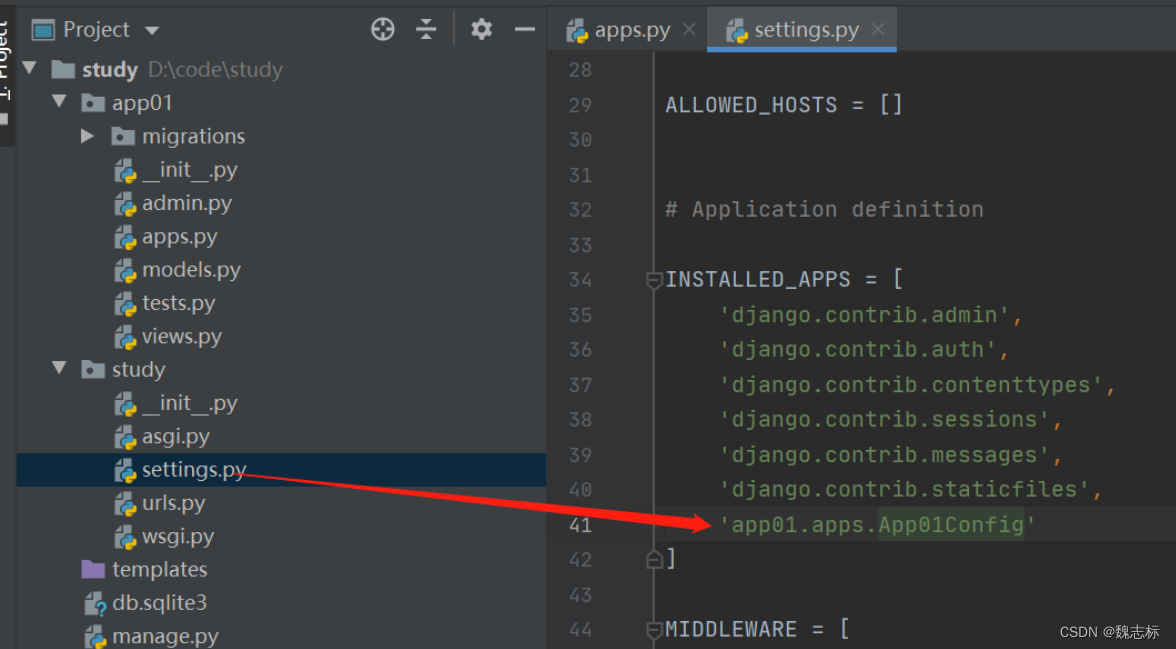
6. Add routing
Route routing is a mapping relationship! Routing is a relationship between the url path requested by the client and the application requested by the user [here means the view in django.
请求路径和视图函数不是一对一映射关系!
All routes in django are finally saved to a variable urlpatterns., urlpatterns must be declared in the urls.py general route under the main application. This is set by the configuration file settings.
When django is running, when the client sends an http request to the server, the server’s web server will extract the url address from the http protocol, find the urls of all the routing information added to urlpatterns in the program from within the program, and perform traversal matching . If it is equal or the match is successful, the view method of the current url object is called.
In the process of adding routes to the urlpatterns routing list, django provides a total of 2 functions for developers to register routes.
from django.urls import path      # 字符串路由    本章节重点讲解字符串路由
from django.urls import re_path   # 正则路由,会把url地址看成一个正则模式与客户端的请求url地址进行正则匹配
# path和re_path 使用参数一致.仅仅在url参数和接收参数时写法不一样
Add login path in global urls.py
from django.contrib import admin
from django.urls import path
from app01 import views     ###从app01导入views模块
urlpatterns = [
    path('admin/', admin.site.urls),
    path('login/', views.login),   ###添加login路径
]
Edit the views.py file in app01
from django.shortcuts import render,HttpResponse   ###导入HttpResponse

def login(request):
    return HttpResponse("登录成功")
Run the study project and access it on the web interface
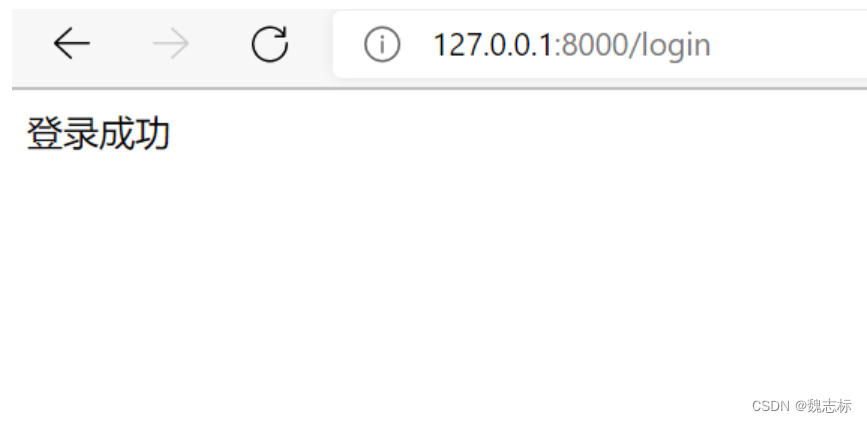
7. Template file templates
The template engine is a technology that allows developers to fill server-side data into html web pages to complete rendering effects. It achieves the function of separating the front-end code from the server-side code, and separates the business logic code and data representation code in the project, so that front-end developers and server-side developers can better complete collaborative development.
静态网页:页面上的数据都是写死的,万年不变

动态网页:页面上的数据是从后端动态获取的(比如后端获取当前时间;后端获取数据库数据然后传递给前端页面)
A very famous DjangoTemplate template engine (DTL) in the field of web development is built into the Django framework. DTL official document
To use the template engine in the django framework to better display the data in the view to the client, three steps need to be completed:
在项目配置文件中指定保存模板文件的模板目录。一般模板目录都是设置在项目根目录或者主应用目录下。

在视图中基于django提供的渲染函数绑定模板文件和需要展示的数据变量

在模板目录下创建对应的模板文件,并根据模板引擎内置的模板语法,填写输出视图传递过来的数据。
Add user_list path in global urls.py
from django.contrib import admin
from django.urls import path
from app01 import views
urlpatterns = [
    path('admin/', admin.site.urls),
    path('login/', views.login),
    path('user_list', views.user_list),
]
Edit the views.py file in app01
from django.shortcuts import render,HttpResponse

def login(request):
    return HttpResponse("登录成功")

def user_list(request):

    #根据app的注册顺序,在每个app的templates目录下找
    return render(request,"user.html")
Create a templates directory in app01 and create a new user.html file
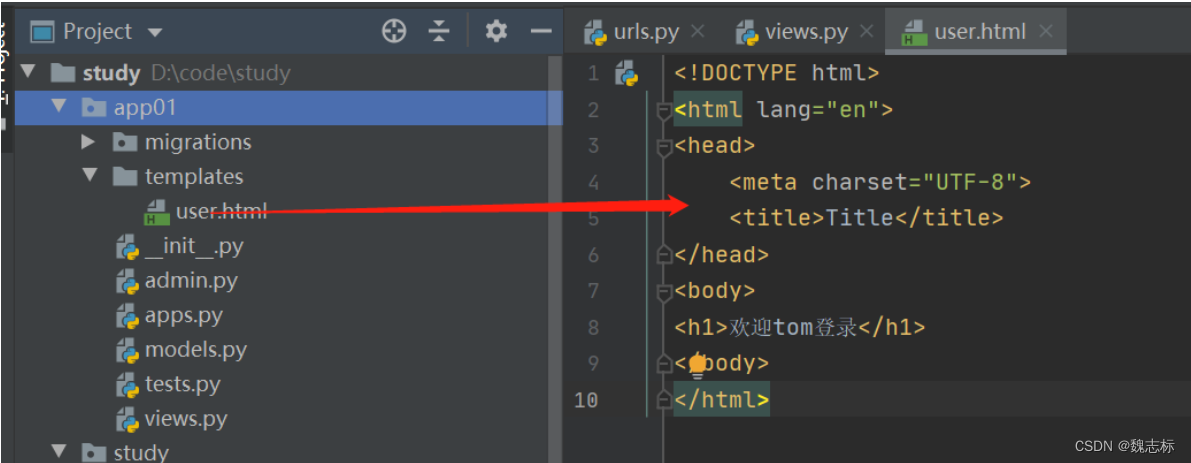
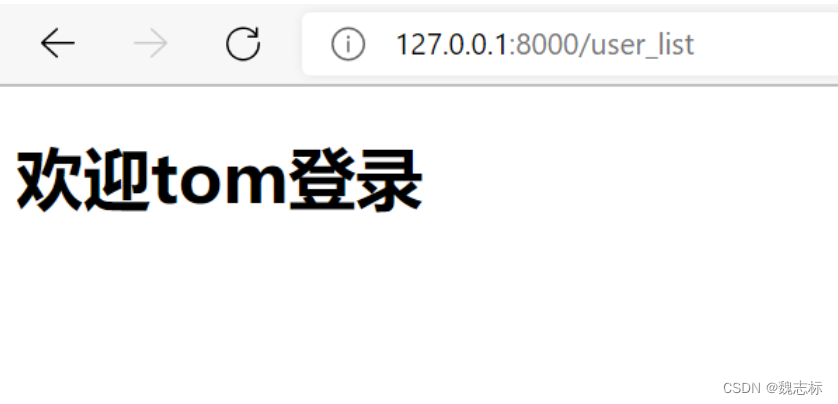
Run the project and visit the web page
8. Static files
When using static files such as pictures, videos, styles, etc., you need to create a static directory under each subdirectory. Edit the

html file and add pictures, as follows:
<!DOCTYPE html>
<html lang="en">
<head>
    <meta charset="UTF-8">
    <title>Title</title>
</head>
<body>
<h1>图片</h1>
<img src="/static/img/pic.jpg" alt="">
</body>
</html>
Edit the urls.py file and the views.py file under app01
from django.contrib import admin
from django.urls import path
from app01 import views
urlpatterns = [
    path('admin/', admin.site.urls),
    path('login/', views.login),
    path('user_list/', views.user_list),
    path('pic/', views.pic)
]
def pic(request):
    return render(request,"pic.html")

In order to prevent the location of the static directory from changing in the future, and the html file is modified too much, the following methods can be used:
{% load static %}     ###load static 加载目录
<!DOCTYPE html>
<html lang="en">
<head>
    <meta charset="UTF-8">
    <title>Title</title>
</head>
<body>
<h1>图片</h1>
<img src={% static 'img/pic.jpg' %} alt="">    ###此处引用,之后static路径发生变化,此处可不做修改。
</body>
</html>
Nine, parameter import and redirection
- parameter import
from django.contrib import admin
from django.urls import path
from app01 import views
urlpatterns = [
    path('admin/', admin.site.urls),
    path('login/', views.login),
    path('user_list/', views.user_list),    urls.py文件中使用user_list路由
    path('pic/', views.pic)
]
def user_list(request):

    user_name = "tom"  ###views.py文件中添加变量
    return render(request,"user.html",{"user": user_name}) ##此处传入
<!DOCTYPE html>
<html lang="en">
<head>
    <meta charset="UTF-8">
    <title>Title</title>
</head>
<body>
<h1>欢迎{{ user }}登录</h1>   ####html文件中进行接收
</body>
</html>
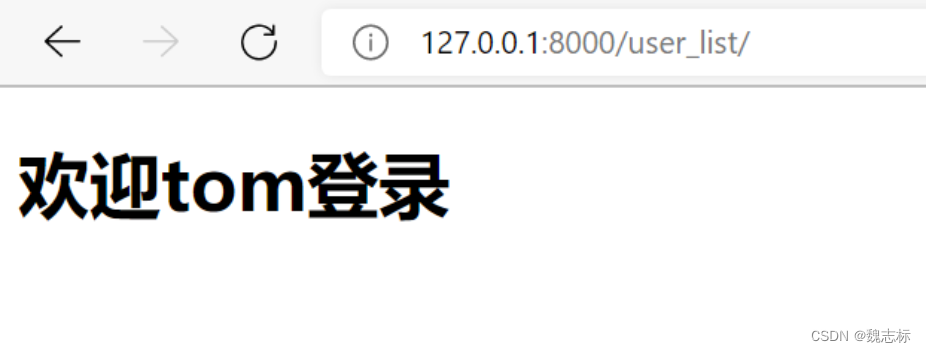
Access interface
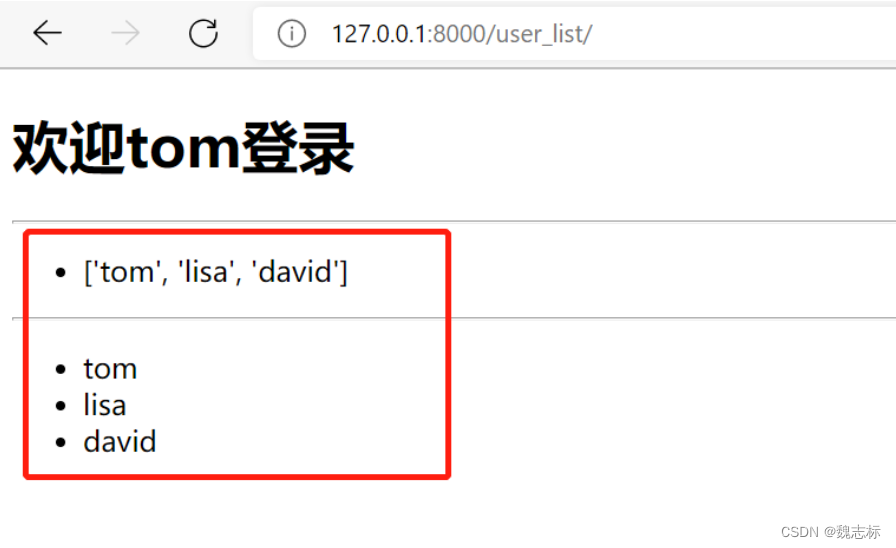
incoming list
def user_list(request):

    user_name = "tom"
    data_list = ["tom","lisa","david"]
    return render(request,"user.html",{"user": user_name,"user_list": data_list})
<!DOCTYPE html>
<html lang="en">
<head>
    <meta charset="UTF-8">
    <title>Title</title>
</head>
<body>
<h1>欢迎{{ user }}登录</h1>
<hr>
<ul>
    <li>{{ user_list }}</li>   #########
</ul>
<hr>
<ul>
   {% for item in user_list %}   ###列表循环
    <li>{{ item }}</li>
    {% endfor %}
</ul>
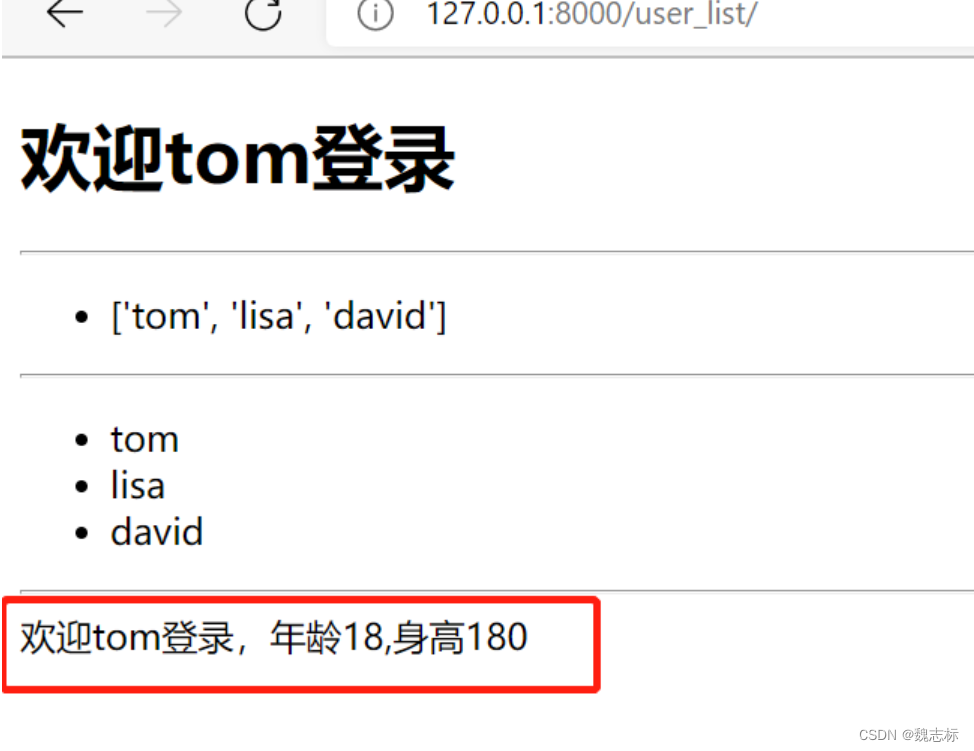
pass in dictionary
def user_list(request):

    user_name = "tom"
    data_list = ["tom","lisa","david"]
    data_dict ={"user": "tom","age": 18,"height": 180}
    return render(request,"user.html",{"user": user_name,"user_list": data_list,"user_info": data_dict})
<div>
    <span>欢迎{{ user_info.user }}登录,年龄{{ user_info.age }},身高{{ user_info.height }}</span>
</div>
</body>
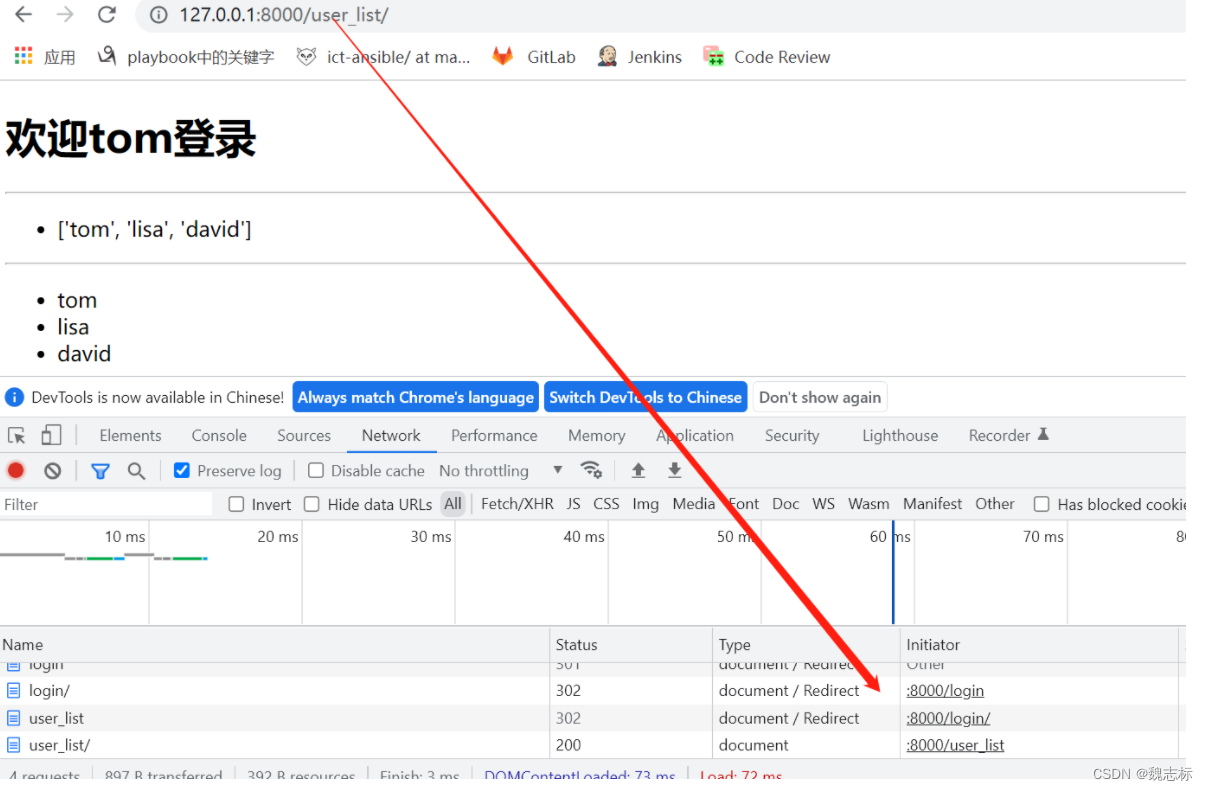
- Redirect
Login to login page, redirect to user_list
def login(request):
    return redirect("/user_list")
You can see that it is redirected to user_list
10. Request and response (get, post)
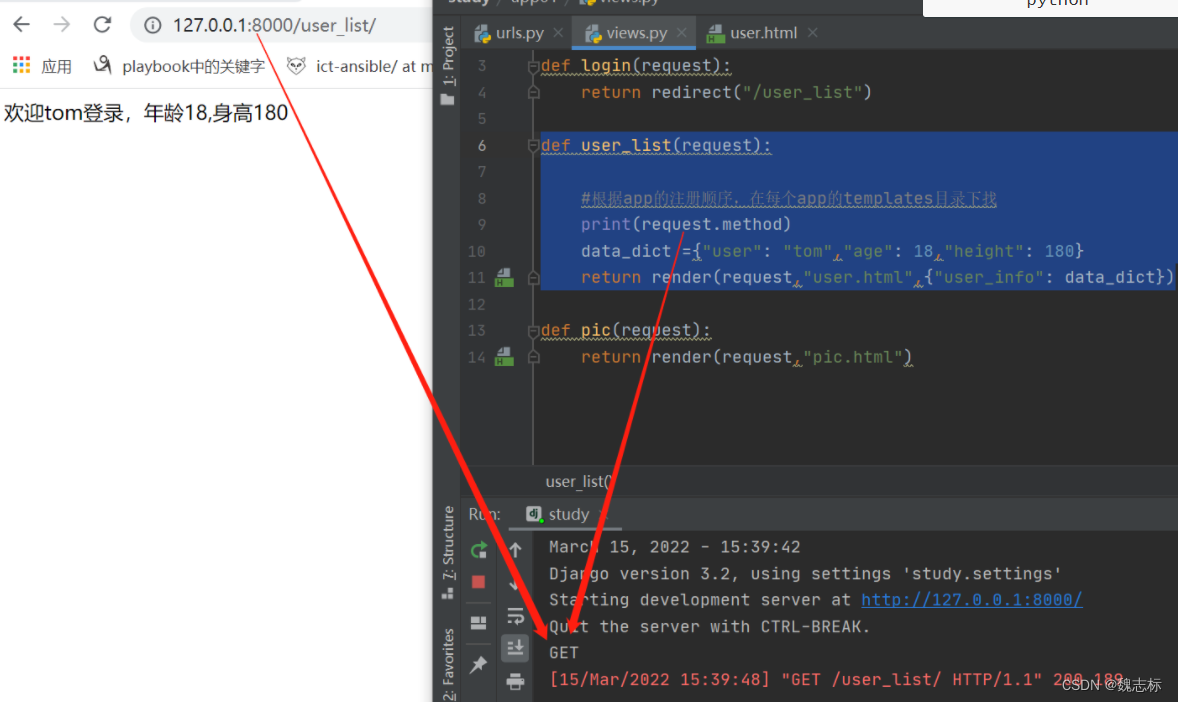
GET
Edit the views.py file
def user_list(request):

    print(request.method)   ###打印请求方式
    data_dict ={"user": "tom","age": 18,"height": 180}
    return render(request,"user.html",{"user_info": data_dict})
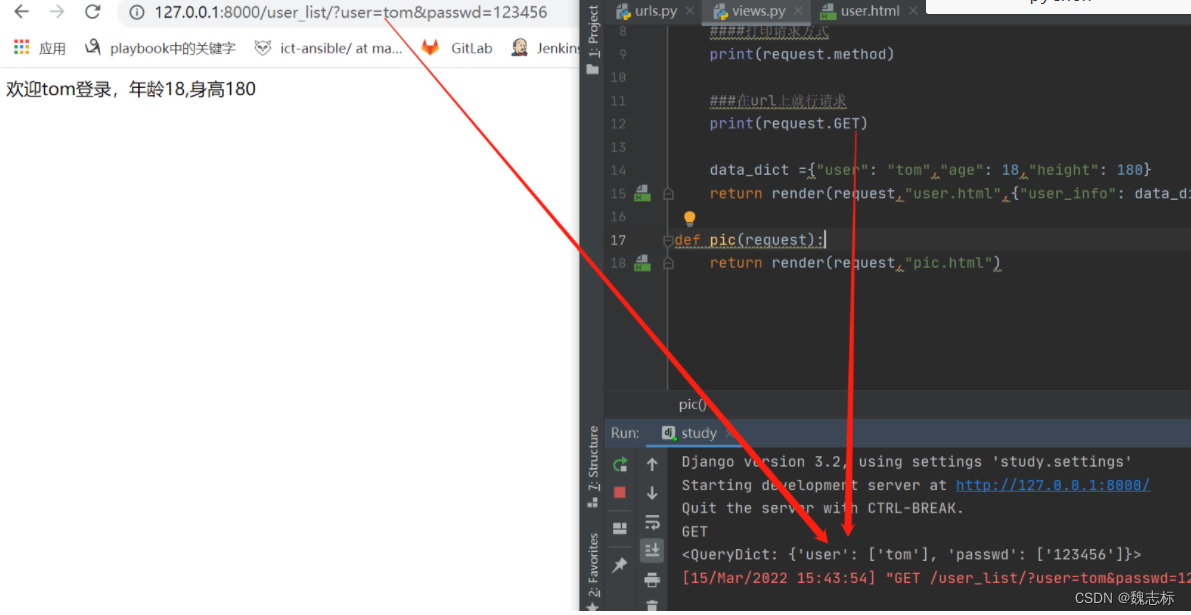
def user_list(request):

    ####打印请求方式
    print(request.method)

    ###在url上进行请求
    print(request.GET)

    data_dict ={"user": "tom","age": 18,"height": 180}
    return render(request,"user.html",{"user_info": data_dict})
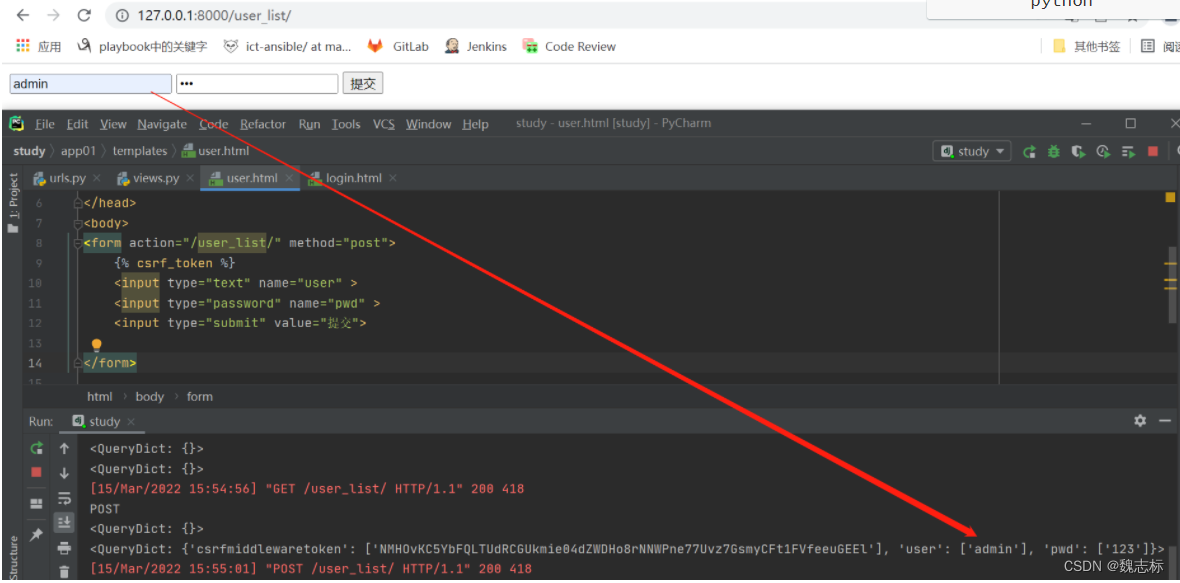
POST
def user_list(request):

    ####打印请求方式
    print(request.method)

    ###在url上就行请求
    print(request.GET)

    ###打印post请求
    print(request.POST)

    data_dict ={"user": "tom","age": 18,"height": 180}
    return render(request,"user.html",{"user_info": data_dict})
edit-user.html
<body>
<form action="/user_list/" method="post">
    {% csrf_token %}    ###添加此参数,否则会出现403 forbiden
    <input type="text" name="user" >
    <input type="password" name="pwd" >
    <input type="submit" value="提交">

</form>

</body>
    ####打印请求方式
    print(request.method)

    ###在url上就行请求
    print(request.GET)

    ###打印post请求
    print(request.POST)

    ###响应 HttpResponse("返回内容"),内容字符串返回给请求者
    ###return HttpResponse("你好")

    ###响应读取html文件内容 + 渲染(替换) -> 字符串,返回给用户浏览器
    data_dict ={"user": "tom","age": 18,"height": 180}
    return render(request,"user.html",{"user_info": data_dict})
NOTE: Deleting the following in the global settings.py file will also prevent 403 issues
'django.middleware.csrf.CsrfViewMiddleware',

Category of website: technical article > Blog
Author:Abstract
link:http://www.pythonblackhole.com/blog/article/25257/909162a493c2e903ed2c/
source:python black hole net
Please indicate the source for any form of reprinting. If any infringement is discovered, it will be held legally responsible.
name:
Comment content: (supports up to 255 characters)
no articles
